

Rv-Reno Part 1
What a long, long L O N G few weeks it has been, friends! We have been back in Ohio and between visiting with family and friends and working on RV projects, we have been crazy busy! We completed two of the biggest projects I had on my grand "list-of-projects" and as time consuming (and at times frustrating) they were, we are finally getting to enjoy our hard work! We had so many friends and family that have helped and we could not have done it all without you guys!! So THANK YOU from the bottoms of my feet to the top of my heart to all of our wonderful friends and family that provided helping hands and moral support these past few weeks!

Now on to the fun part! The two biggest projects we have tackled were painting and replacing the flooring! While so immensely time consuming, we are so in love with the results!! I hope you enjoy the BEFORE/NOW photos and I'll also share all of the details of what we did and how we did it! If you have any questions, shoot me an email or leave a comment here!
PAINTING
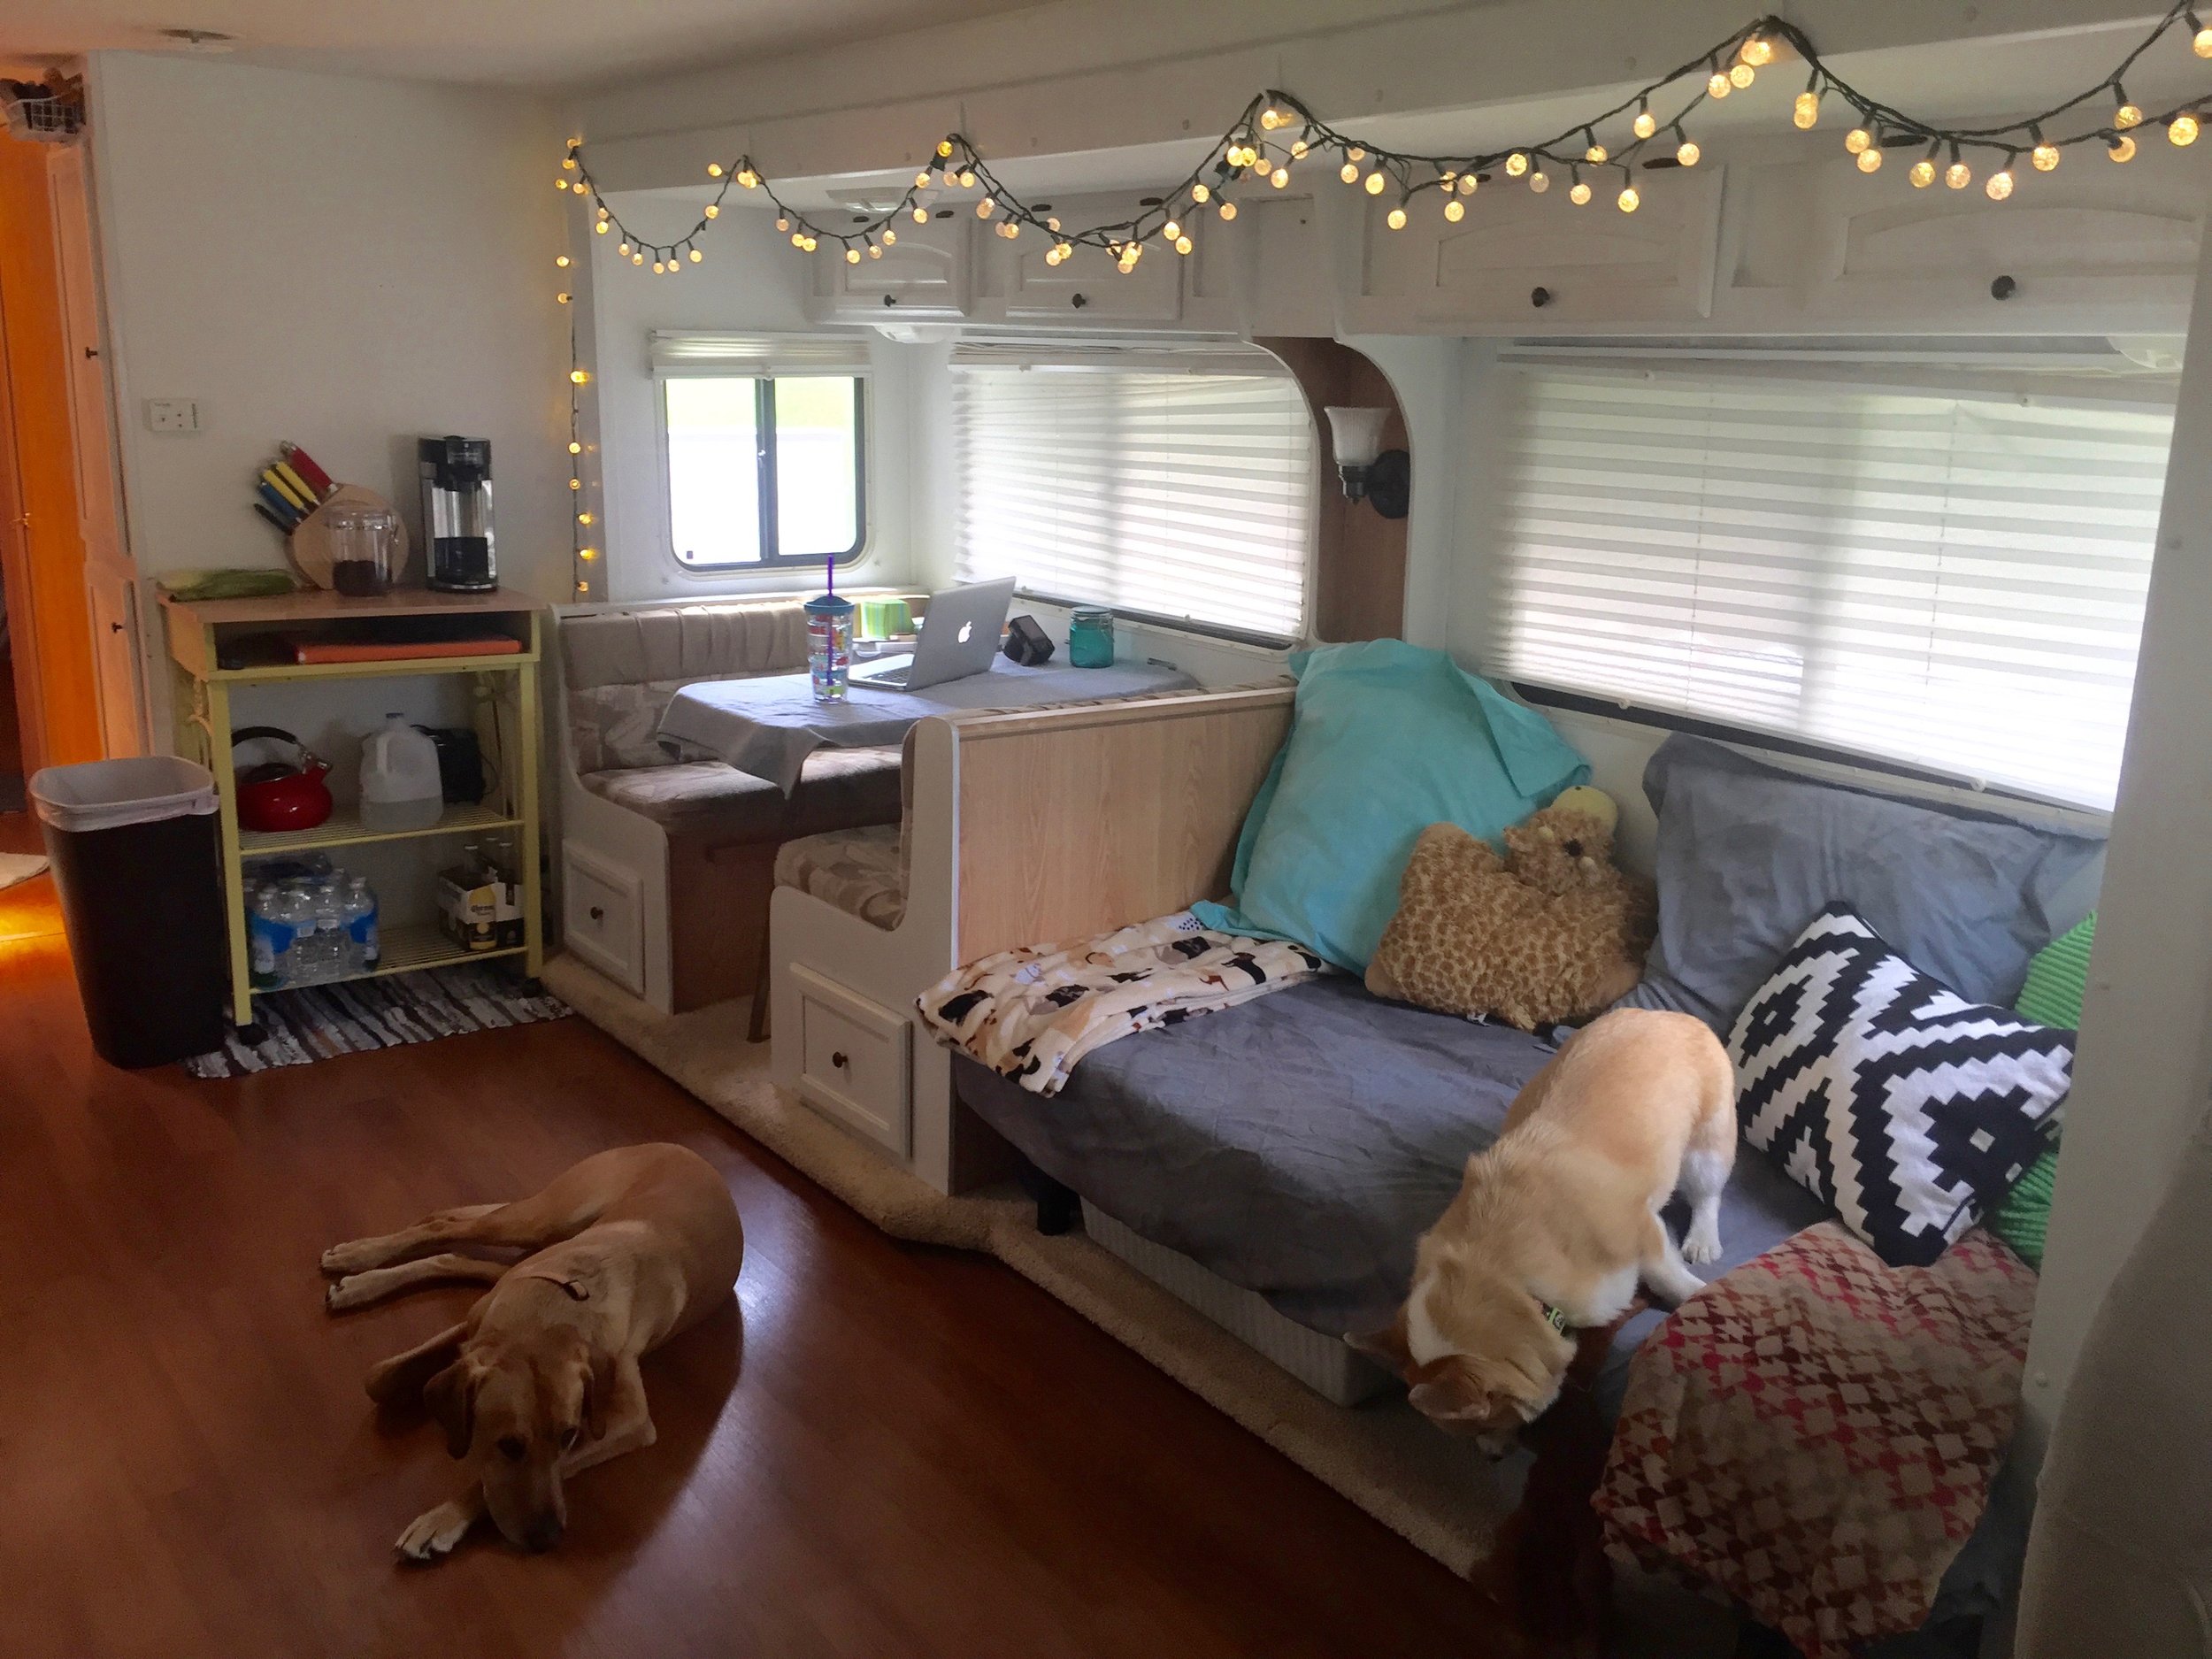
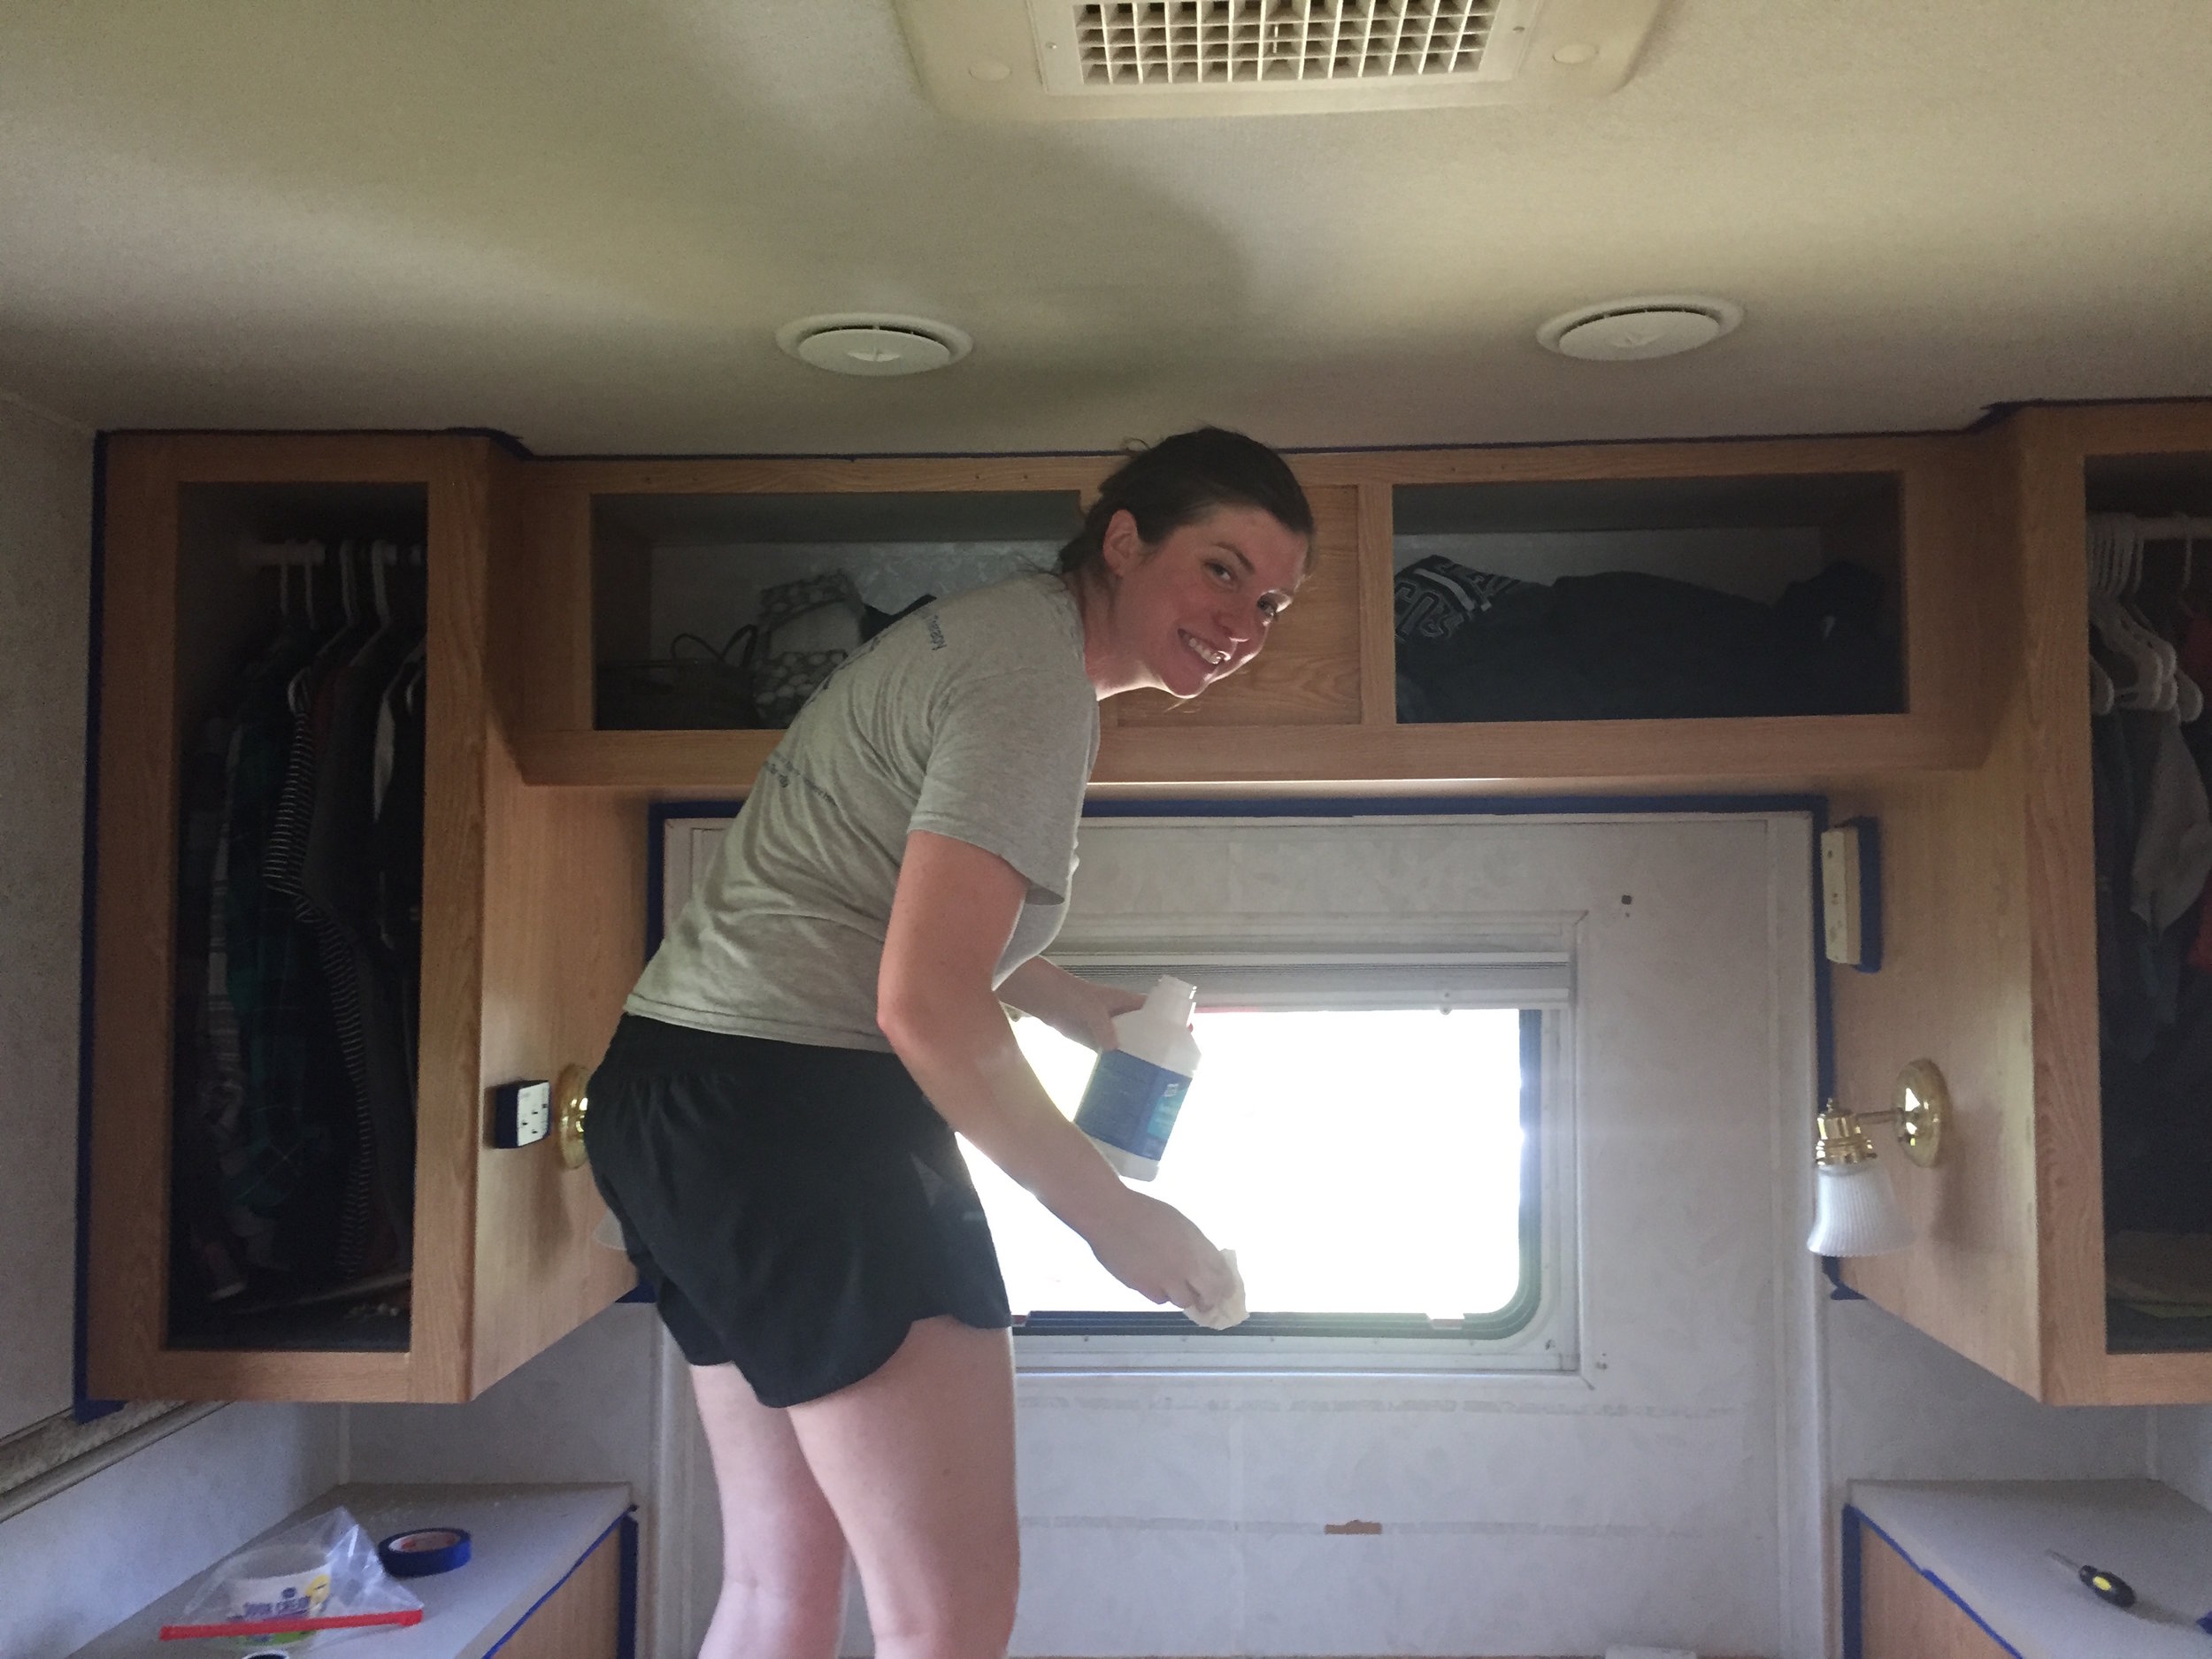
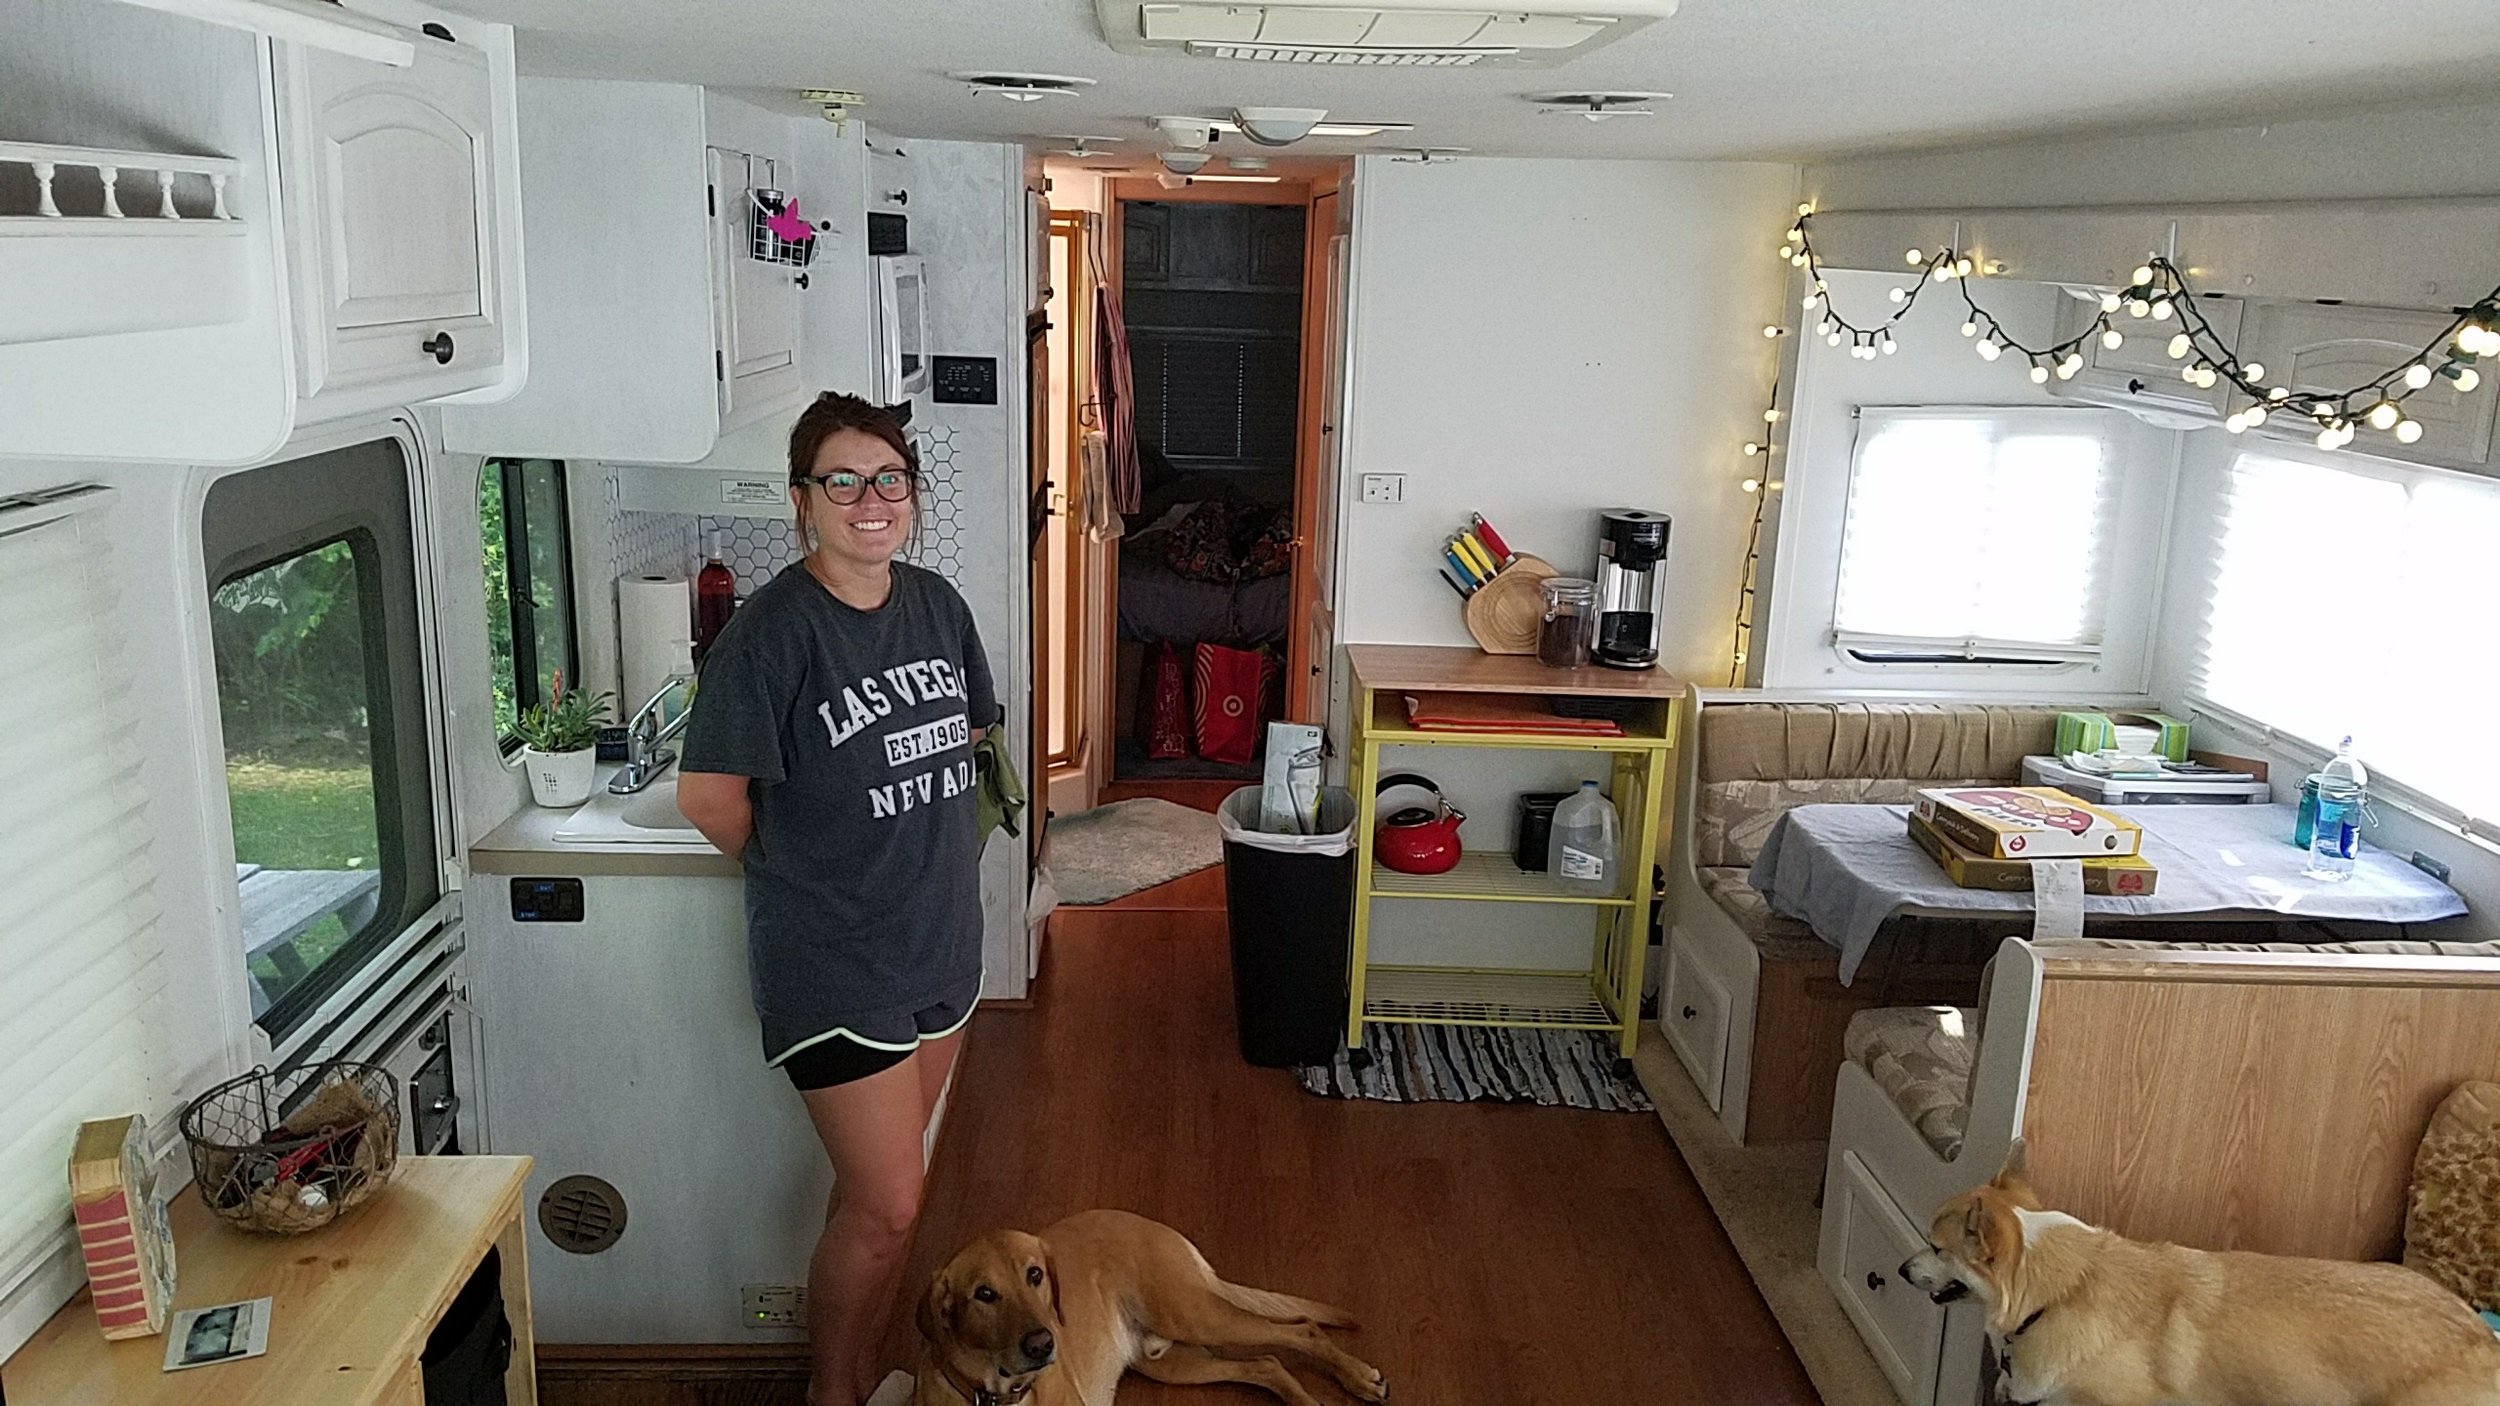
After many nights of showing Joel tons and tons of RV reno photos on Pinterest, we both agreed on painting the cabinets and walls white! EEK! I was so excited that Joel agreed to this, but my excitement quickly dwindled when we took on the enormous task of painting! HOLY TIME CONSUMING! While all time consuming (and taxing on my arm and shoulder) it was SO WORTH IT! The white has seriously made our little home feel so homey, clean, and spacious!!
For the cabinets we enlisted the help of Kate from "Junk Gypsy Kate" who makes custom signs and refurbishes old furniture etc! Kate was so much fun to work with and was such a great teacher! She taught us her chalk paint recipe and painting techniques and helped us get a great start on our cabinets. We love the look that the chalk paint gave the cabinets and are obsessed with how they all turned out! There are so many freaking cabinets in this place (which, before painting, I LOVED this fact haha!) and the chalk paint gives the cabinets just a little bit of a different look/texture than the walls, even though they're the same color.
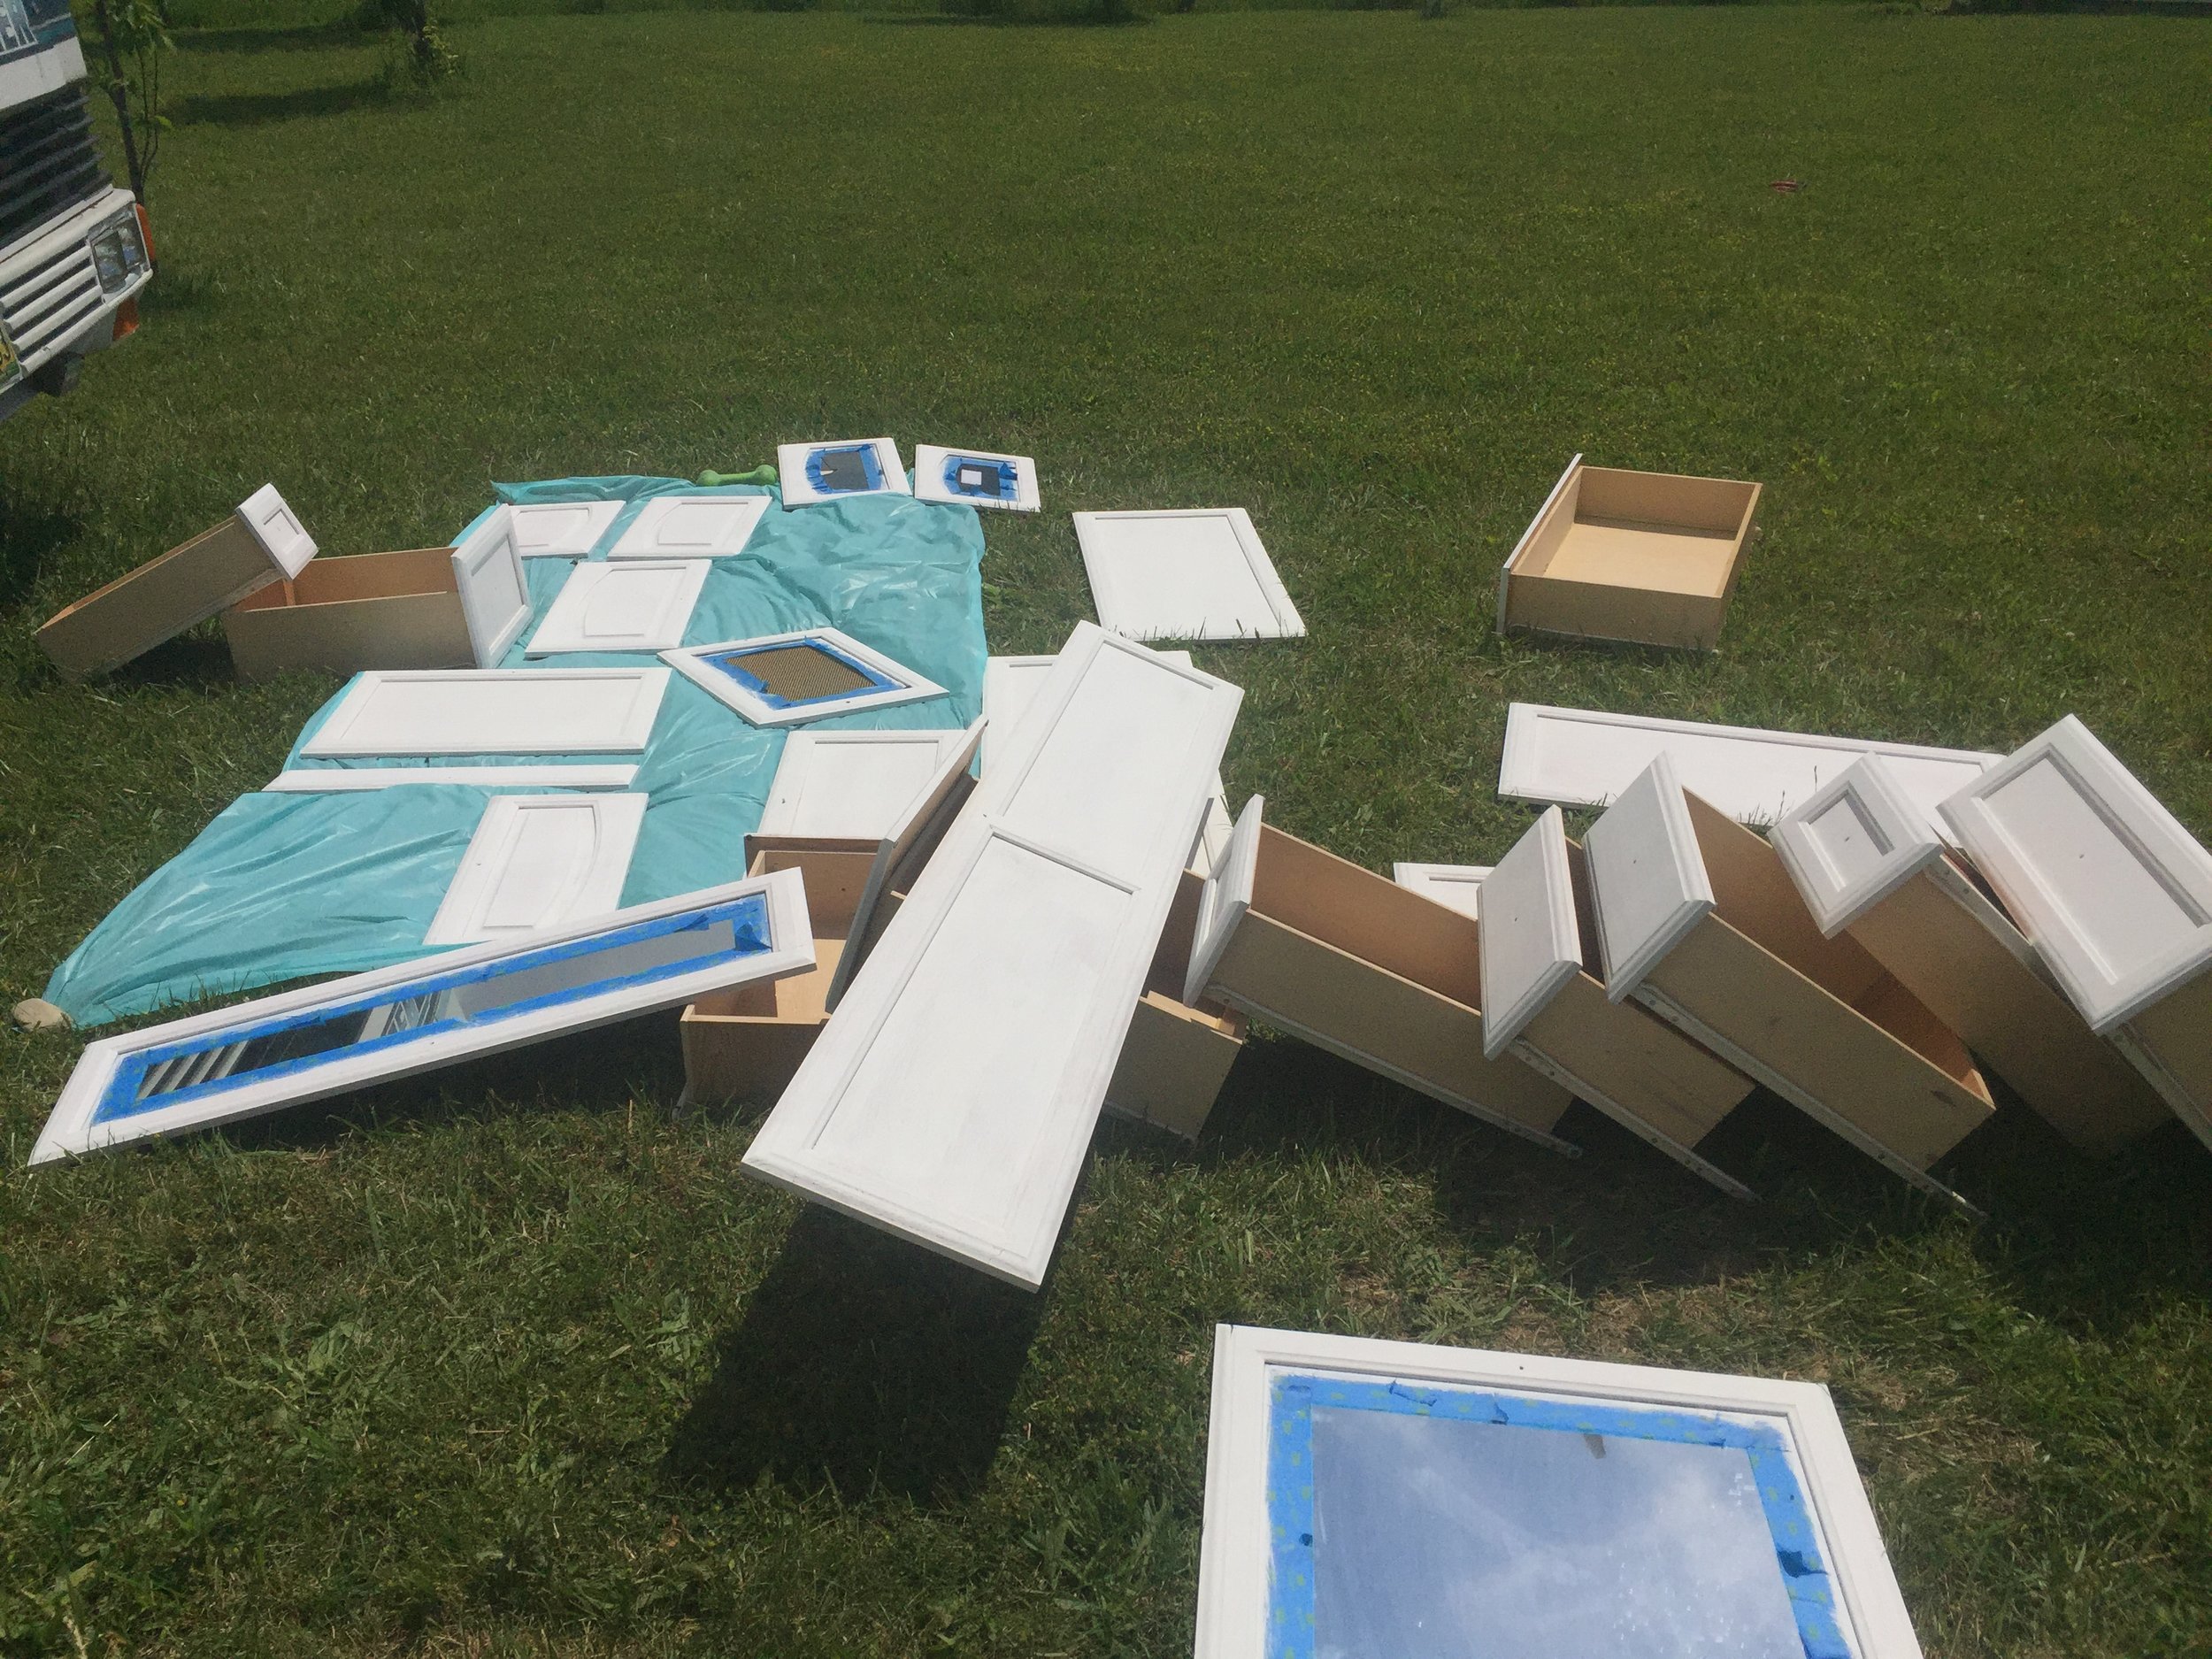
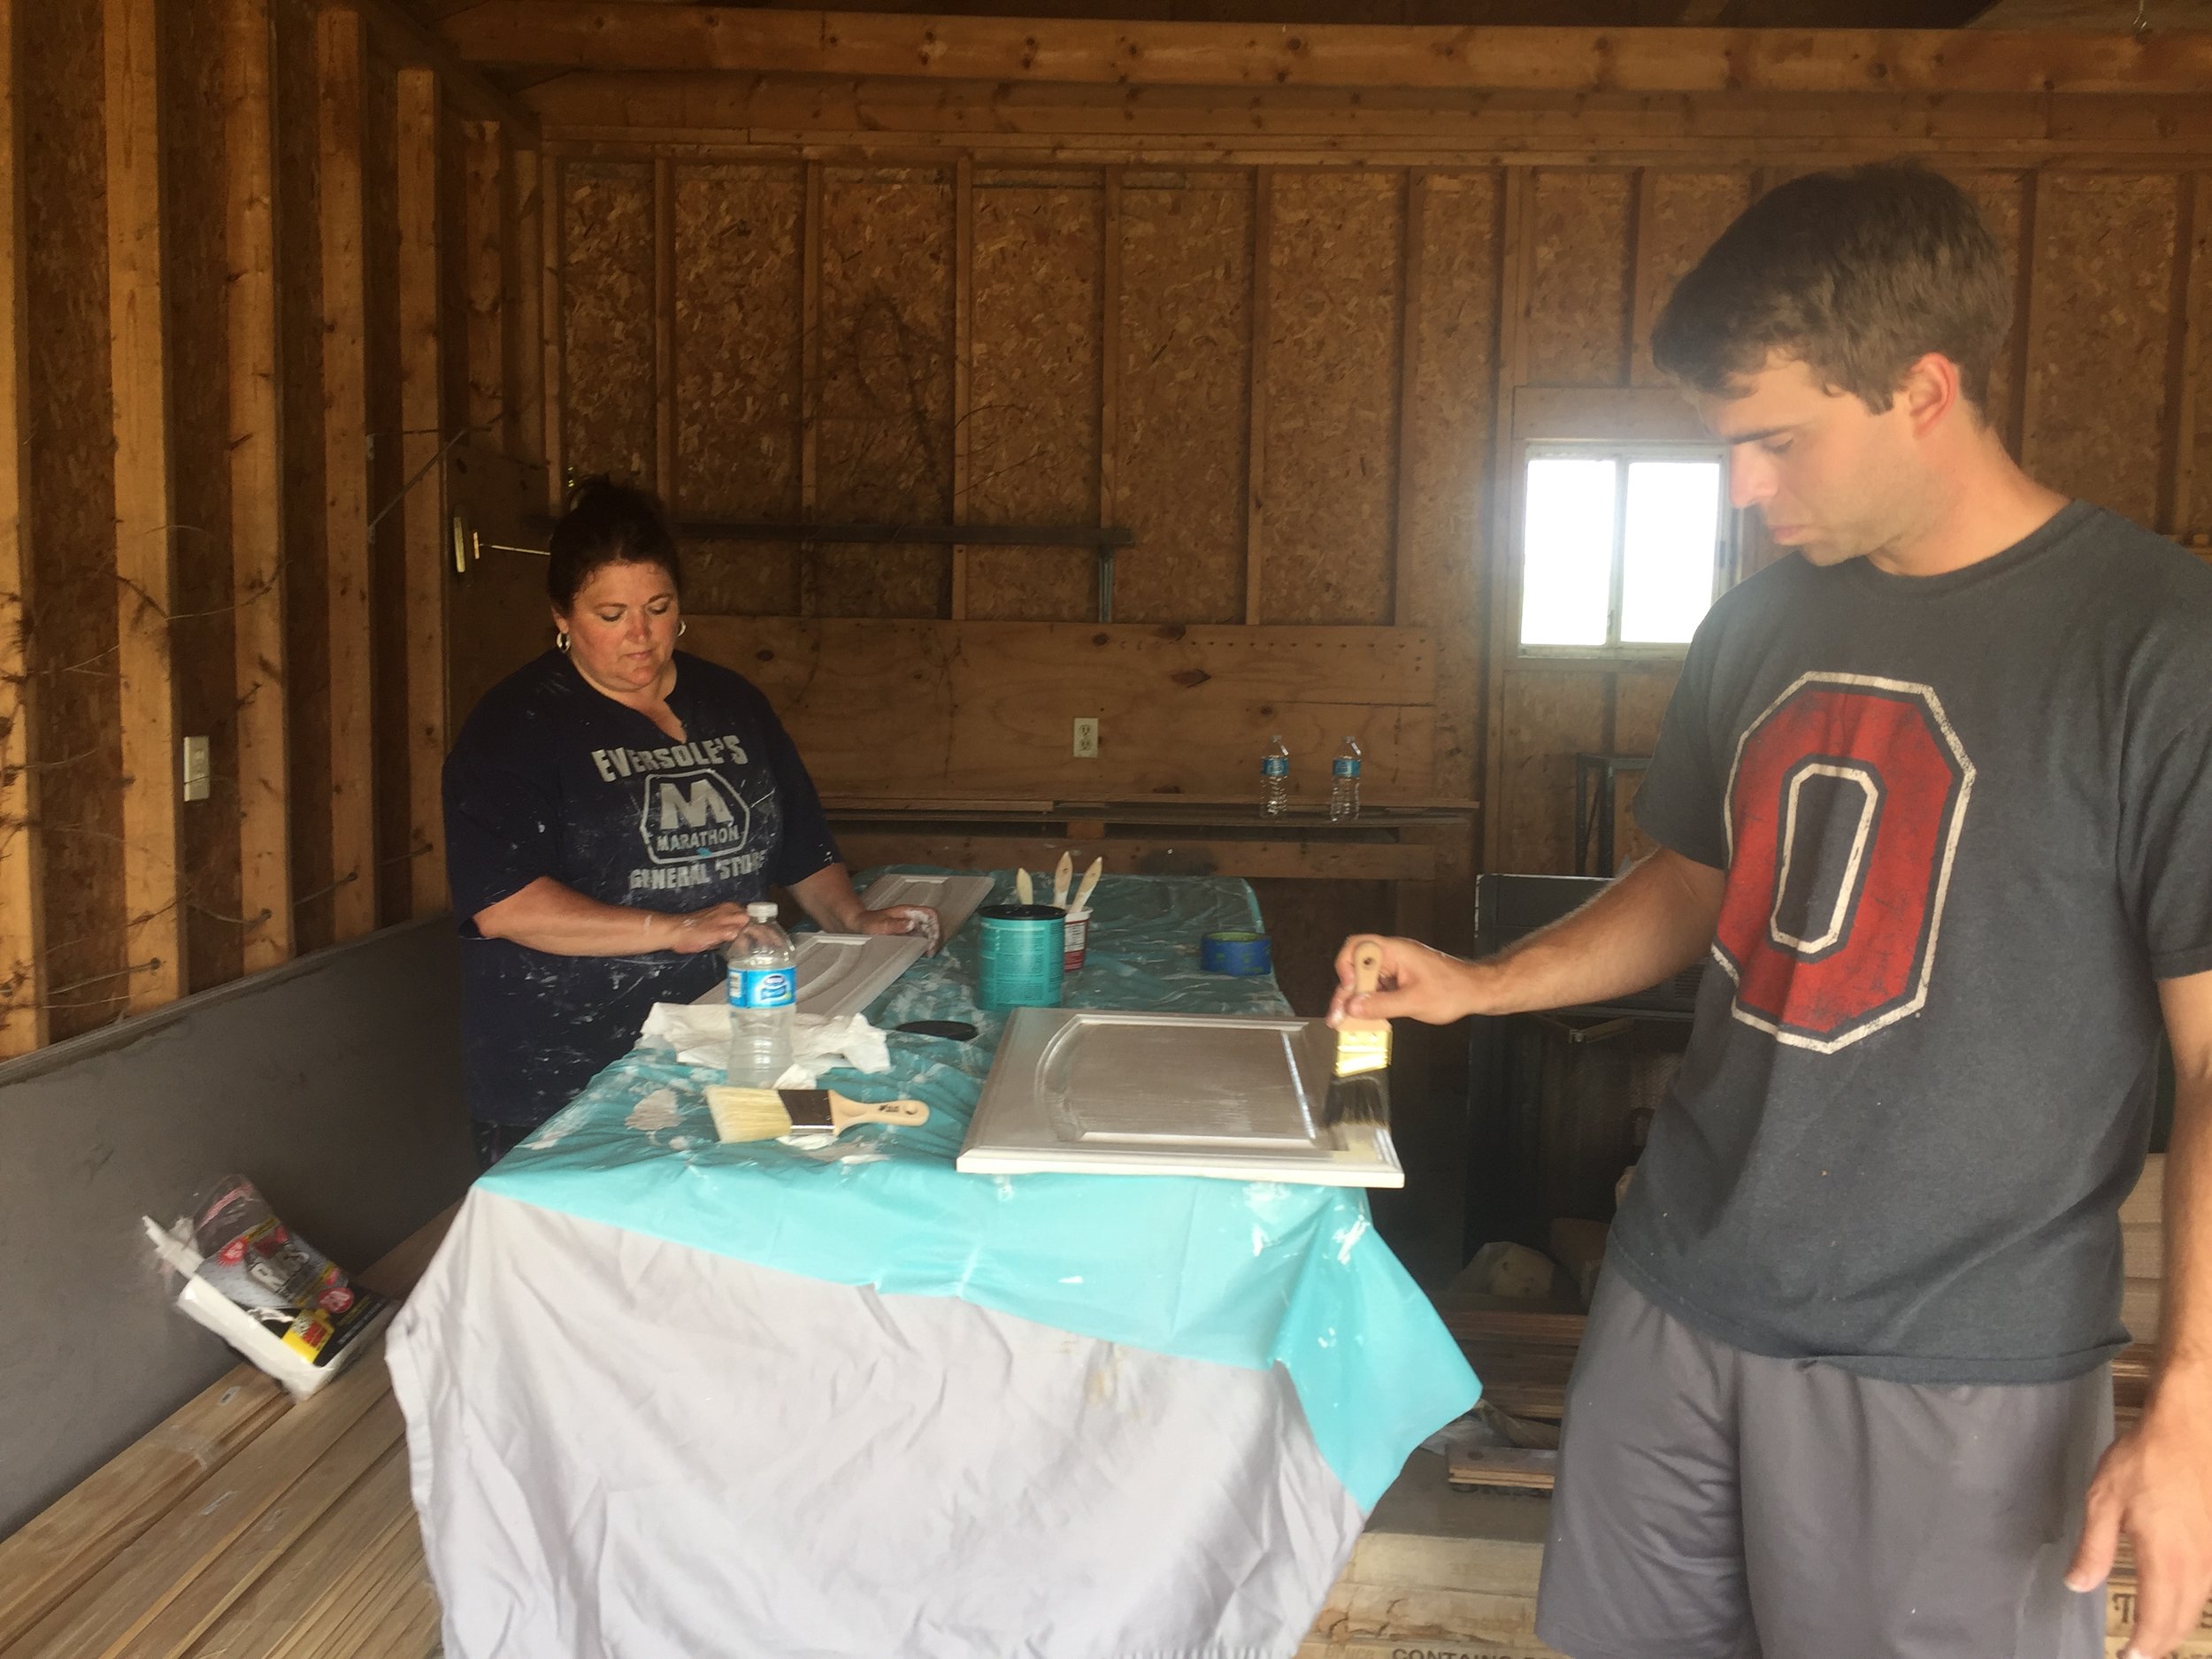
The process for the chalk paint took what felt like a million years, but we decided on chalk paint anyways because the cabinets themselves are not real wood, they are some kind of particle board stuff (the doors are real wood though ha!) We were kind of unsure what type of paint would stick (and stay!) to both surfaces. The chalk paint so far is holding up wonderfully and LOOKS GREAT! First we prepped every surface on the cabinets/doors with a liquid deglosser/sander (to help the paint adhere better) Then on went the first and second coats of chalk paint. After the second coat of chalk paint dried we lightly sanded the surface with steel wool (which I HATE now, btw) before applying the first coat of polycrylic. We let that dry, before we lightly sanded once more, and applied the second coat of polycrylic.
Would I EVER paint the cabinets in a 35 ft RV again, HELL NO (at least not any time soon!) but was it worth it... okay YES! And the most awesomest part, you could do the same thing in ANY color! You can buy or make your own chalk paint in any color you want! If you are willing to be patient and put in the hard work, I promise you will be happy with the results! *We also spray painted the knobs and hinges a matte black color, that gold HAD to go!*
The walls were SO MUCH easier and less work haha!!!! We love the look of white on white, but are glad that the cabinets have that slightly different look to them. After much research and trial/error, we went with Gripper primer and then topped it with just plain, eggshell white paint. At first we thought we might need to sand the walls slightly to keep that ugly wallpaper from peeking through, but there was no need! One coat of primer and paint each was enough to cover the ugly wallpaper stuff that plagued our walls before!! Like I keep saying, we are just so happy with the results and blown away by the huge difference some coats of paint have made!!
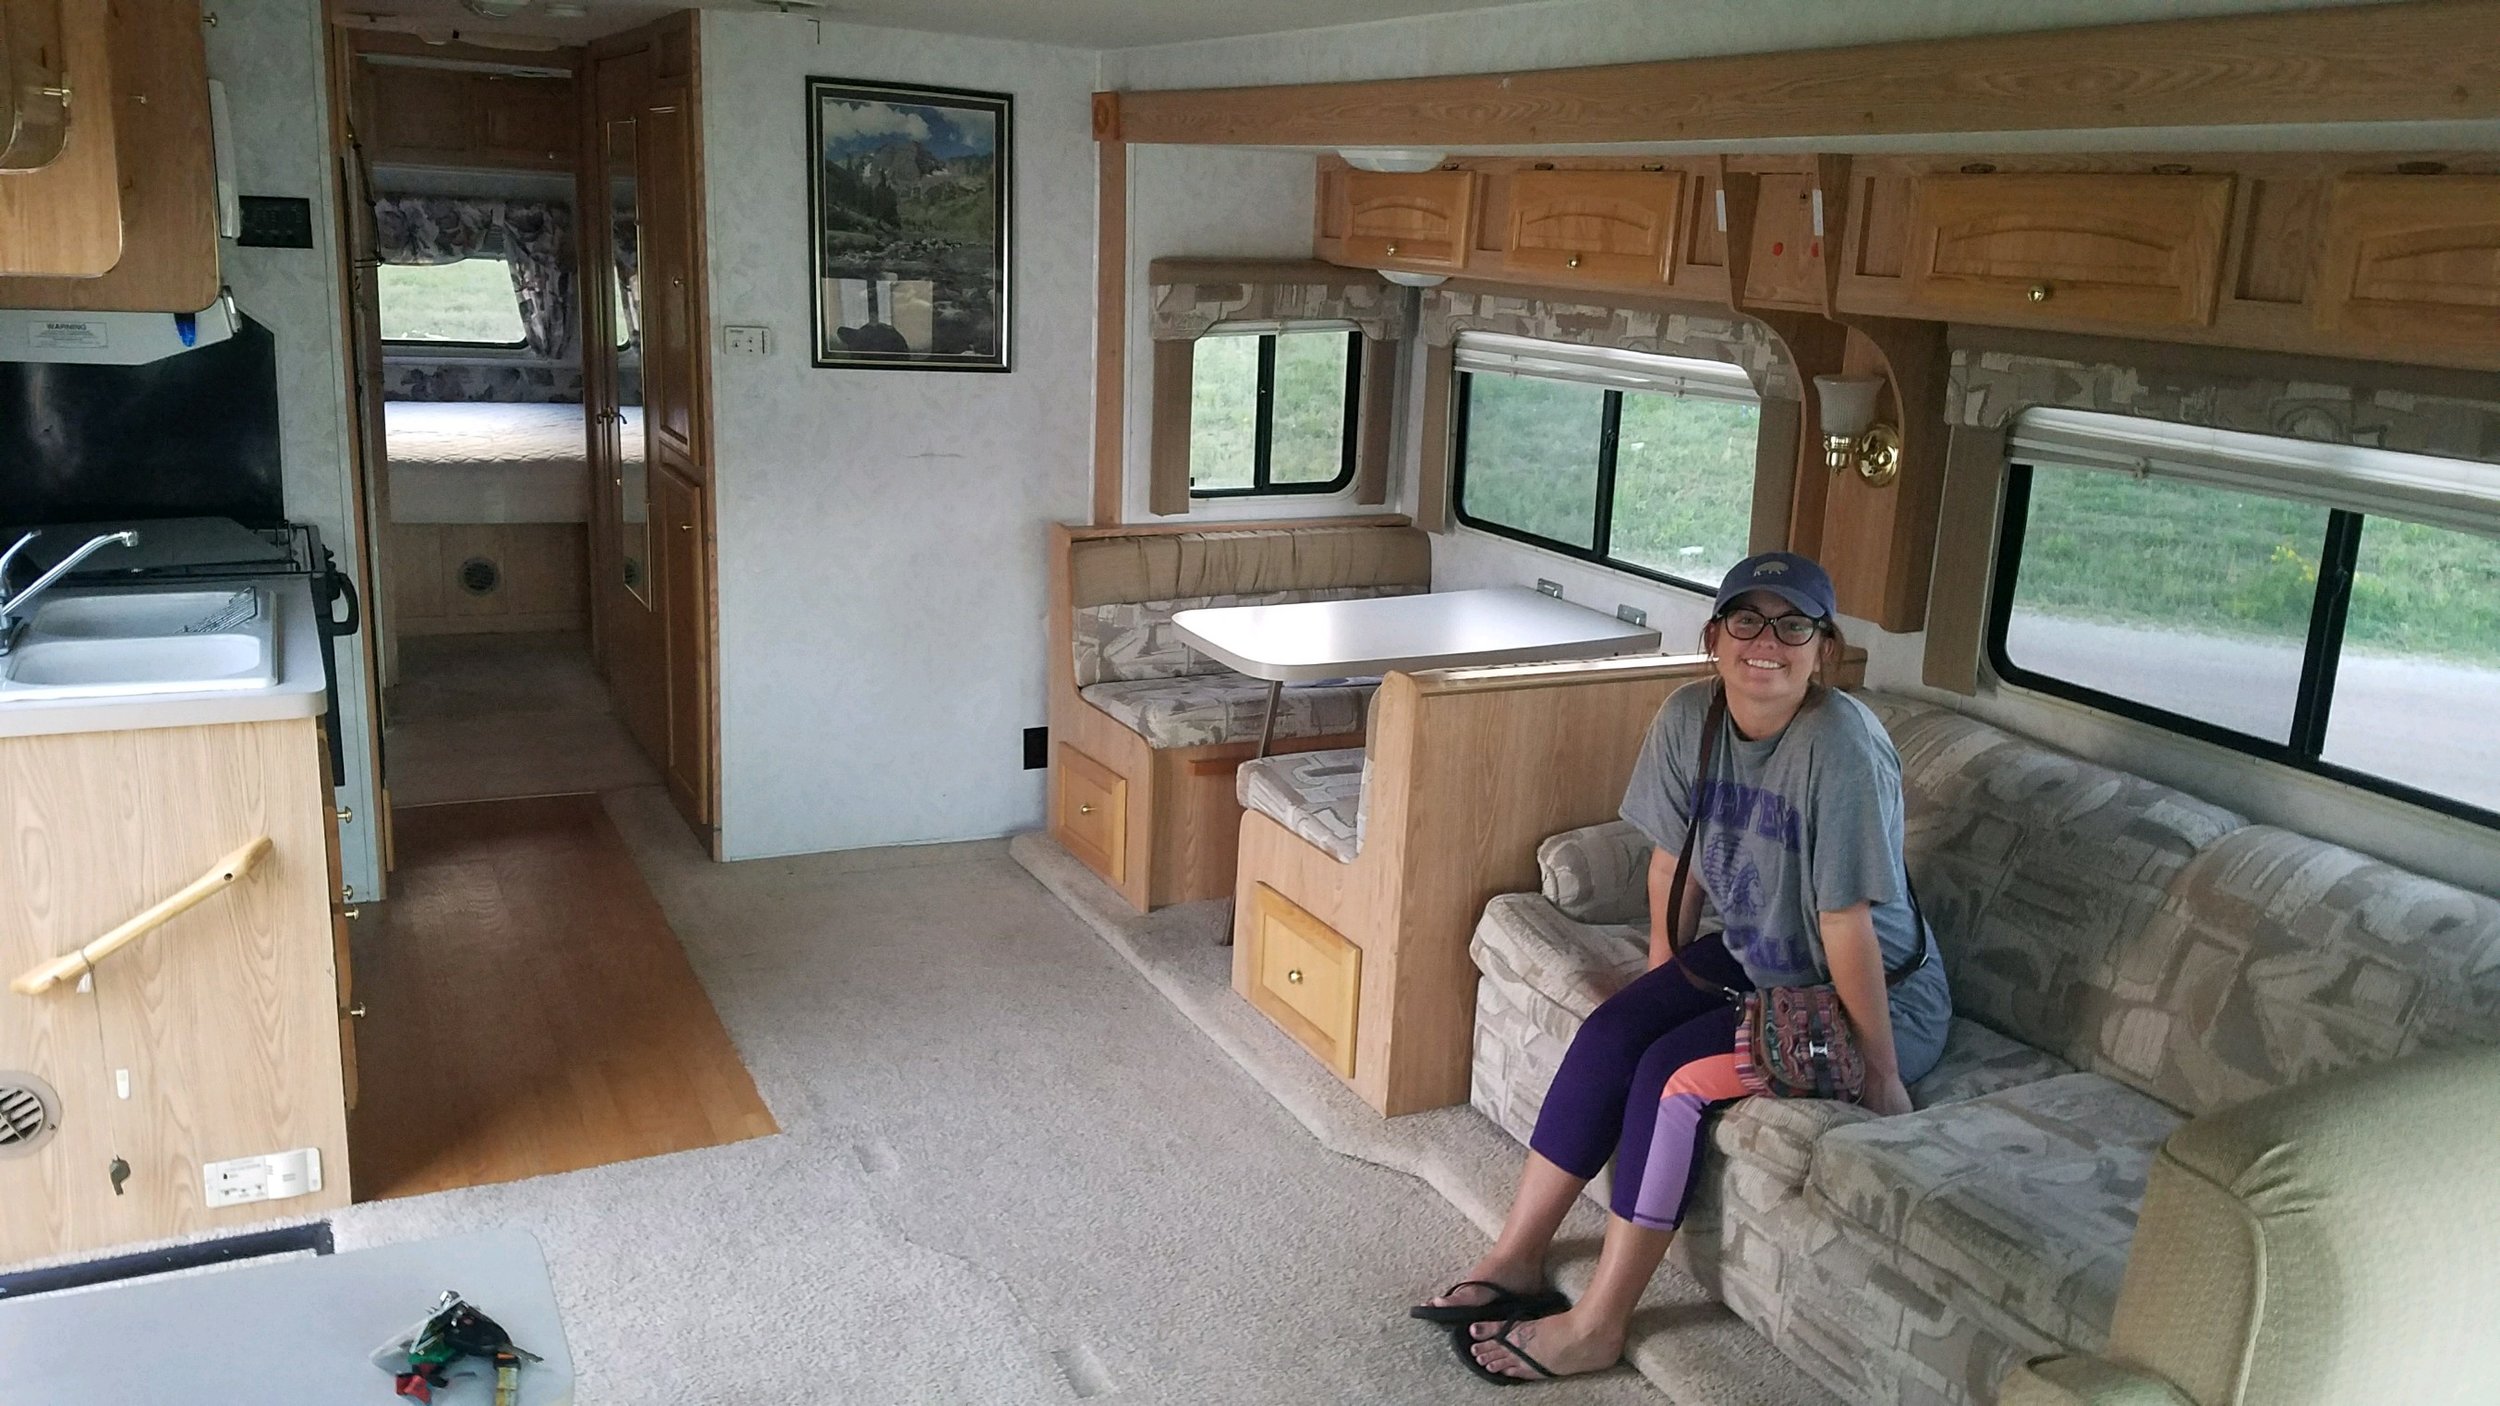
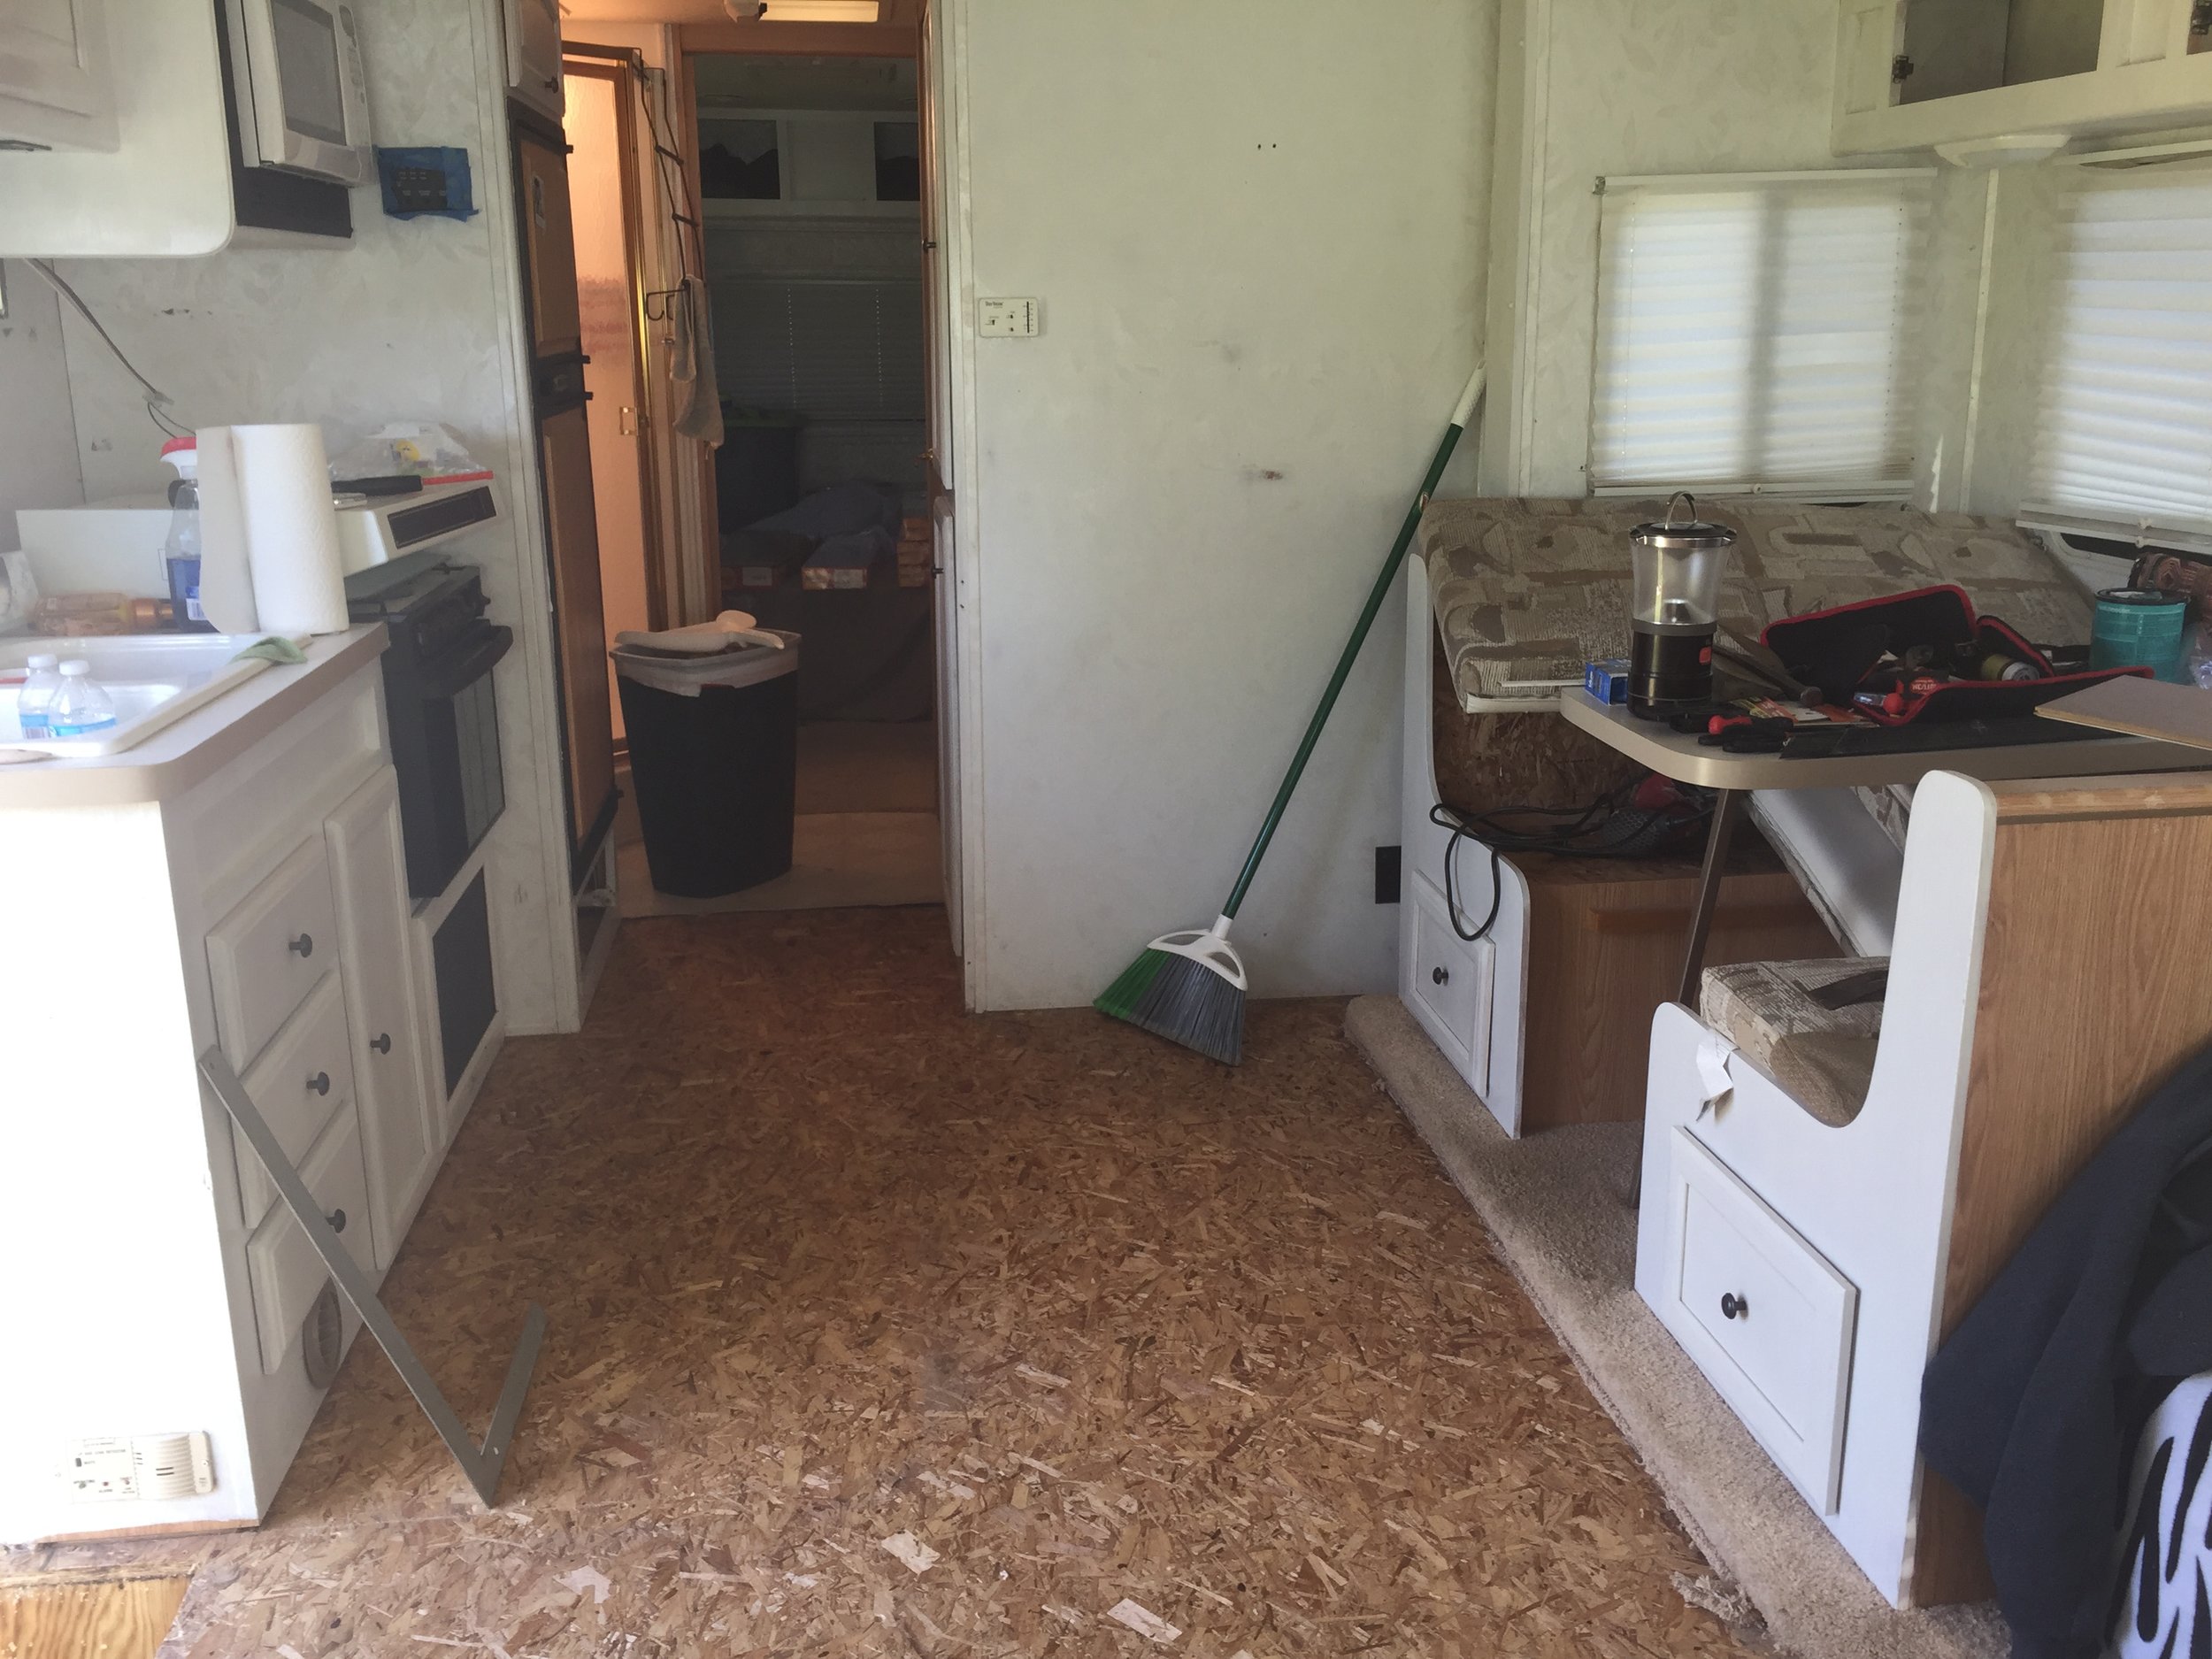
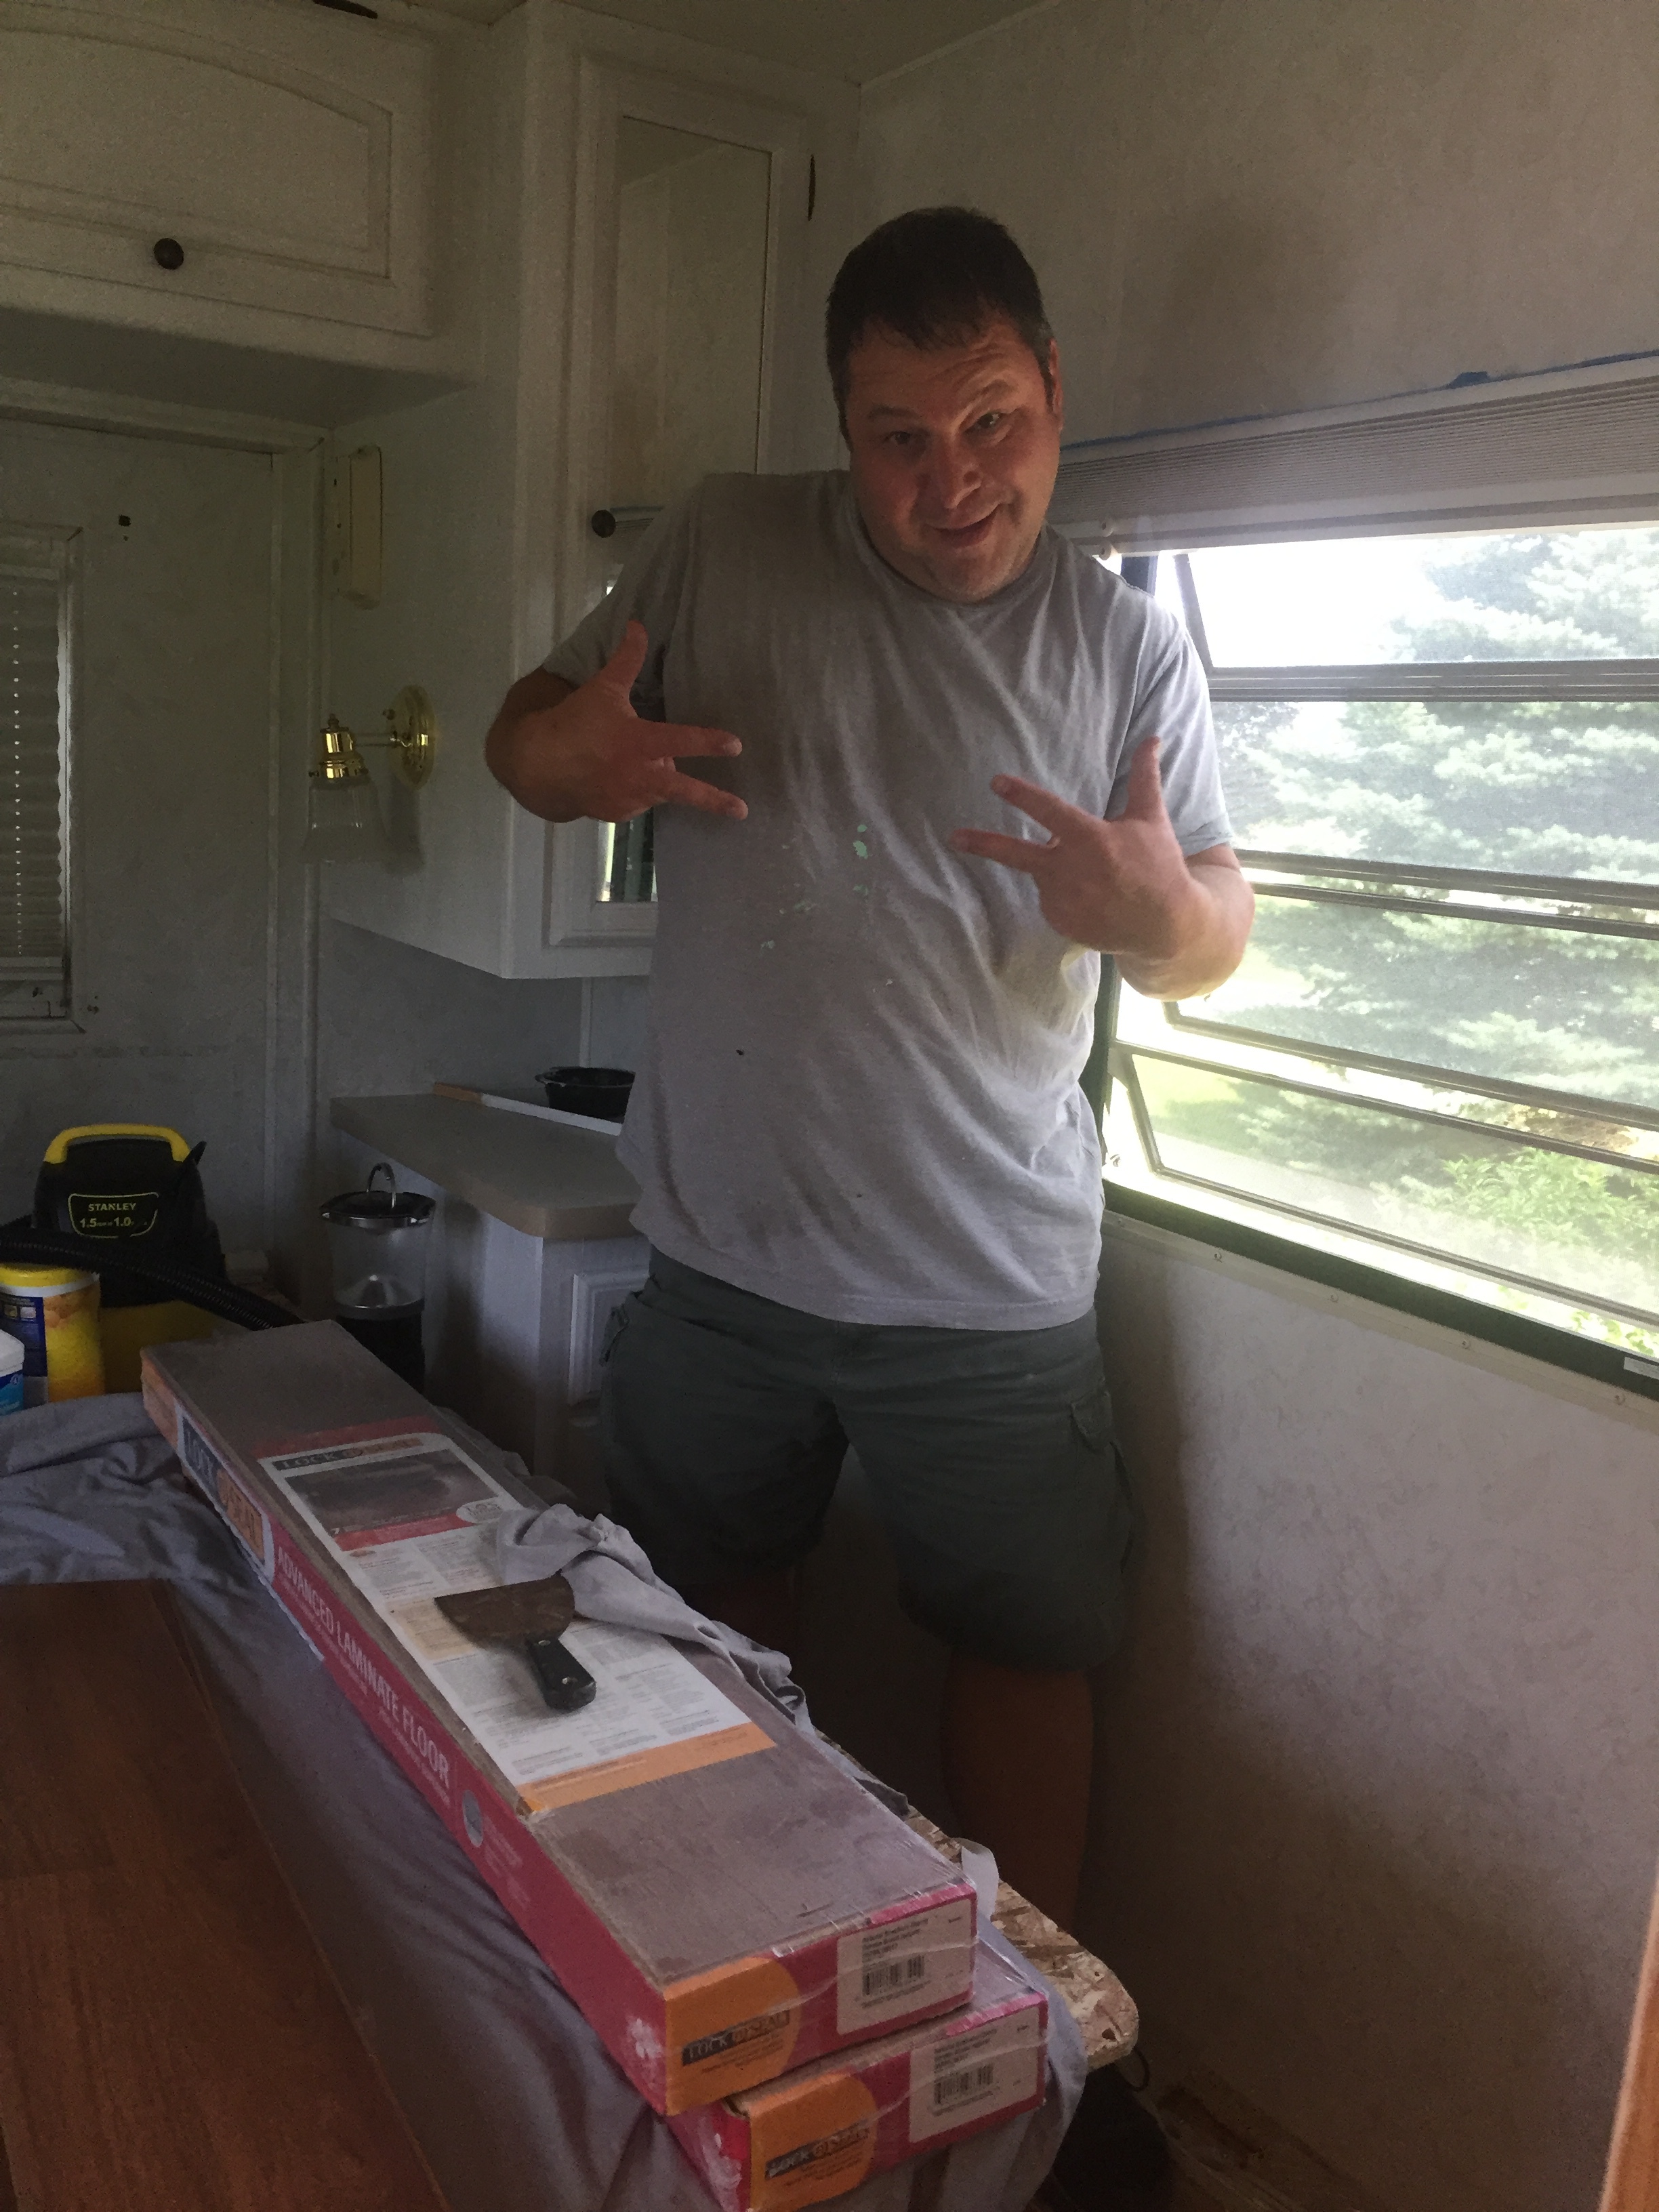
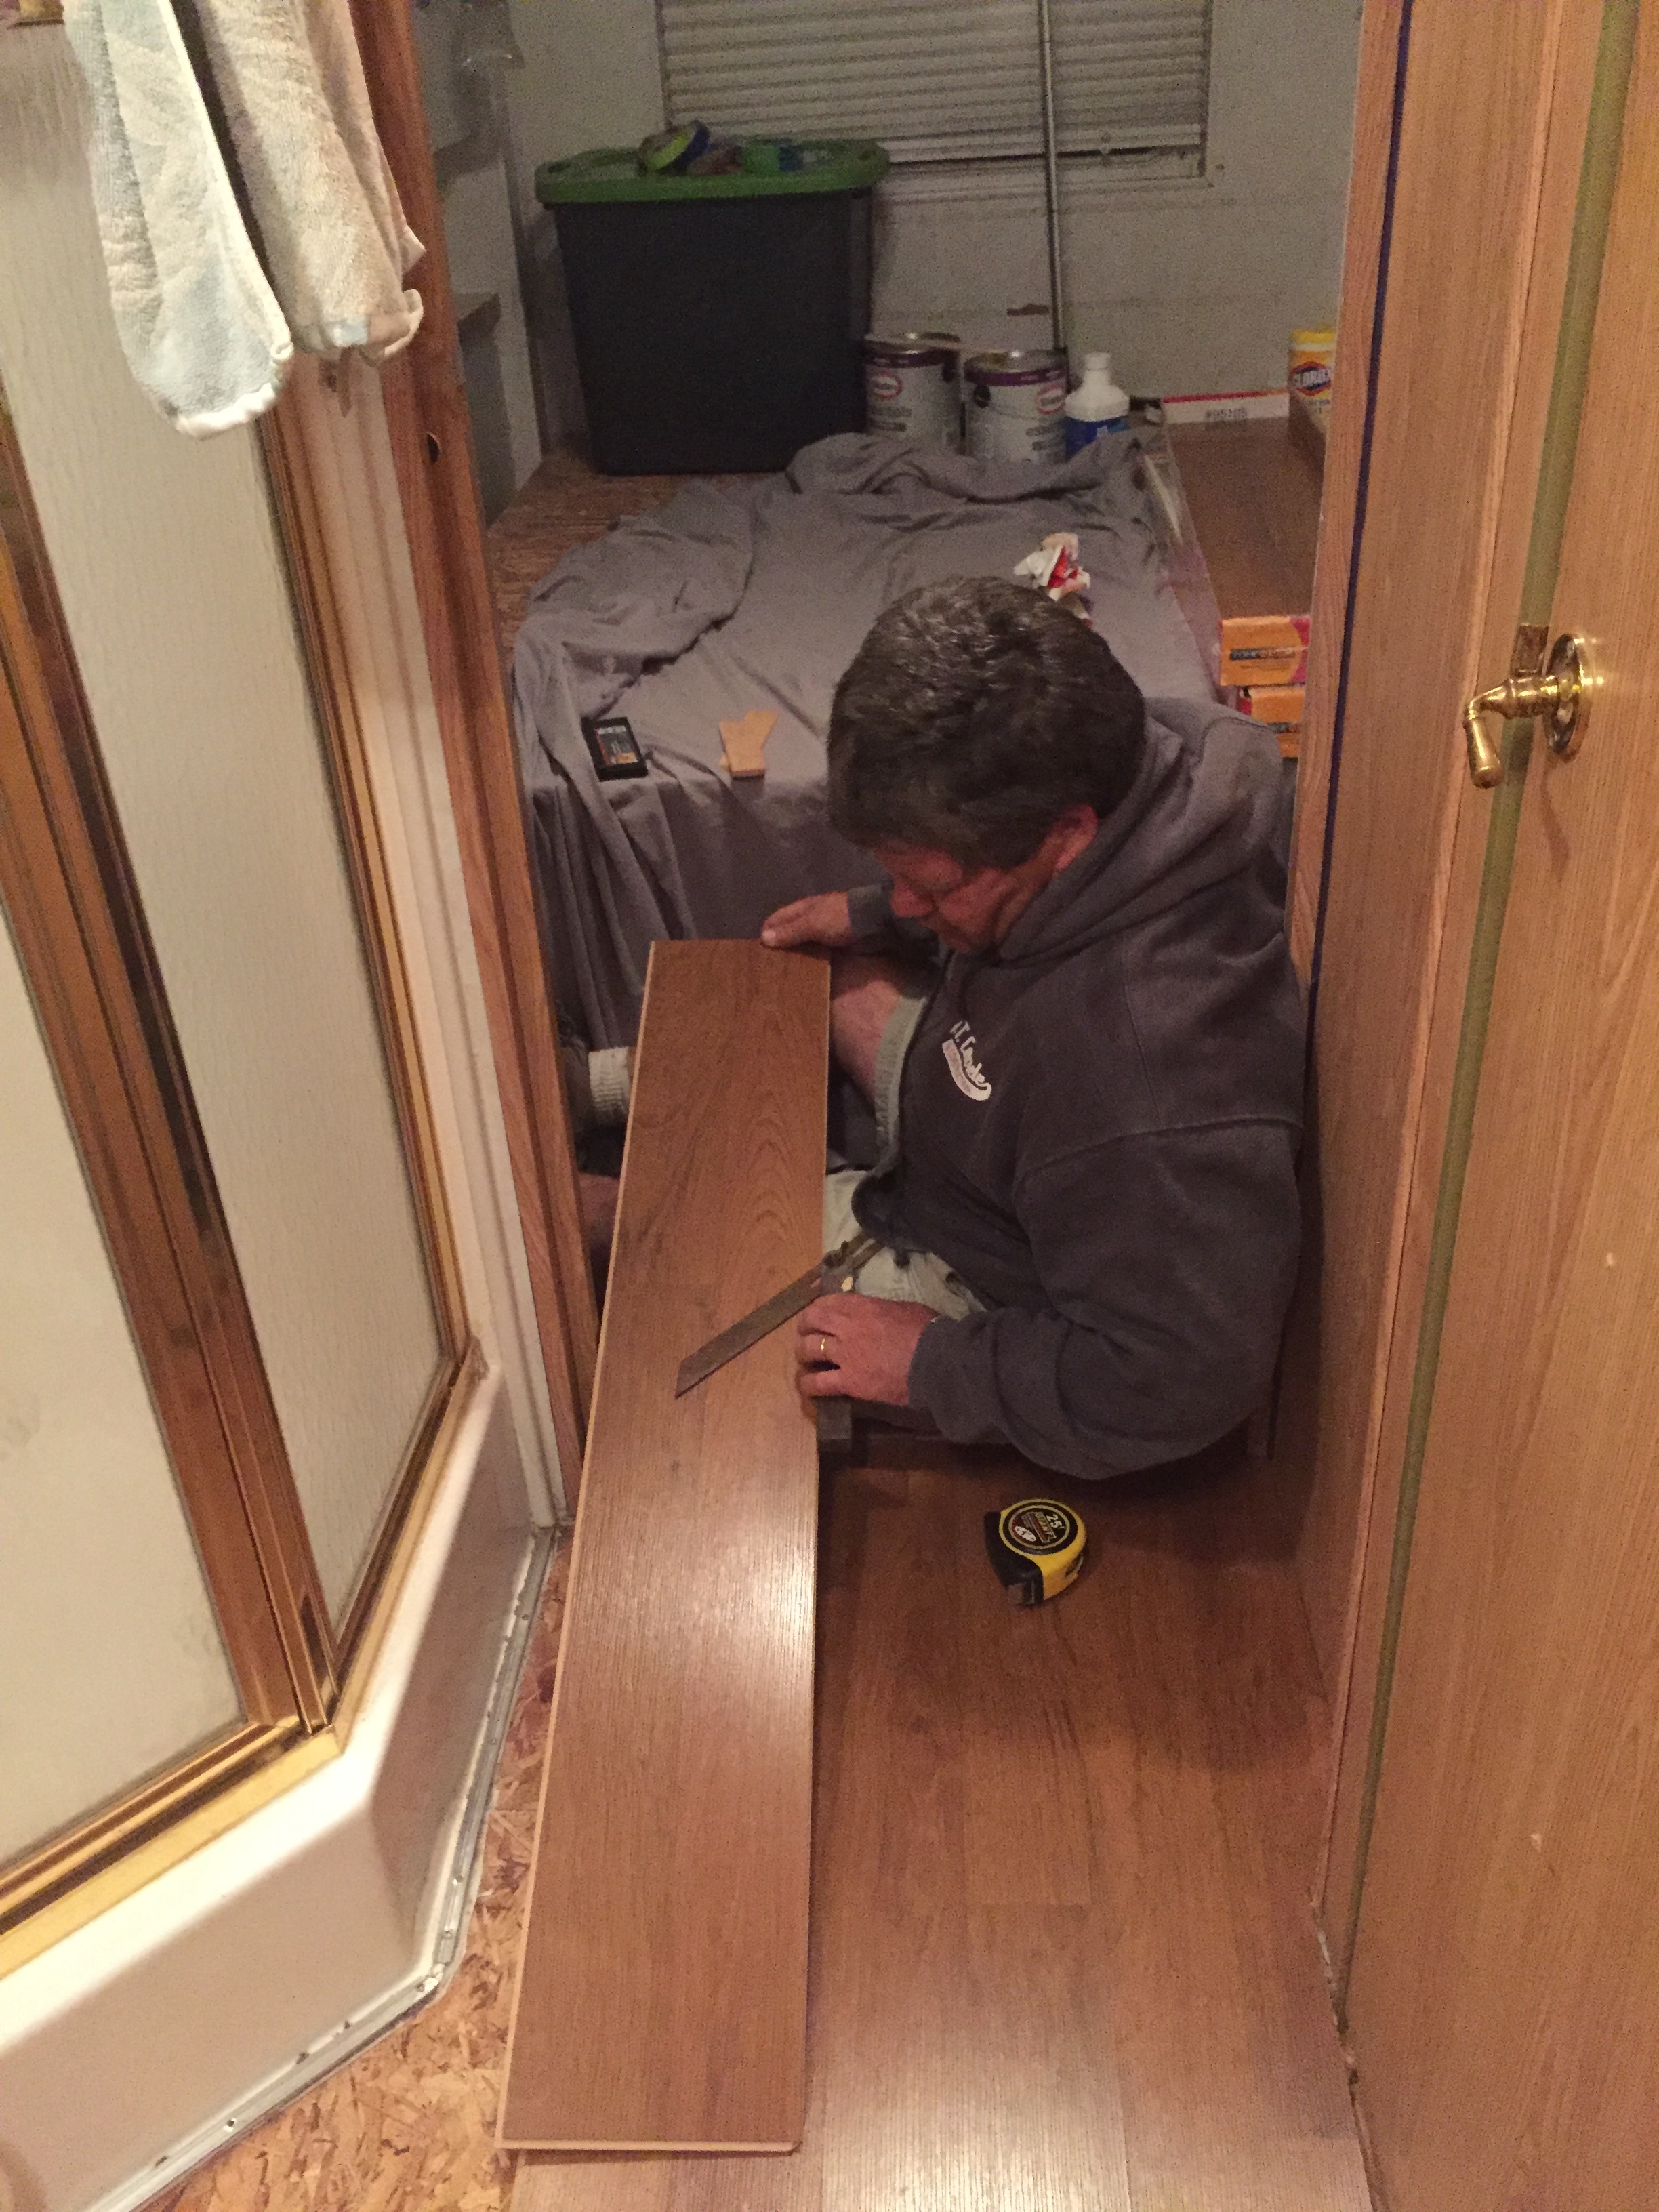
FLOORS

We also spent a lot of time researching and looking at flooring. Everyone had different experiences and advice when it came to flooring, and what it really came down to for us was.... that one of Joel's brothers had enough leftover flooring from their house for our RV! WHAT?! How did we get so lucky!??!! This awesome brother even took the time to come help us prep and start laying down the flooring!!
We did the floor in three sections: front, bathroom, and bedroom. (more out of the fact that I ripped up the linoleum in the shower area when I shouldn't have, and we were undecided for a little while on what to do about it HAHA! Whoopsie) But I actually think it ended up working out because I like to think that, if for some horrible reason we had issues with any of the sections, we won't have to rip out the floor in the ENTIRE RV. For us, we chose to leave the carpet (all of which was in pretty decent condition) in the very front of the RV around the "doghouse" and driver/passenger seats, and on the slide (because we are still undecided what to do on the slide!) and we also left the linoleum in the small sink/potty room (because uh... who knows how to do flooring around the potty?!?! I just don't know...) We trimmed with just plain quarter round from the HD, and put down clear caulking near the sinks, fridge, and shower to help prevent water from getting under the floor.


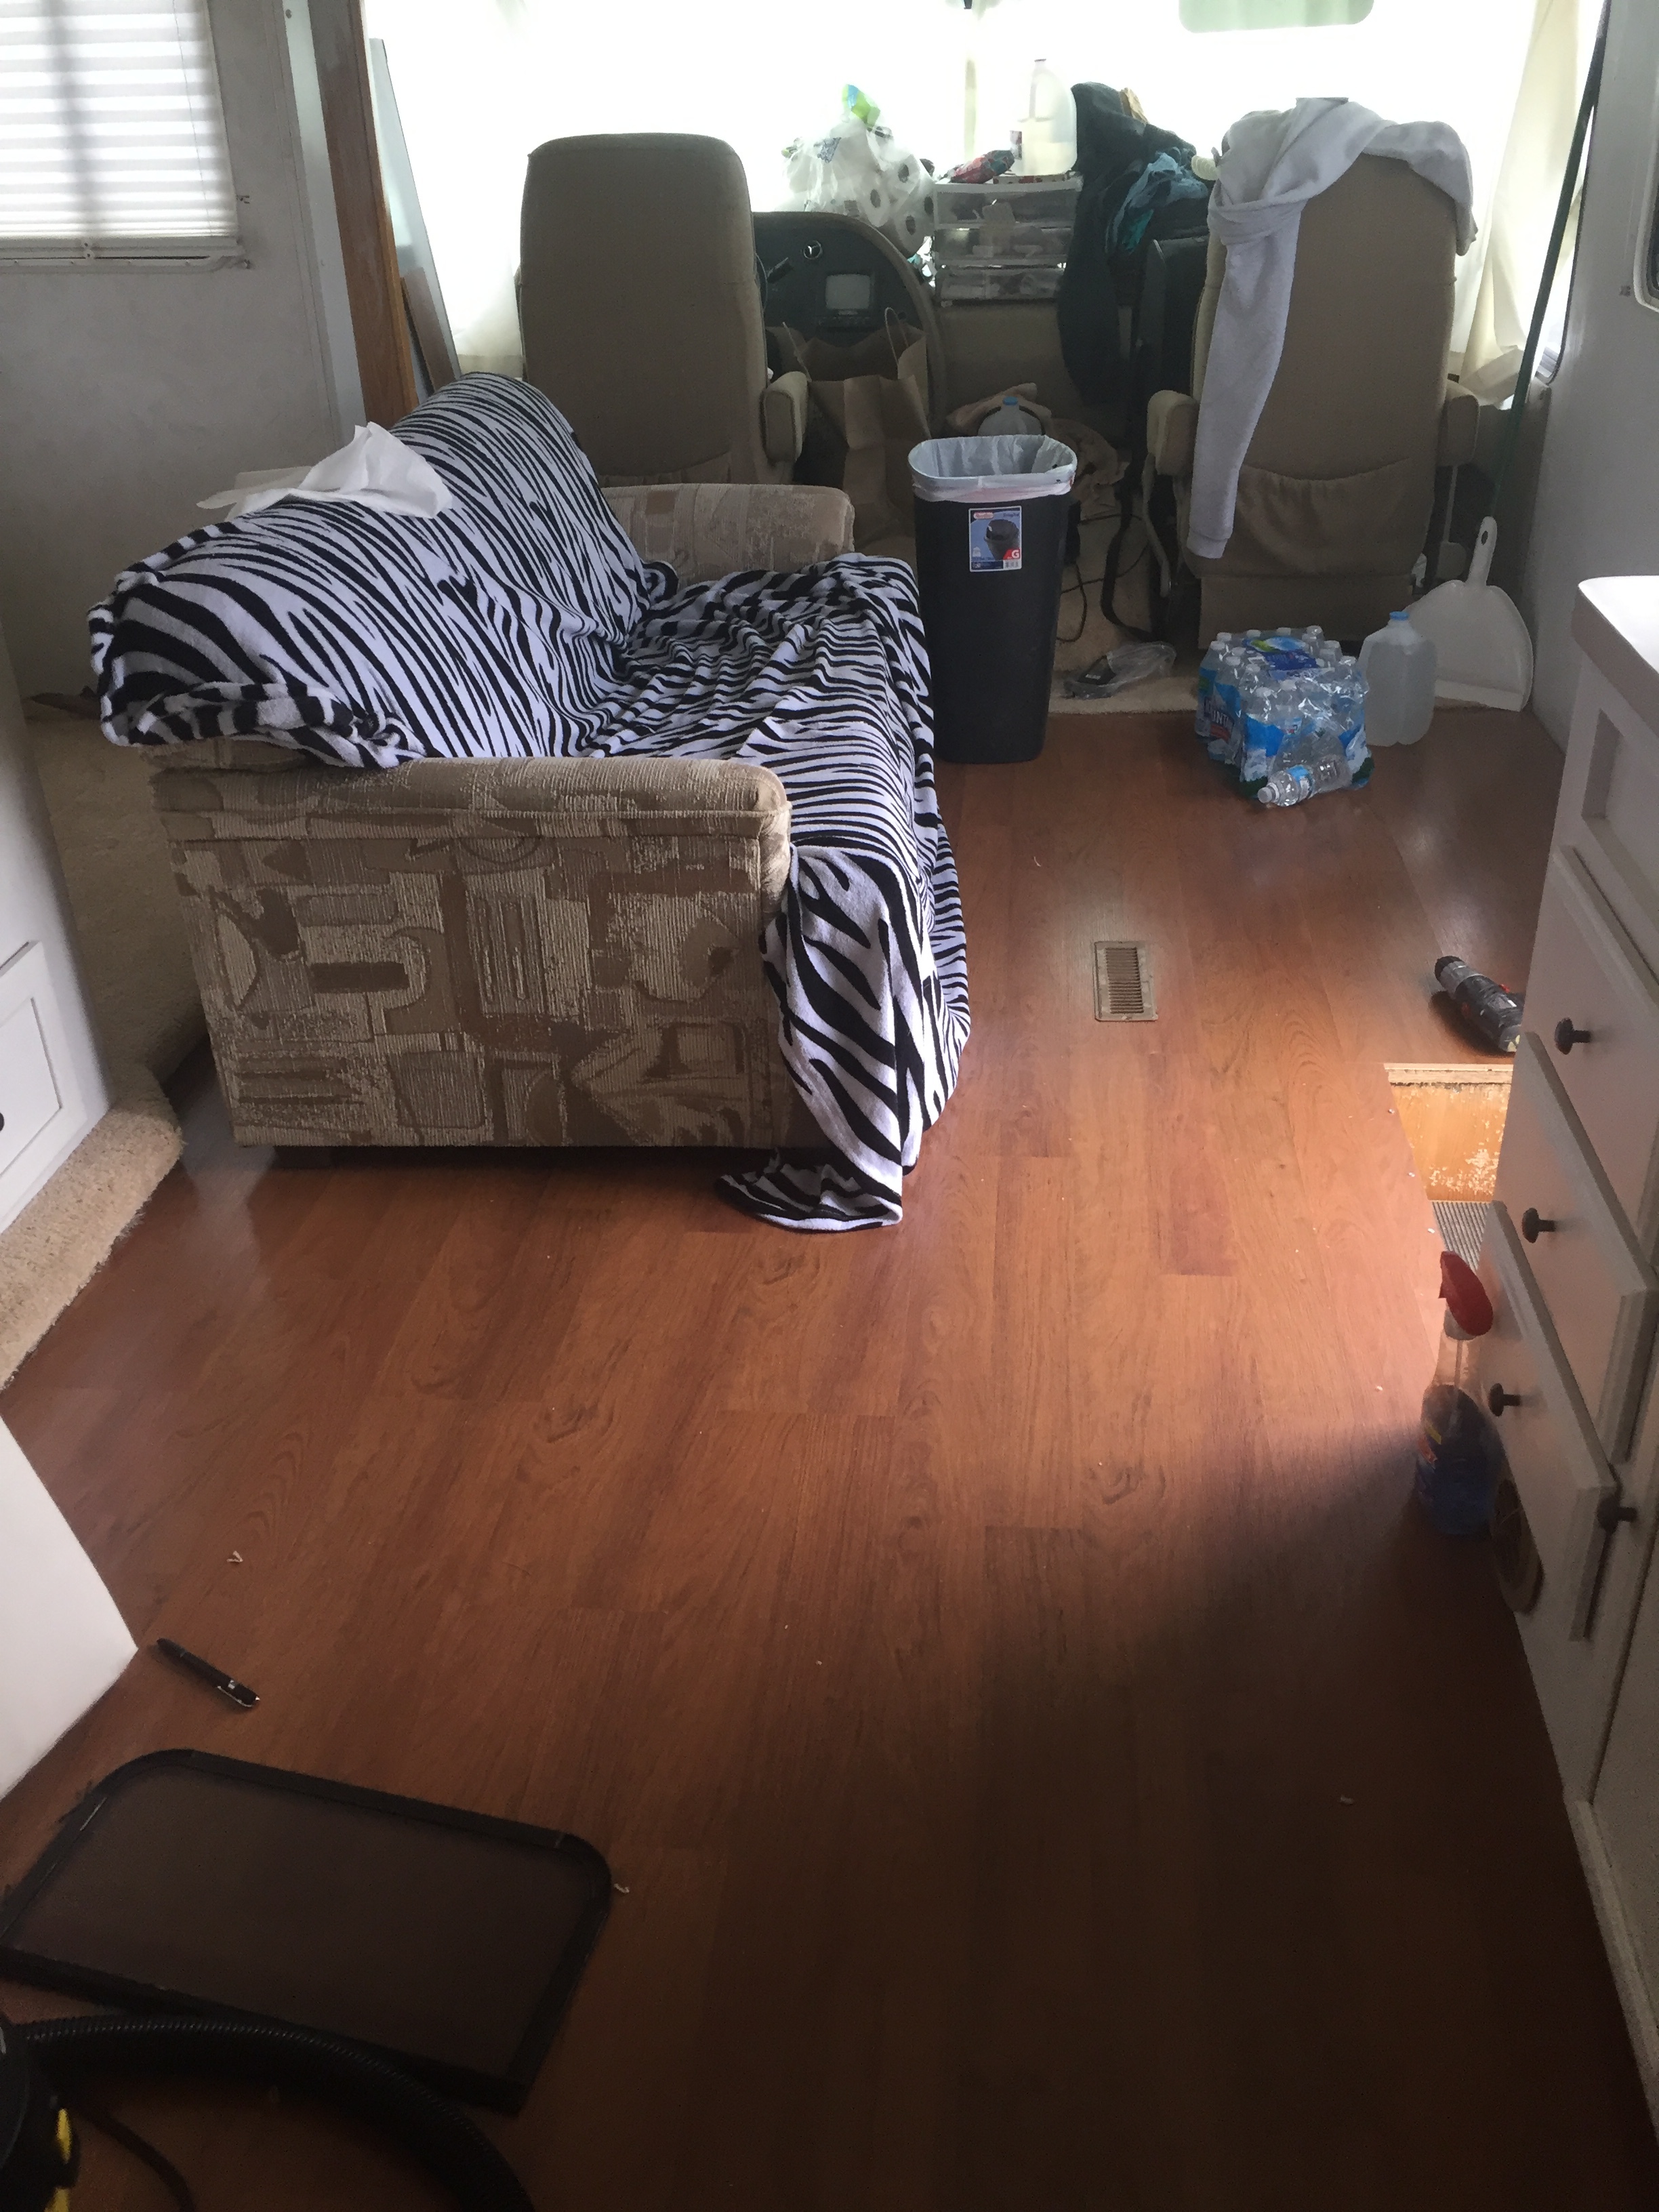

The floors turned out so great and are so easy to keep clean! We found out (the hard way) that a rug was needed at the end of the bed to keep Jake from falling when he gets in and out of bed (poor guy!) and we are still in search of a rug for the top of the entrance steps to help keep dirty paws and shoes from bringing mud inside. I'm also on the hunt for a boot tray type thing for the dog bowls, and possibly a cute rug for the living room for the dogs to lounge on.
OTHER PROJECTS
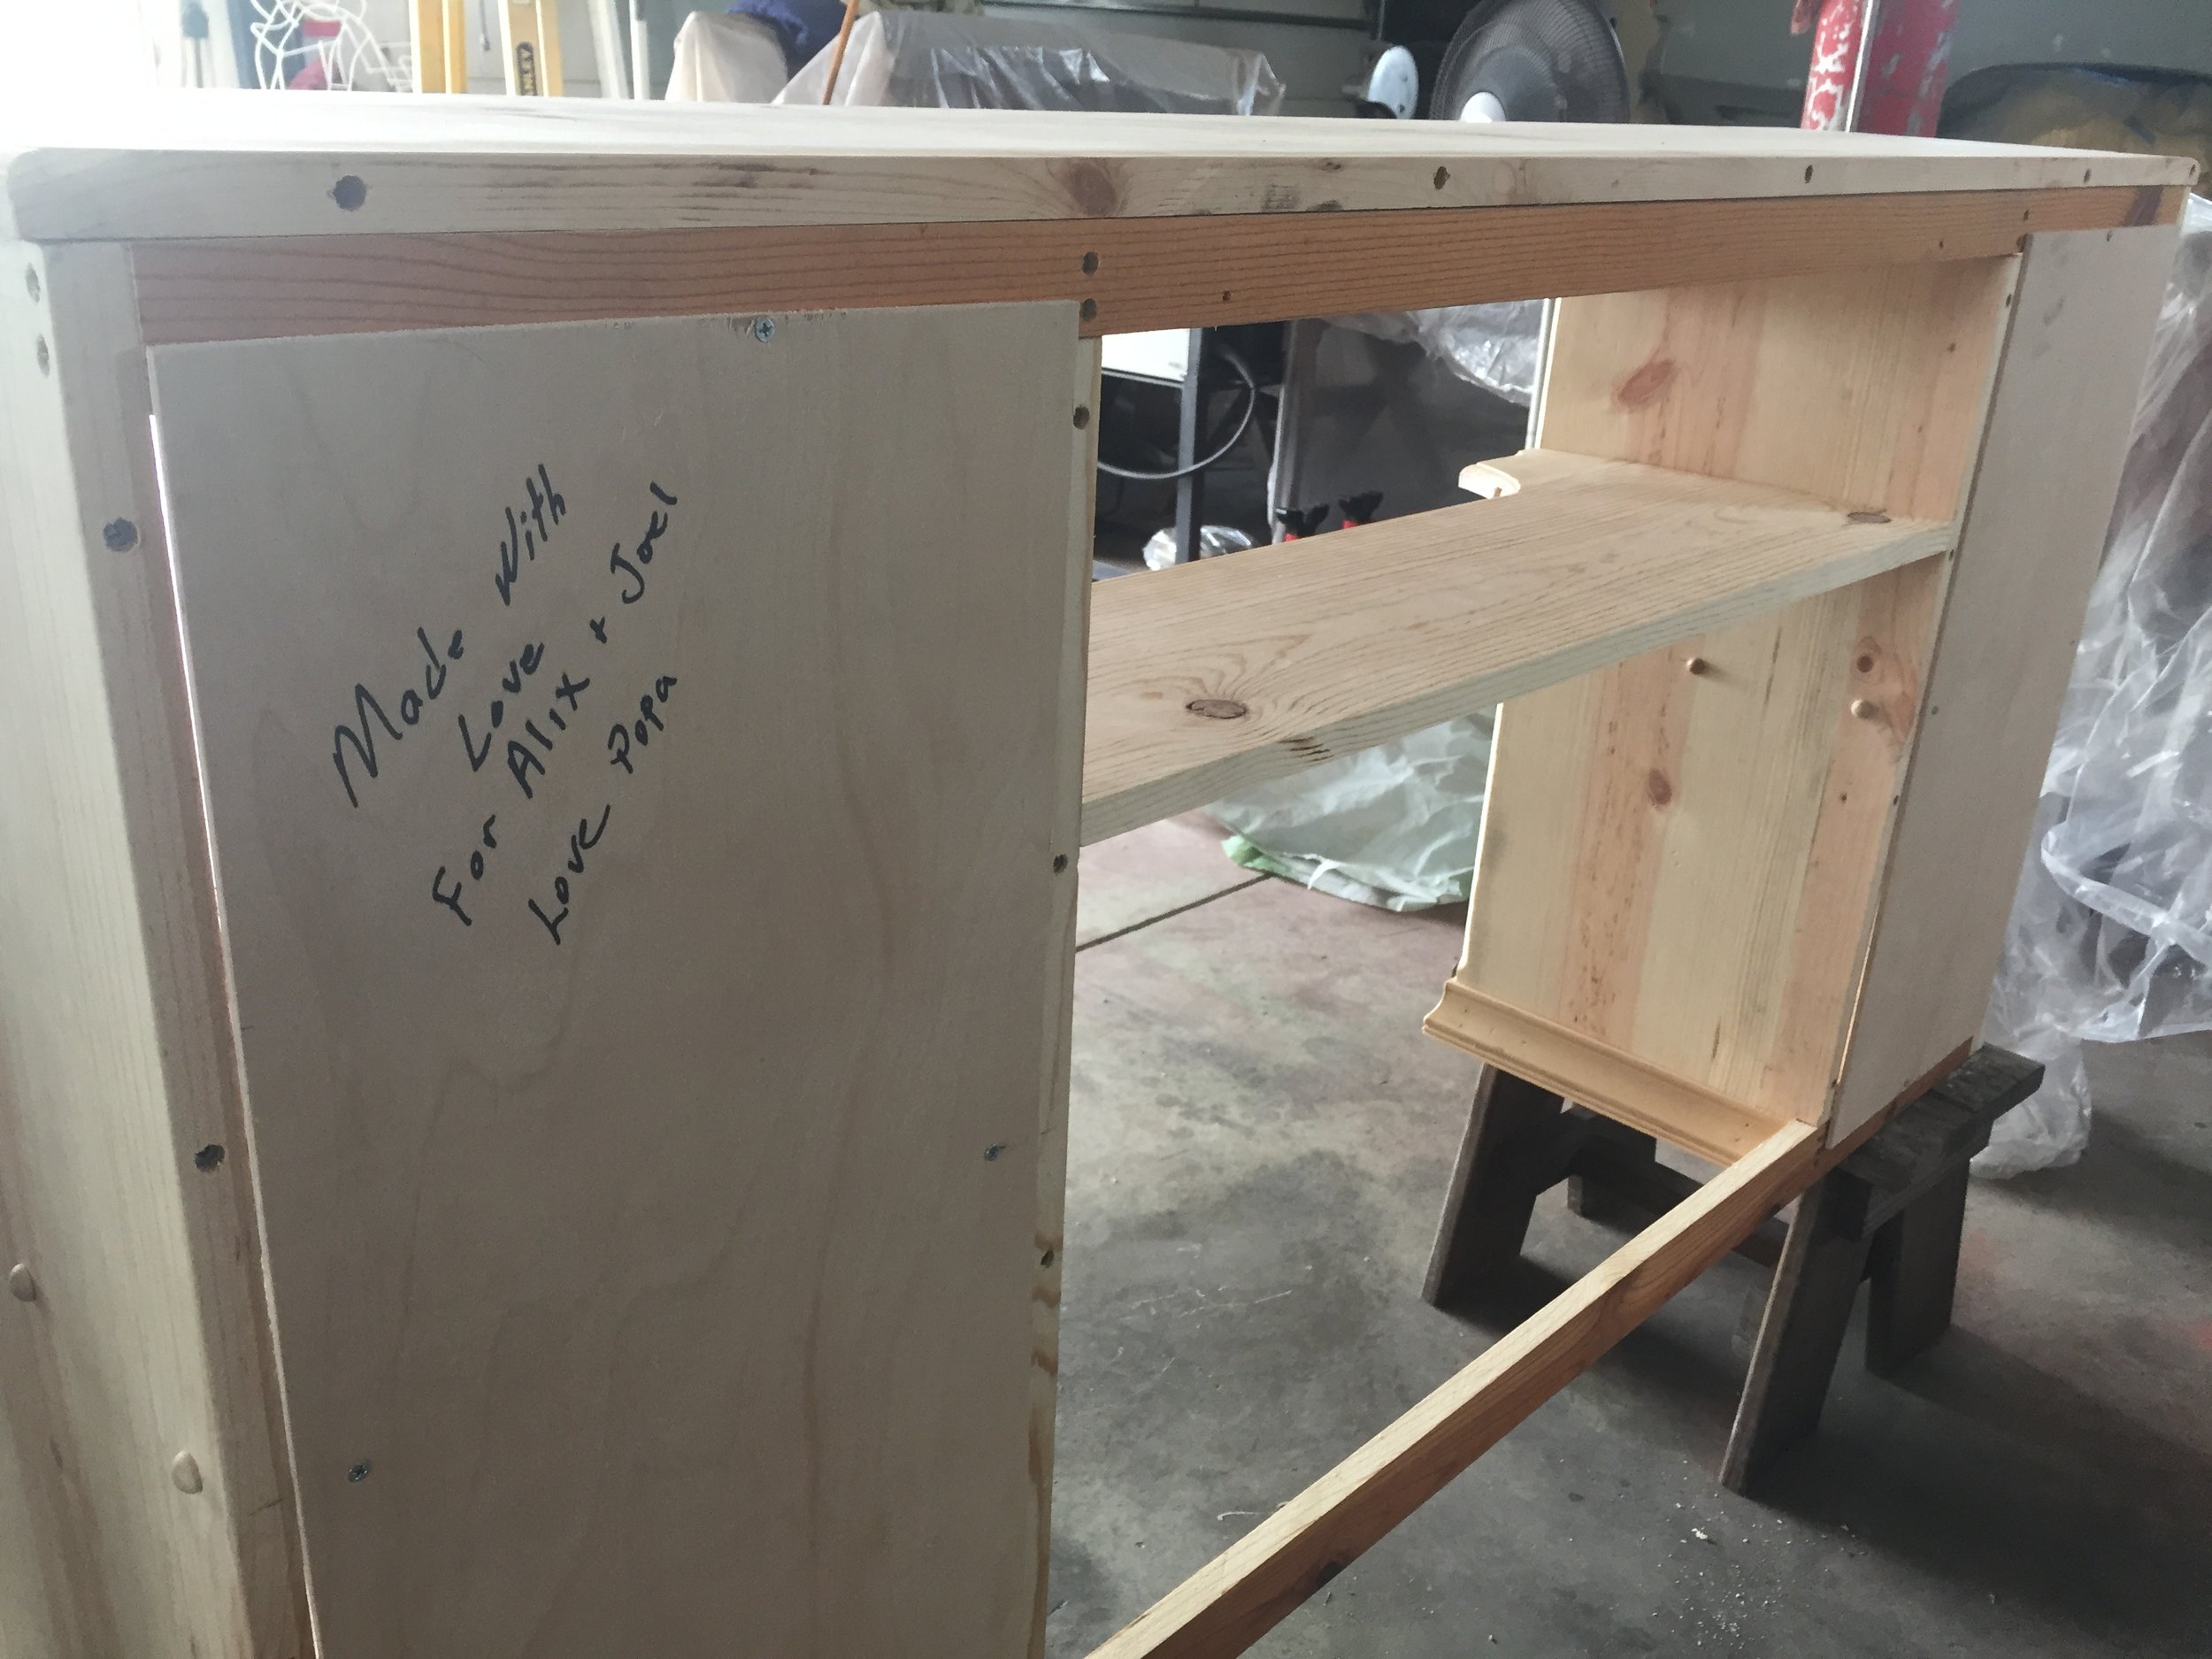
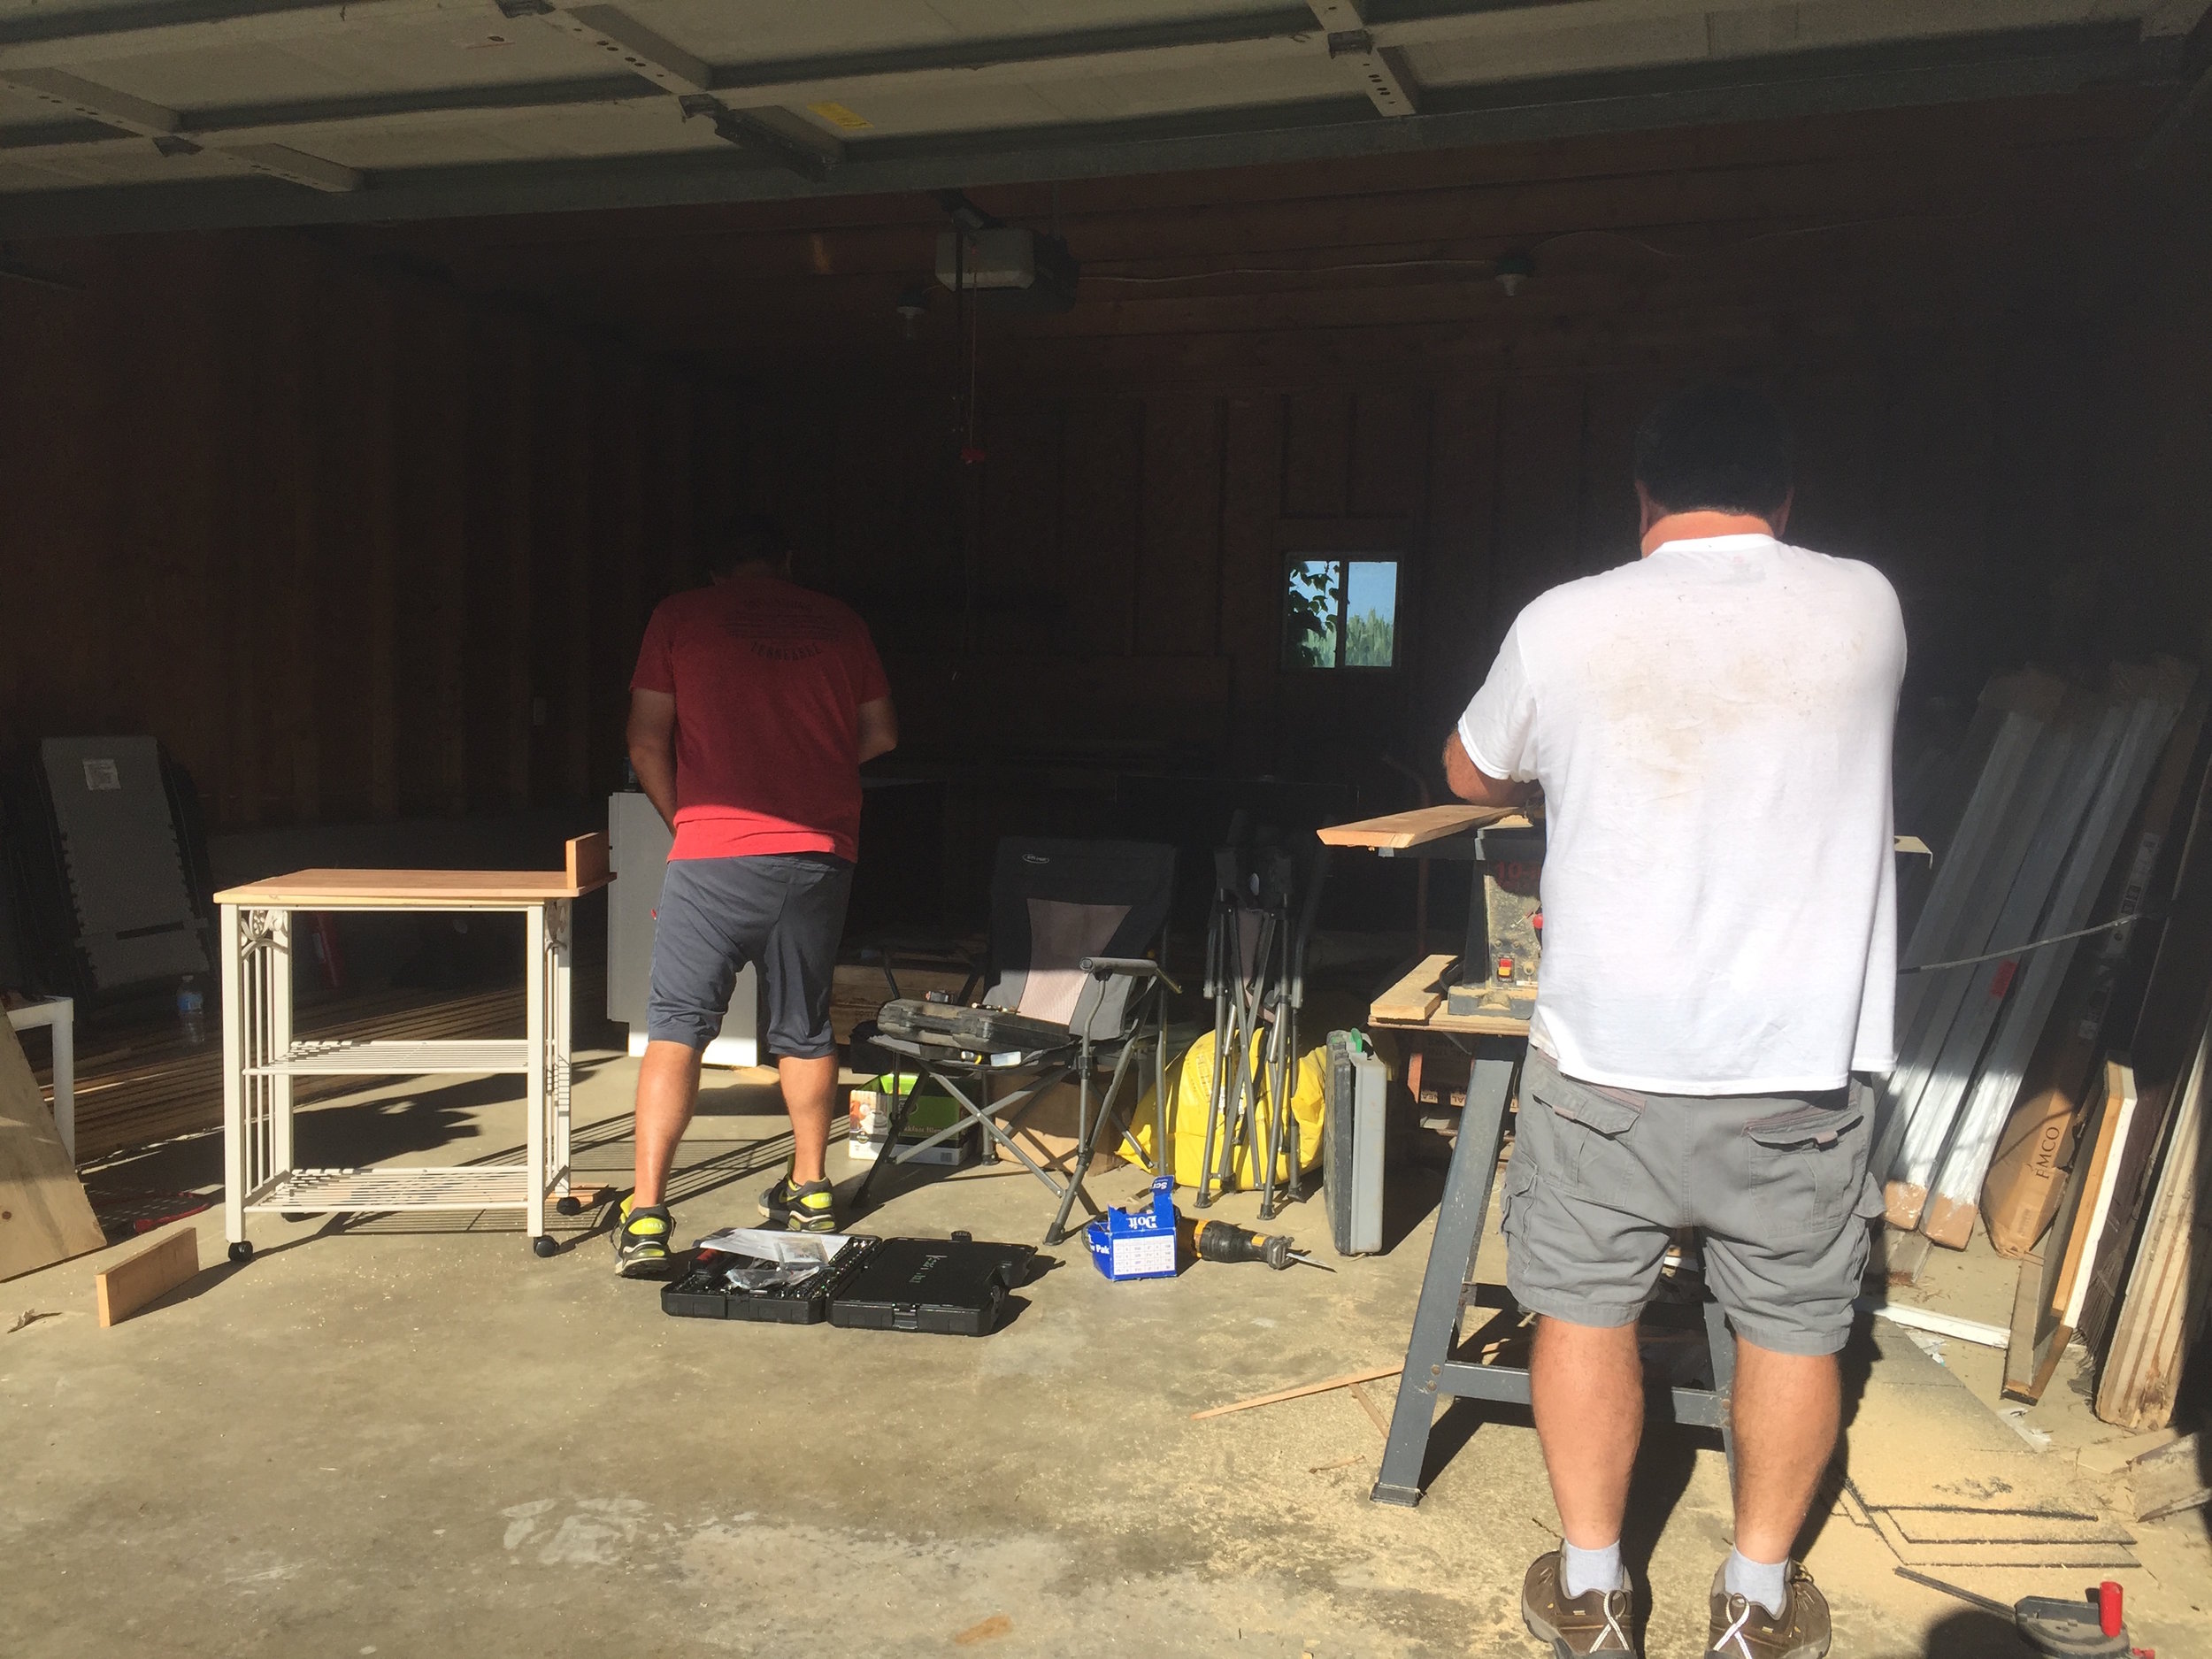
-custom TV/storage console-
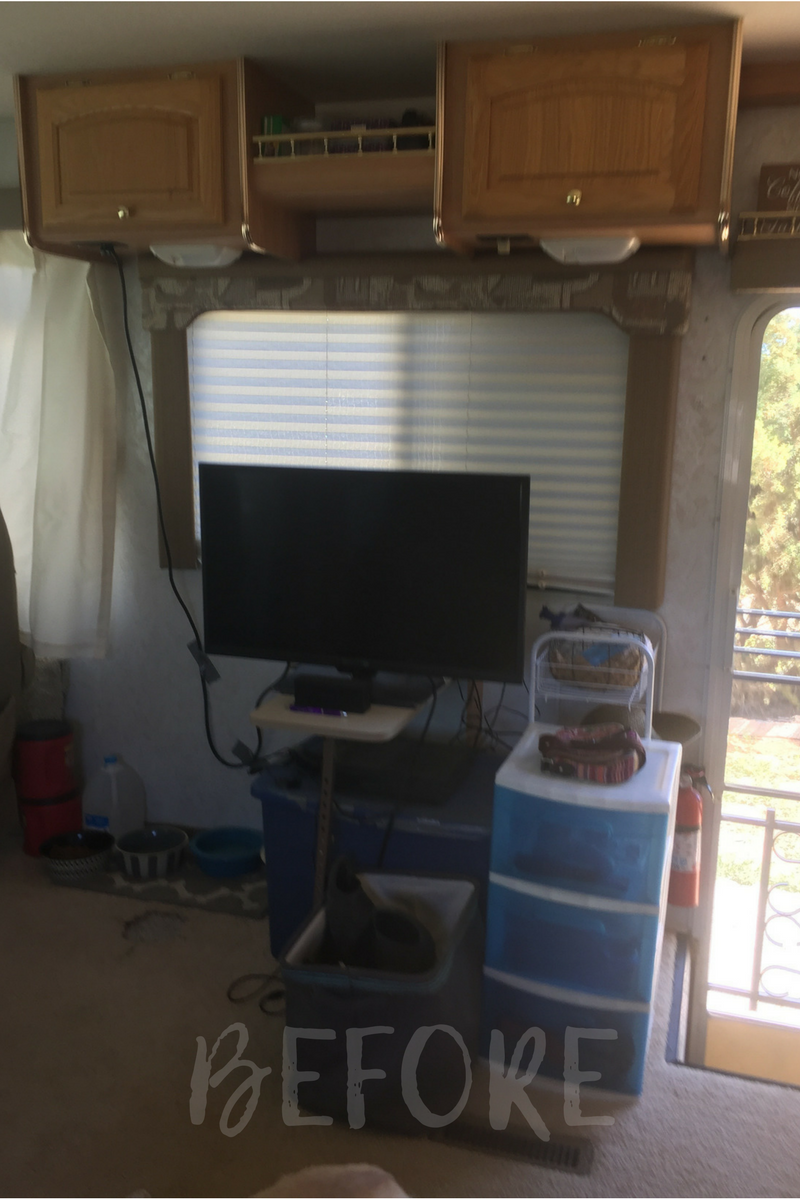

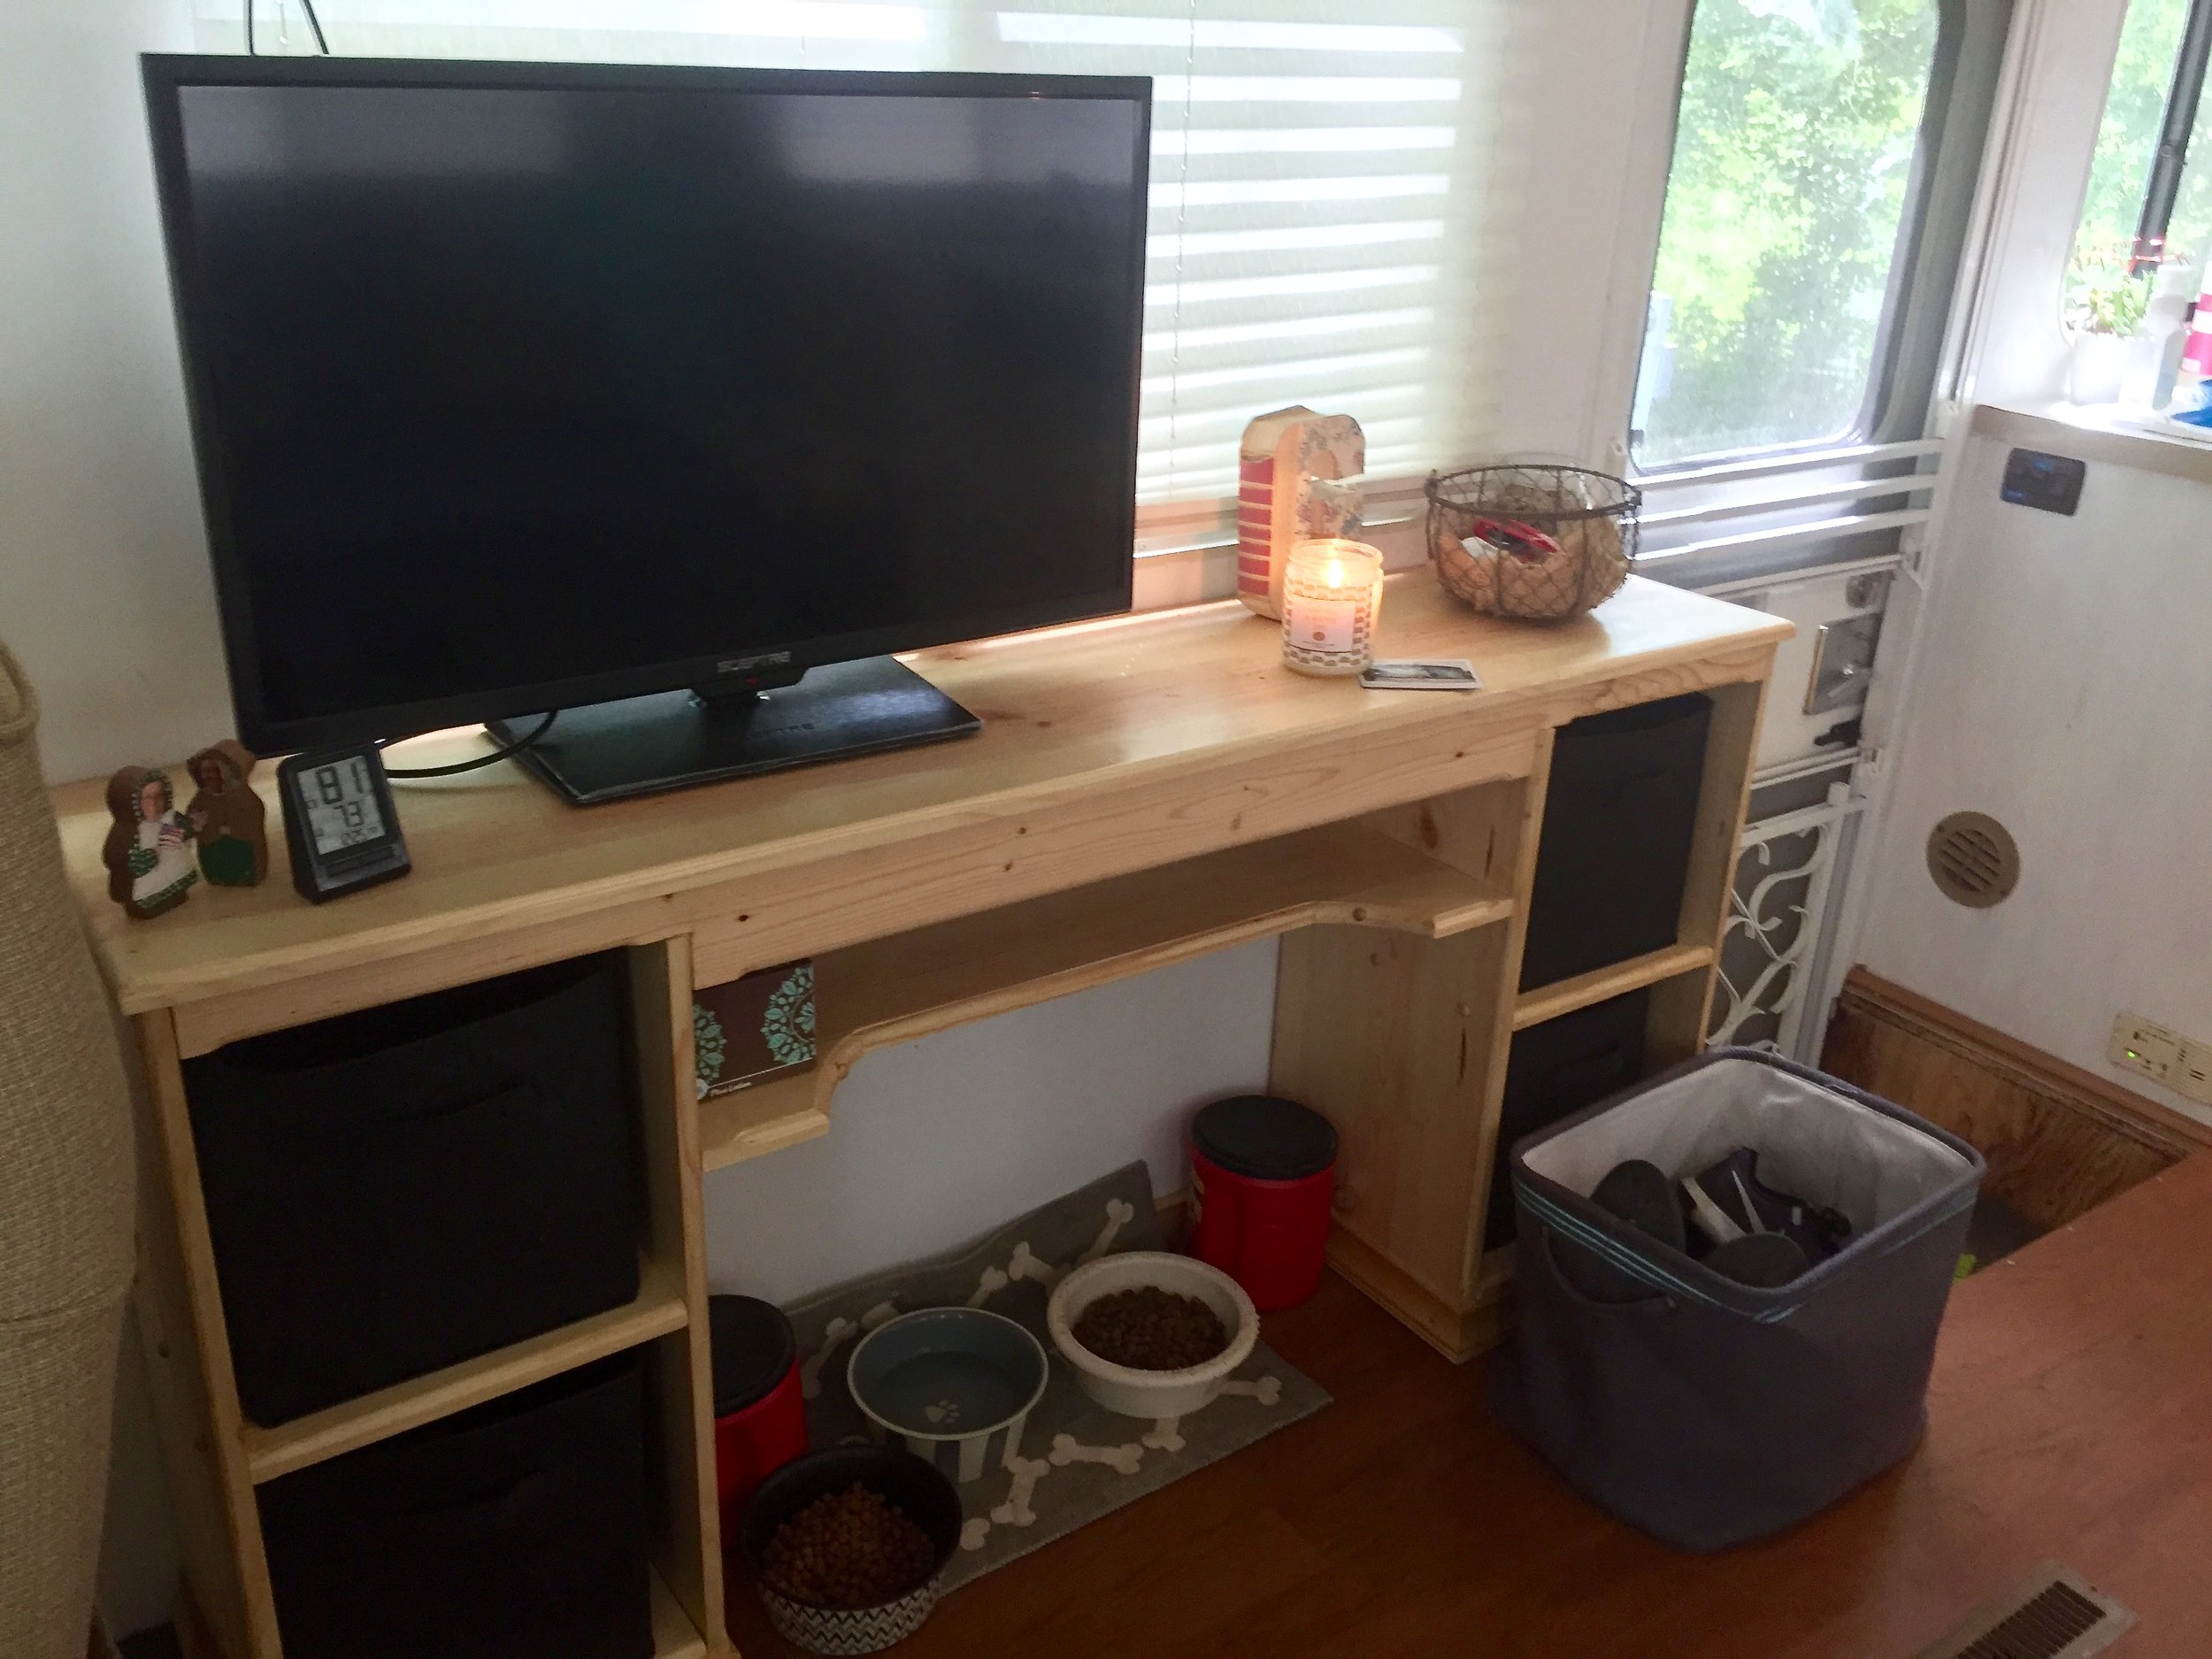
We were desperately in need of an extra storage shelf, and a place for our TV. After taking out the tiny fold down shelf that was under this window, this was the perfect place for a nice size shelf! My dear, sweet-as-can-be Papa came to the rescue with this BEAUTIFULLY made shelf! He will kill me if he finds out I didn't paint it, but I just couldn't bring myself to! It's just so perfect and I wanted to be able to keep it forever! He evened signed the back for us! (cue tears of love and a warm fuzzy feeling! UGH I love that man!) I finished it with two coats of shellac and my step-dad mounted it to the wall to keep it from moving on the road. The shelf such a great addition because it provides so much extra storage and a great place for our tv, but also adds a really nice homey, less camper-ish touch to the RV!

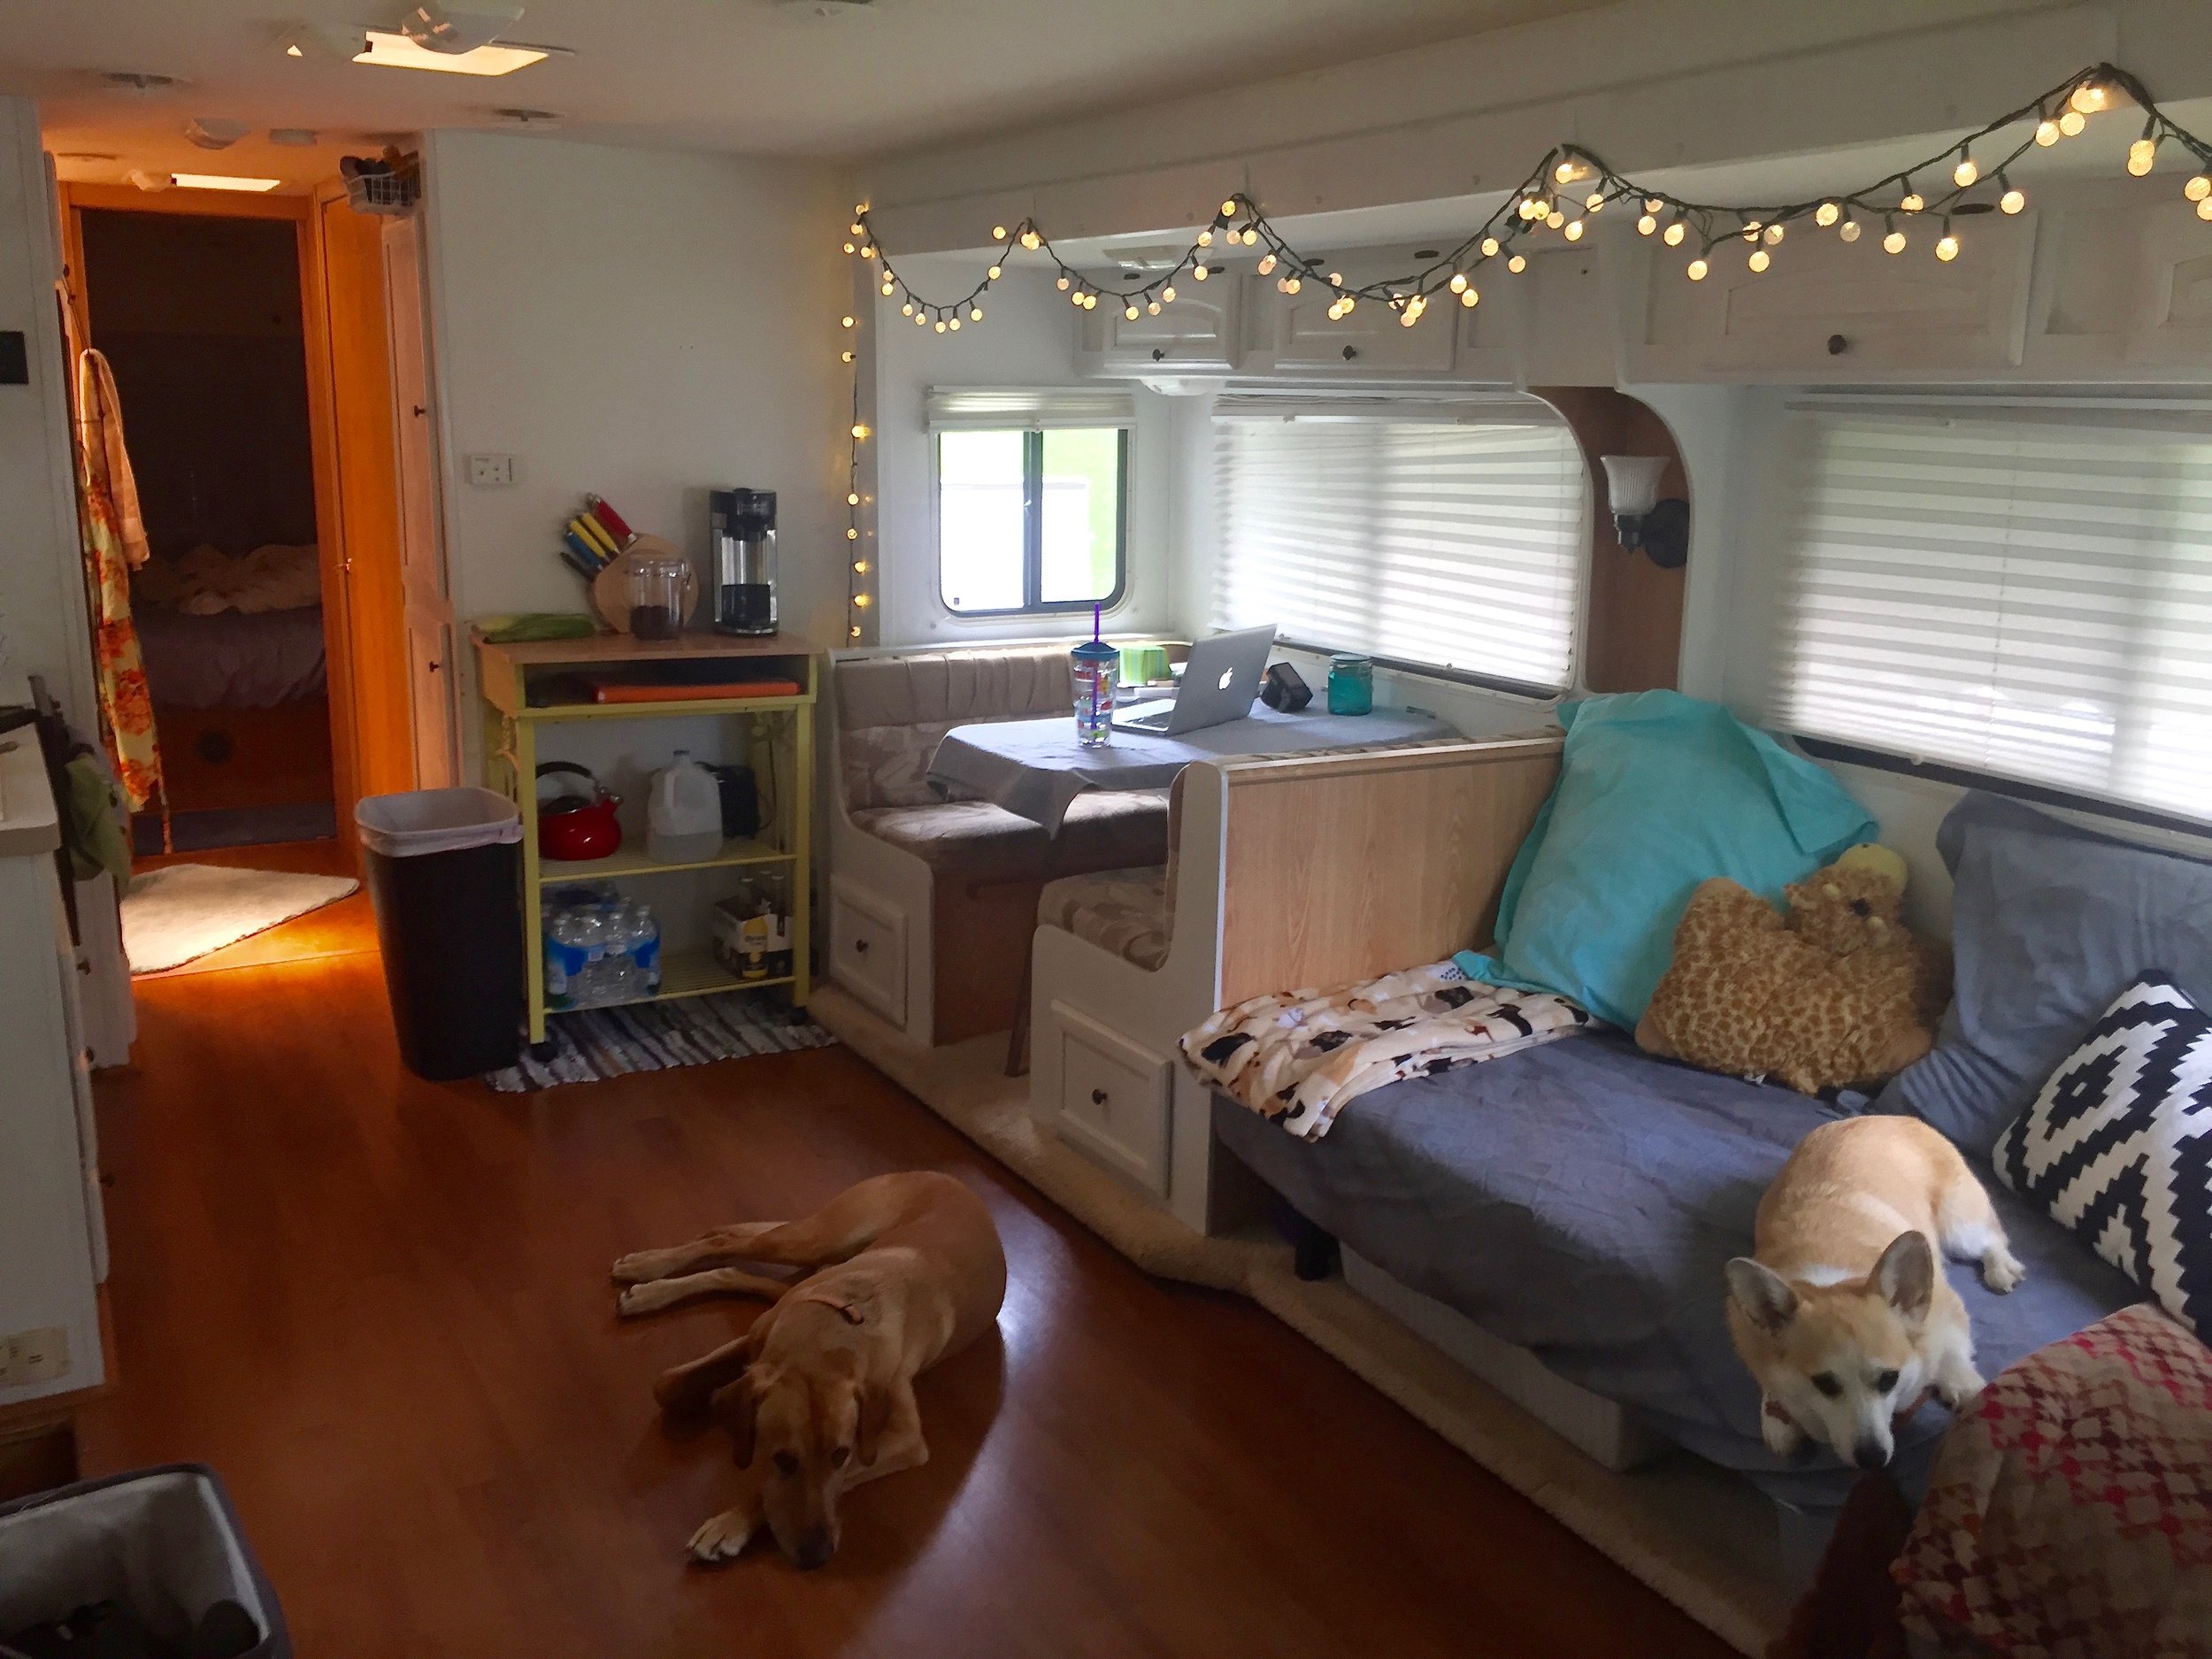
-replacing the couch-
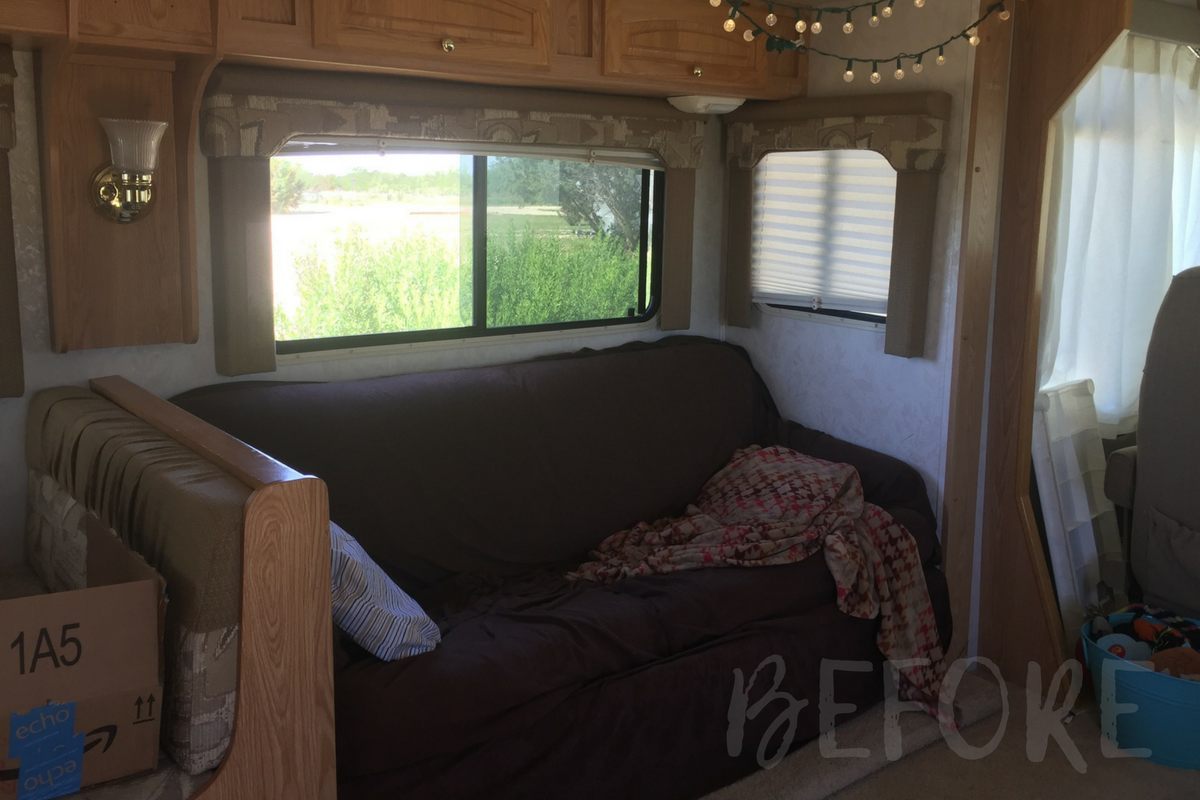
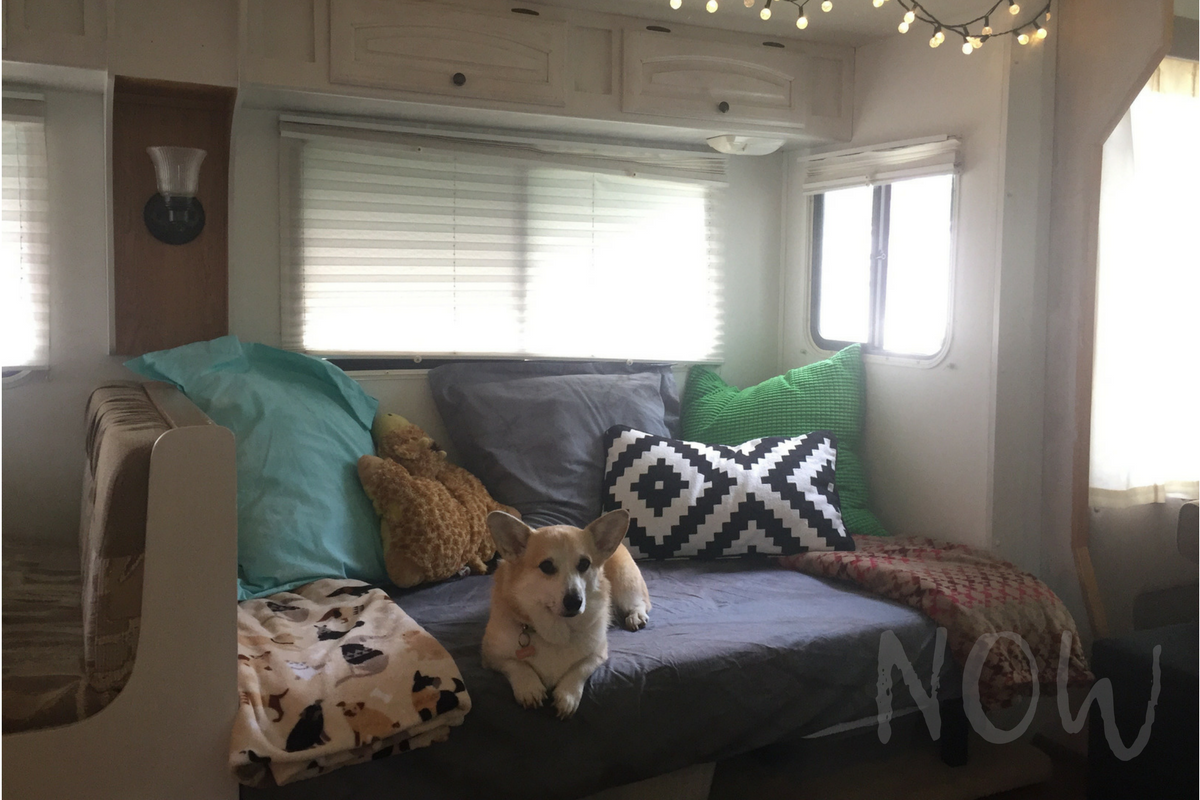
When we bought the RV, I thought the thin mat in our fold out couch was a little grimy so I threw it out.... Then later realized I should not have because the couch sagged after that (again, whooooops! (: ) We soon realized that the couch was too little anyways. There was just not enough room on it for two adults and two dogs! We watch a lot of Netflix and Hulu during the week and knew a nice size couch would be worth the investment. We did not want to remove anything else on the slide, so we had a very specific set of measurements we had to meet. After MUCH searching on my part, I found the PERFECT futon at IKEA! Laid down, the futon would fit just right in the space, and with some oversized pillows for the back would be great for all four of us! I headed to Walmart and picked up some twin size fitted sheets for covers (because dog hair!)
**It also should be mentioned that in order to obtain this perfectly sized couch for us, my brother and future-sister-in-law toted me around to TWO different IKEA stores in one evening. TWO. If you live in OH, just do that math. It was a LONG (but mostly fun (; ) day, and I'm so thankful they helped me out!
futon: BALKARP slepper sofa from IKEA
pillows/cases: large pillow (IKEA), green cover (IKEA), small pillow cover (IKEA), large pillows (Kohls)
p.s. also picked up this little foot stool/storage cube and ALL OF MY SHOES FIT IN IT! In case you don't know me well, this is quit the accomplishment!!
-bar cart turned food prep/coffee station-

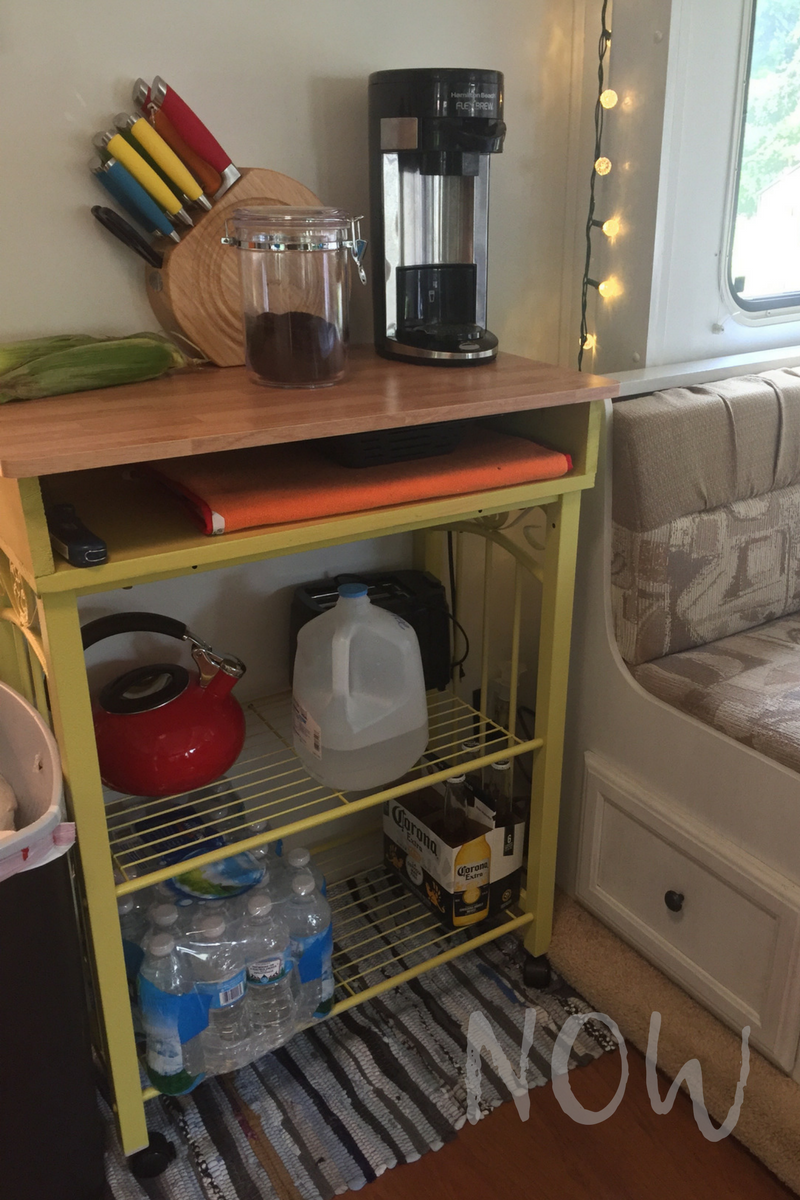
When we first moved into the RV I had recently purchased a plastic white "garage storage" shelf (to use as clothes storage when we lived in a house that previously had a serious mouse problem...) So we used it as temporary shelf/extra storage space in the RV. It worked fine, but wasn't all that sturdy so it was not ideal for food prep. Seeing as our actual kitchen has about 3 inches of counter space (which is in between the sink and stove) I knew that I would need to find something different to use that I could actually cut up our veggies on etc. In comes my mom and step-dad! I had talked my mom into buying this bar cart at an auction (probably two years ago) so I could use it as a coffee bar cart in our "future home" so it was sitting in her basement just waiting to become useful! When we were trying to think of a solution to my lack of counter space, we put together the cart and found that it would work, however it was a little on the short side. My step-dad walked in on our conversation about this and he had the grand idea of adding a shelf to raise the top up! (I tell ya, it pays to know handy/crafty people!) Not too much later, and with the help of my step-brother too, we had the perfect food prep/extra storage shelf/coffee station!! Have I mentioned how awesome my family is!?!? I swear, it has seemed like any problem/snag we have come across, SOMEONE in our family has came up with the solution!
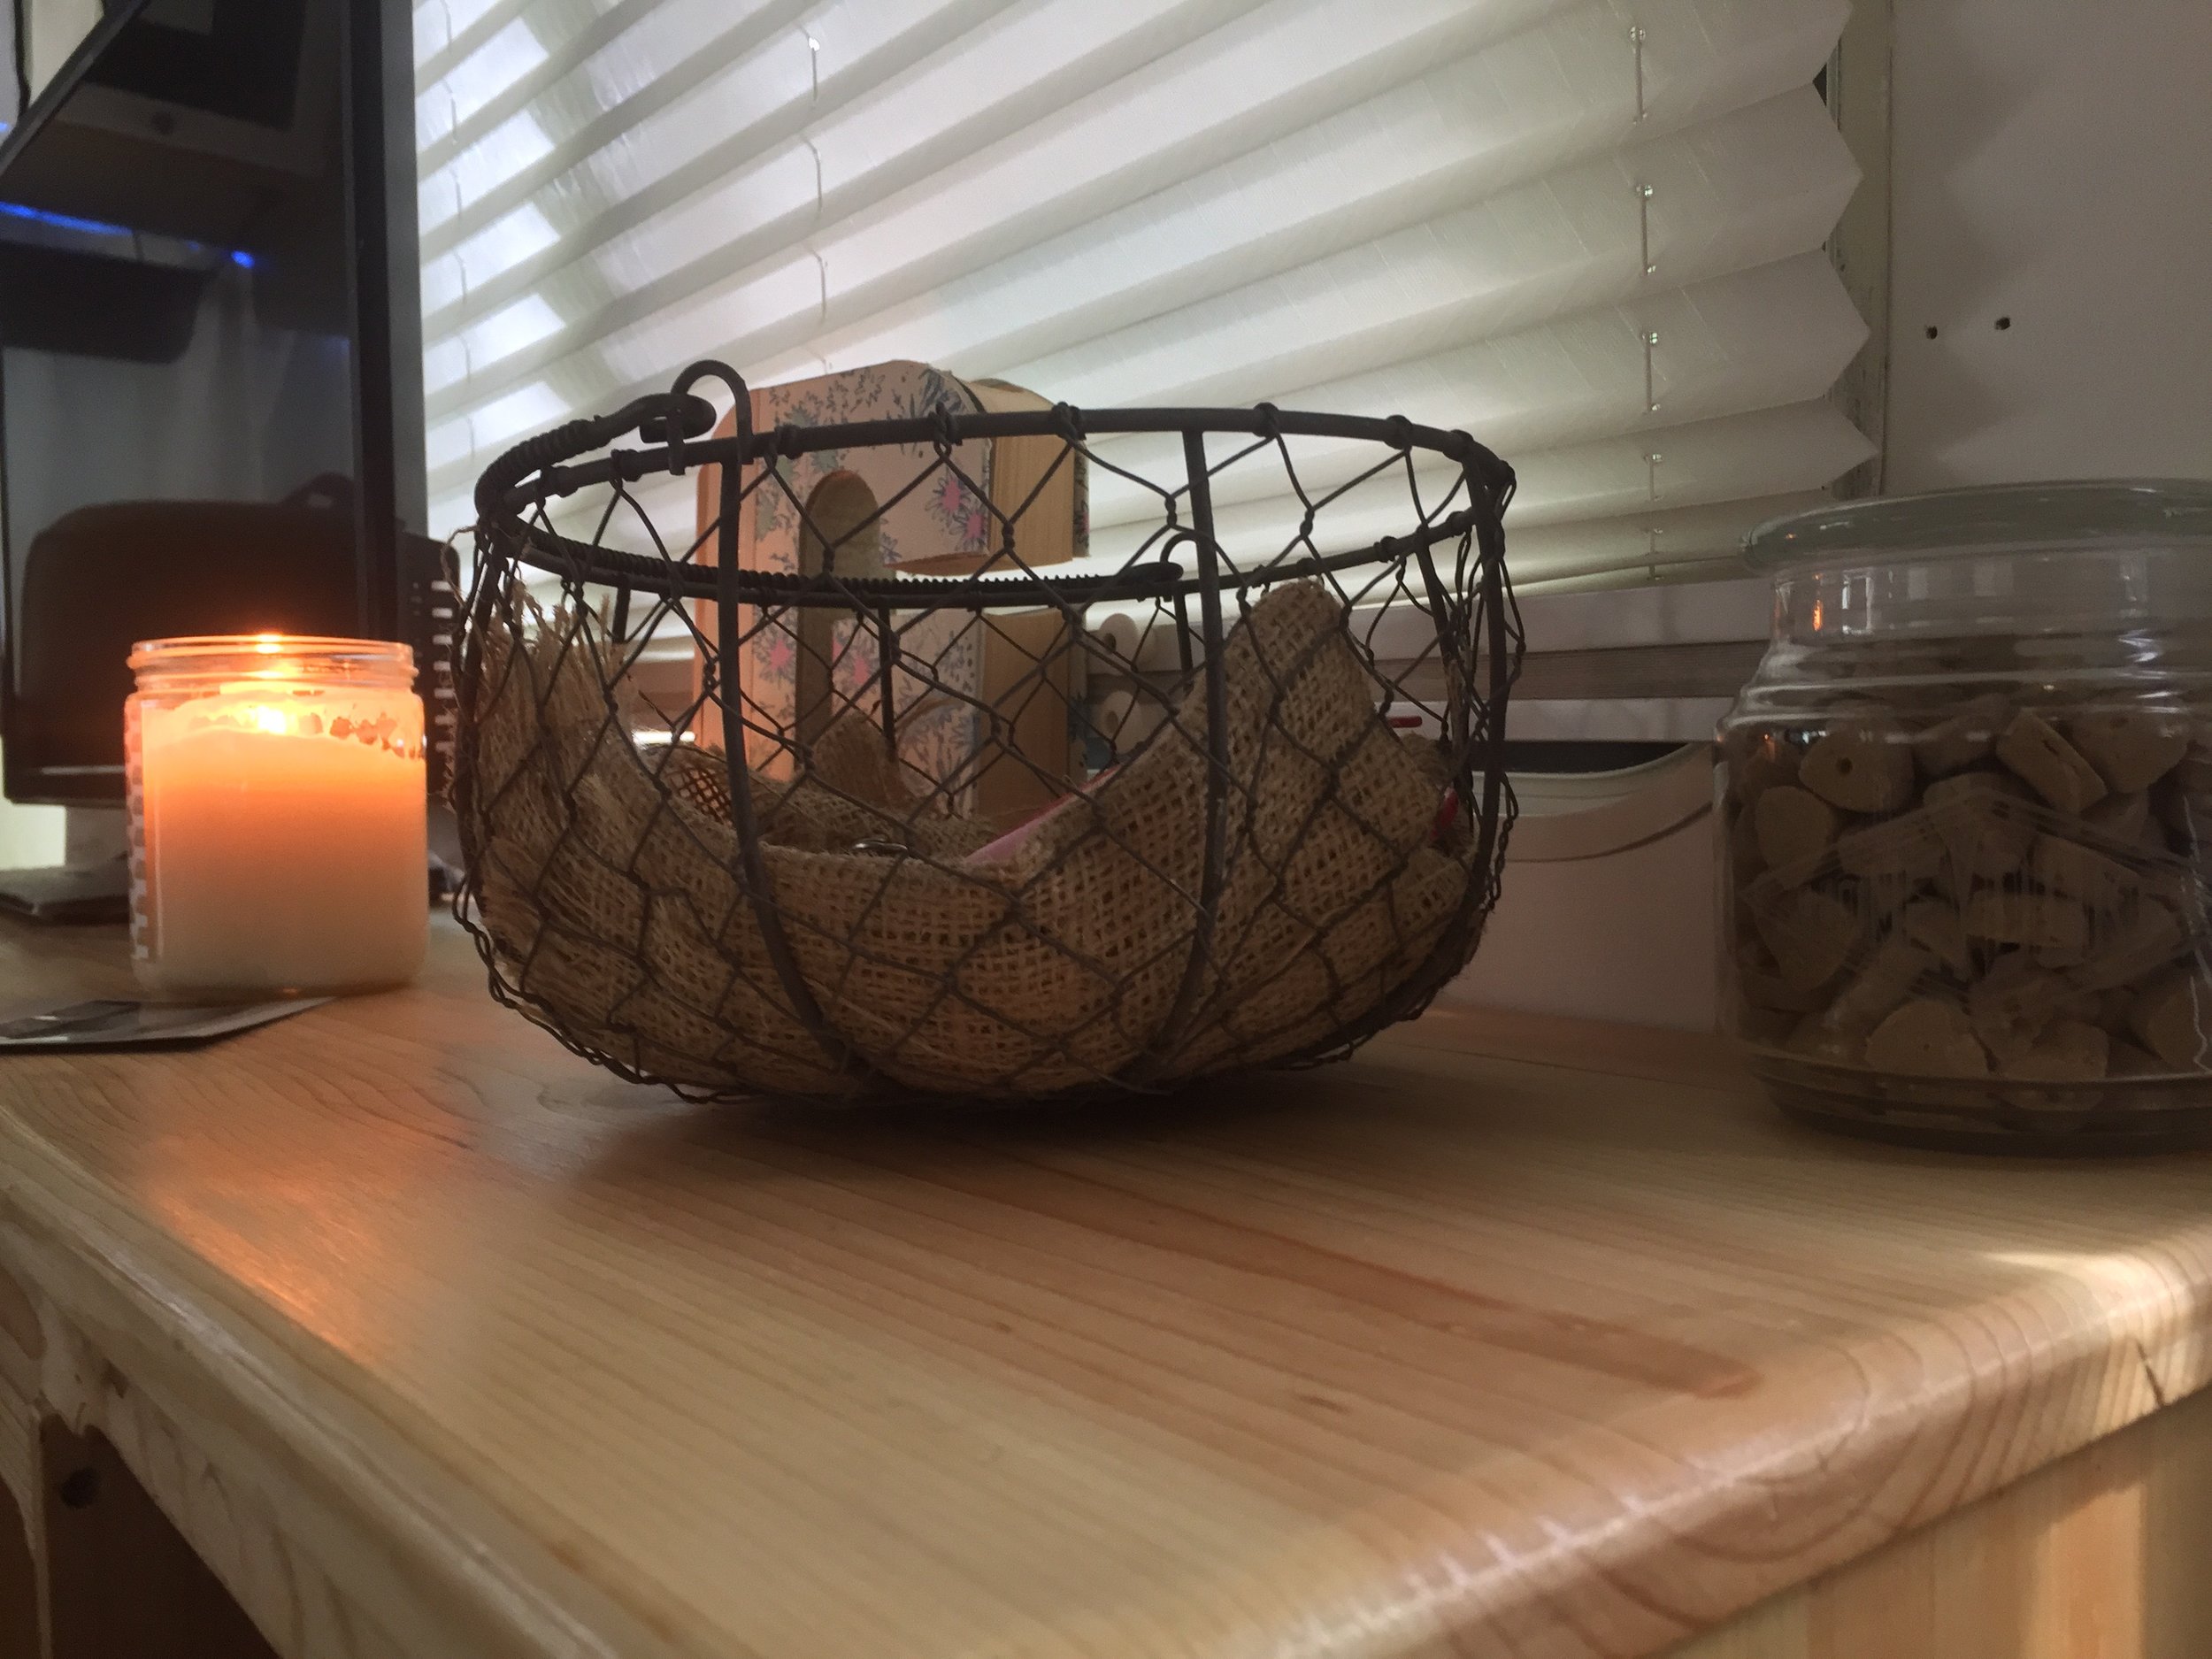
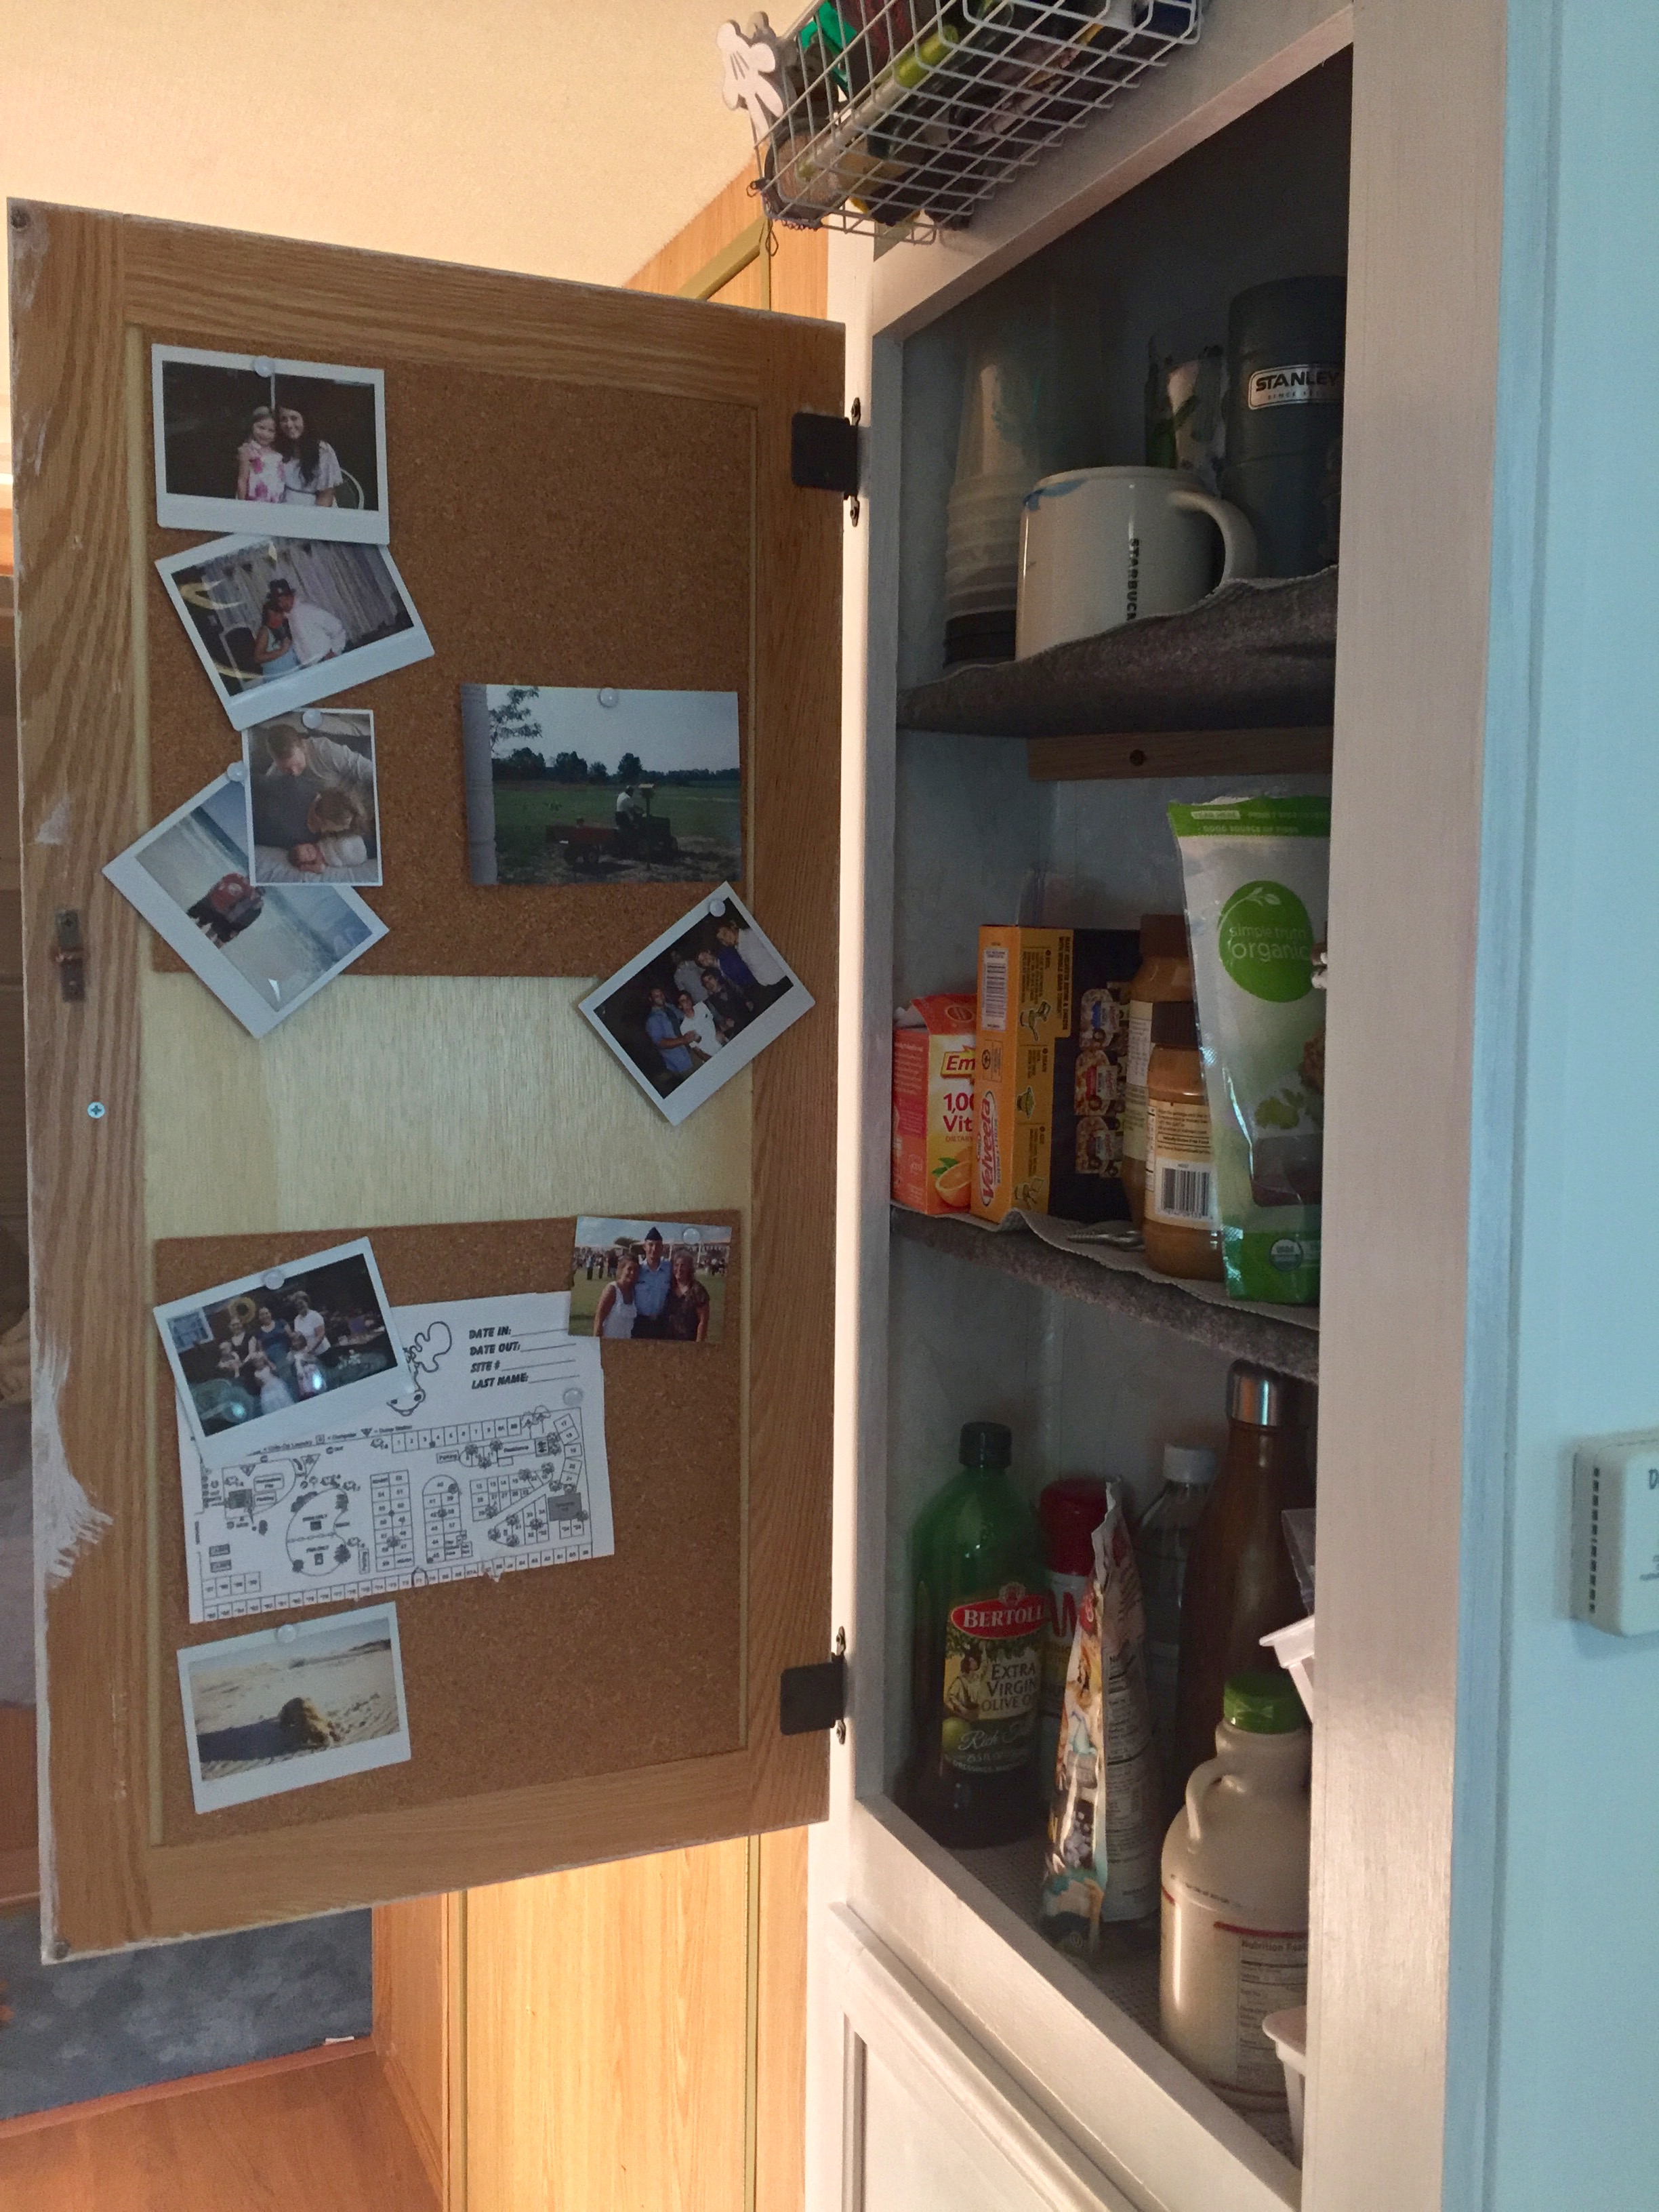
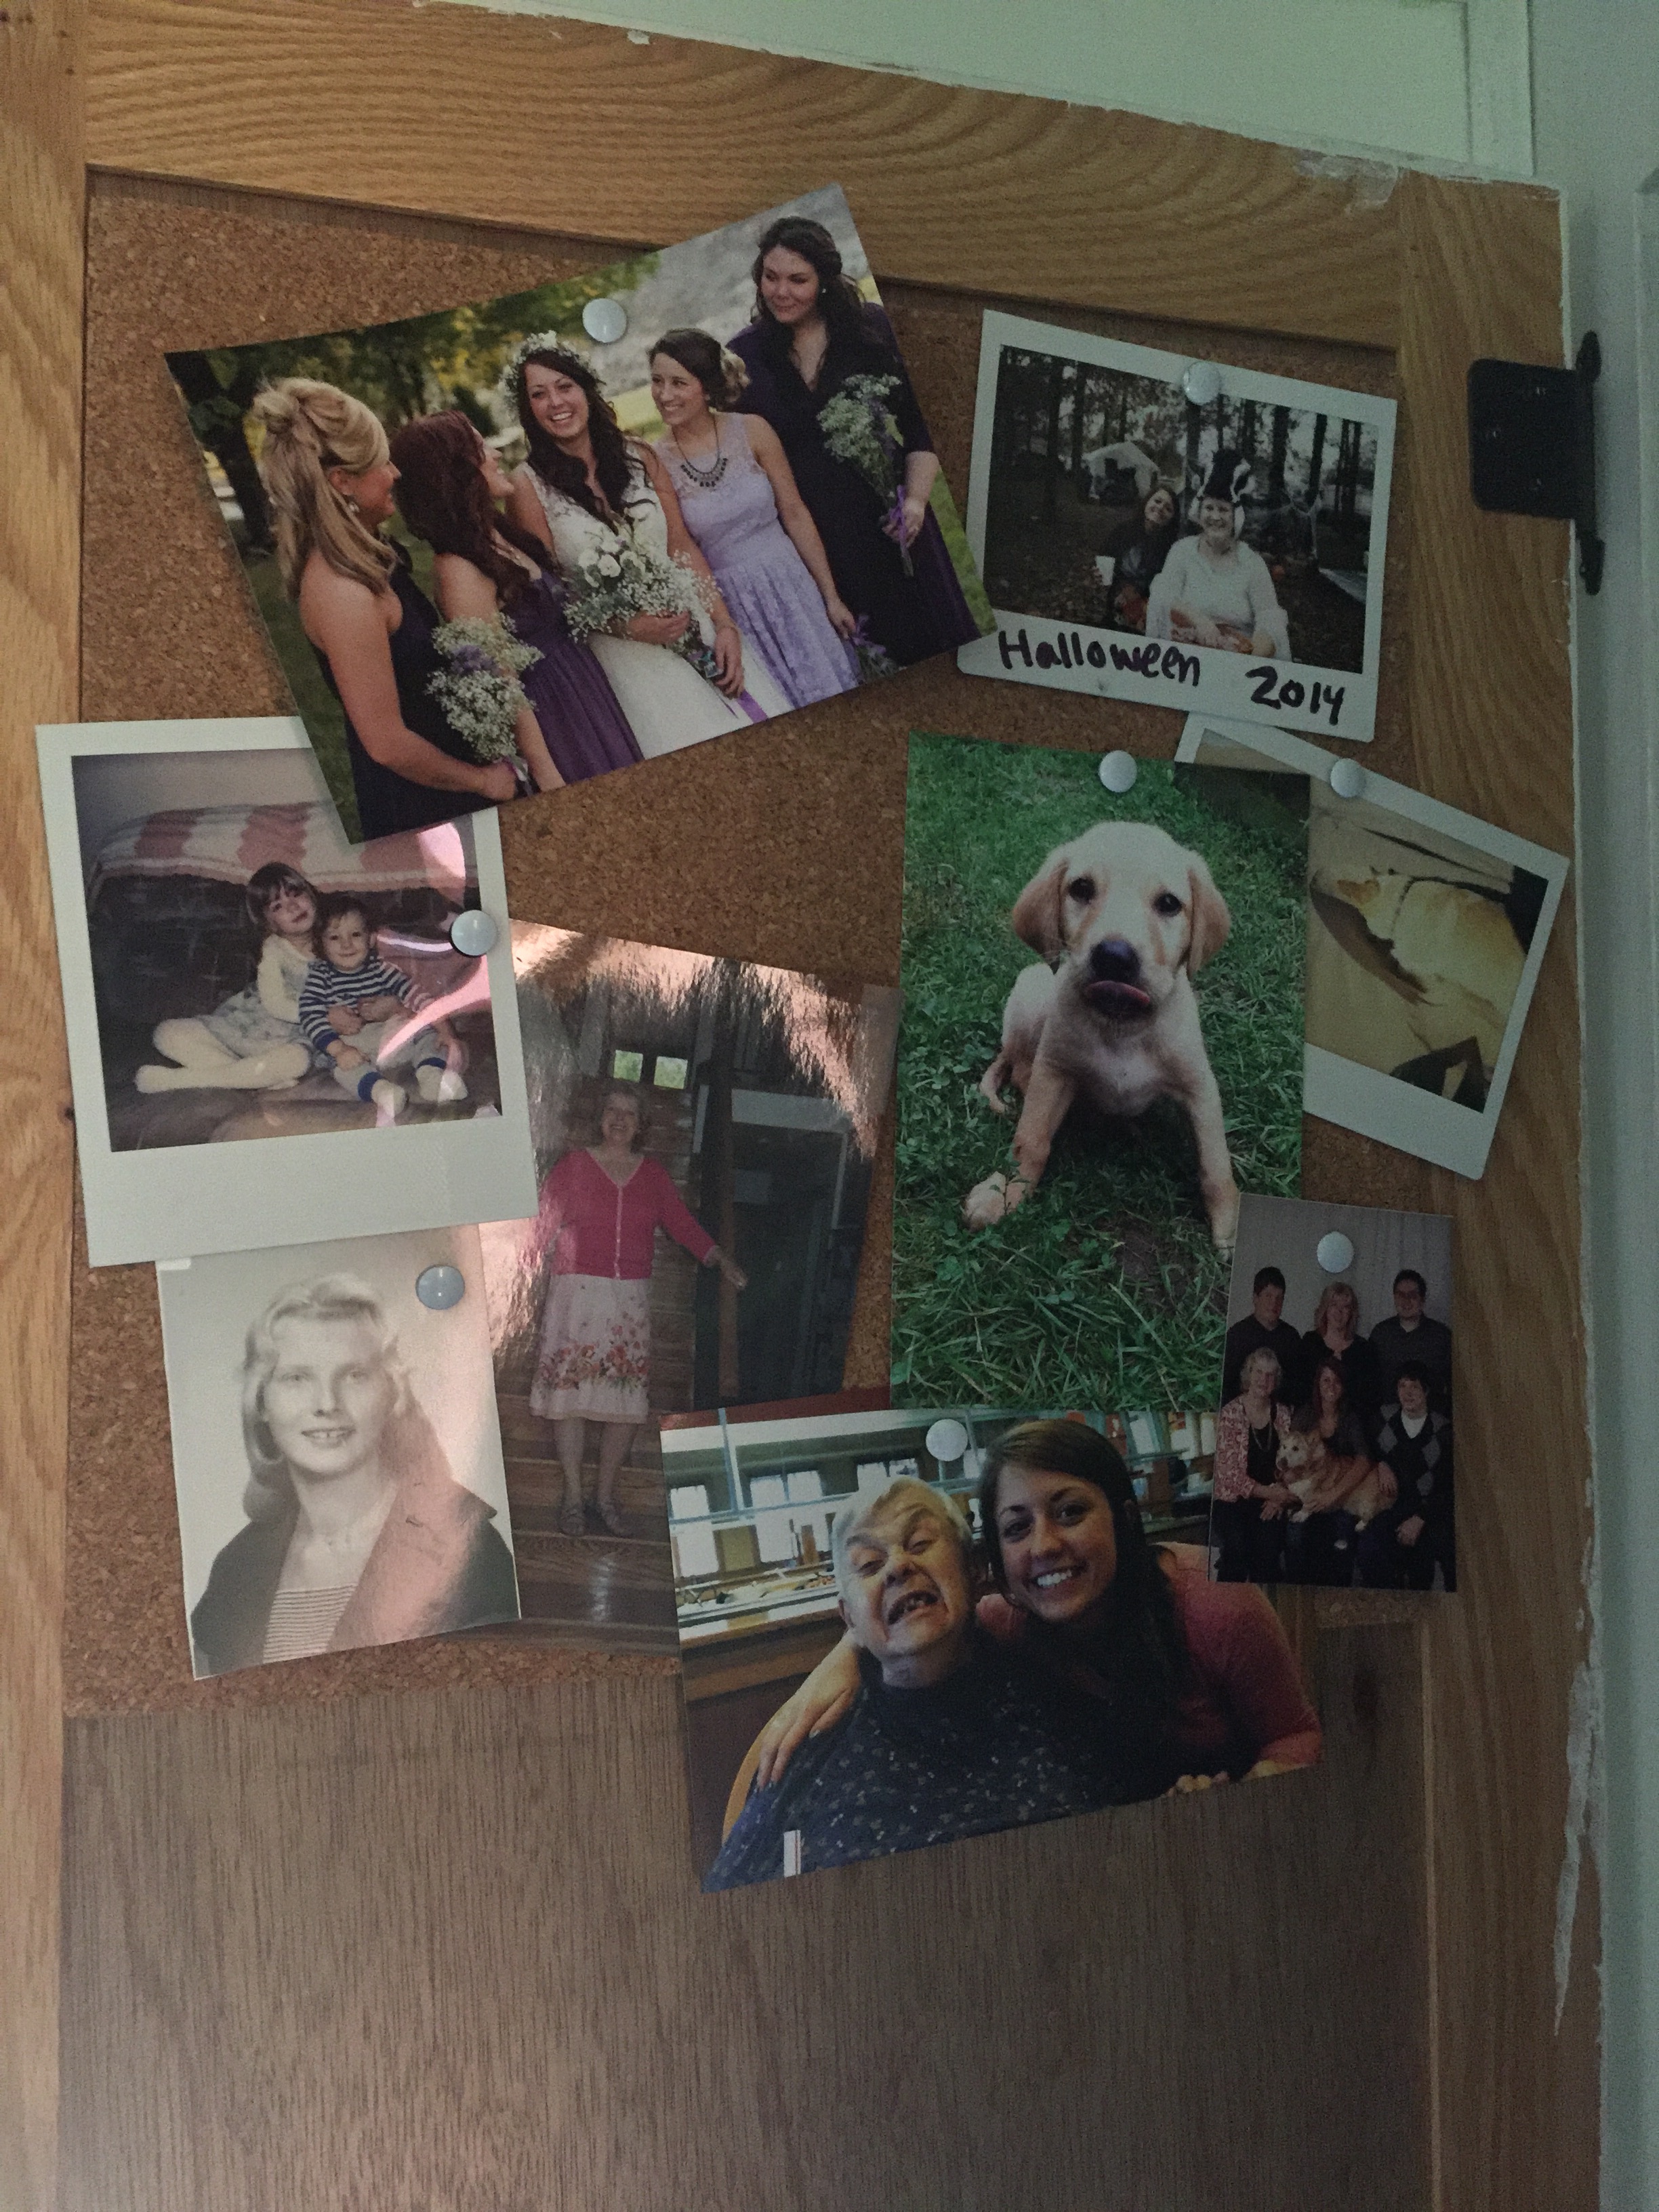
-cork boards-
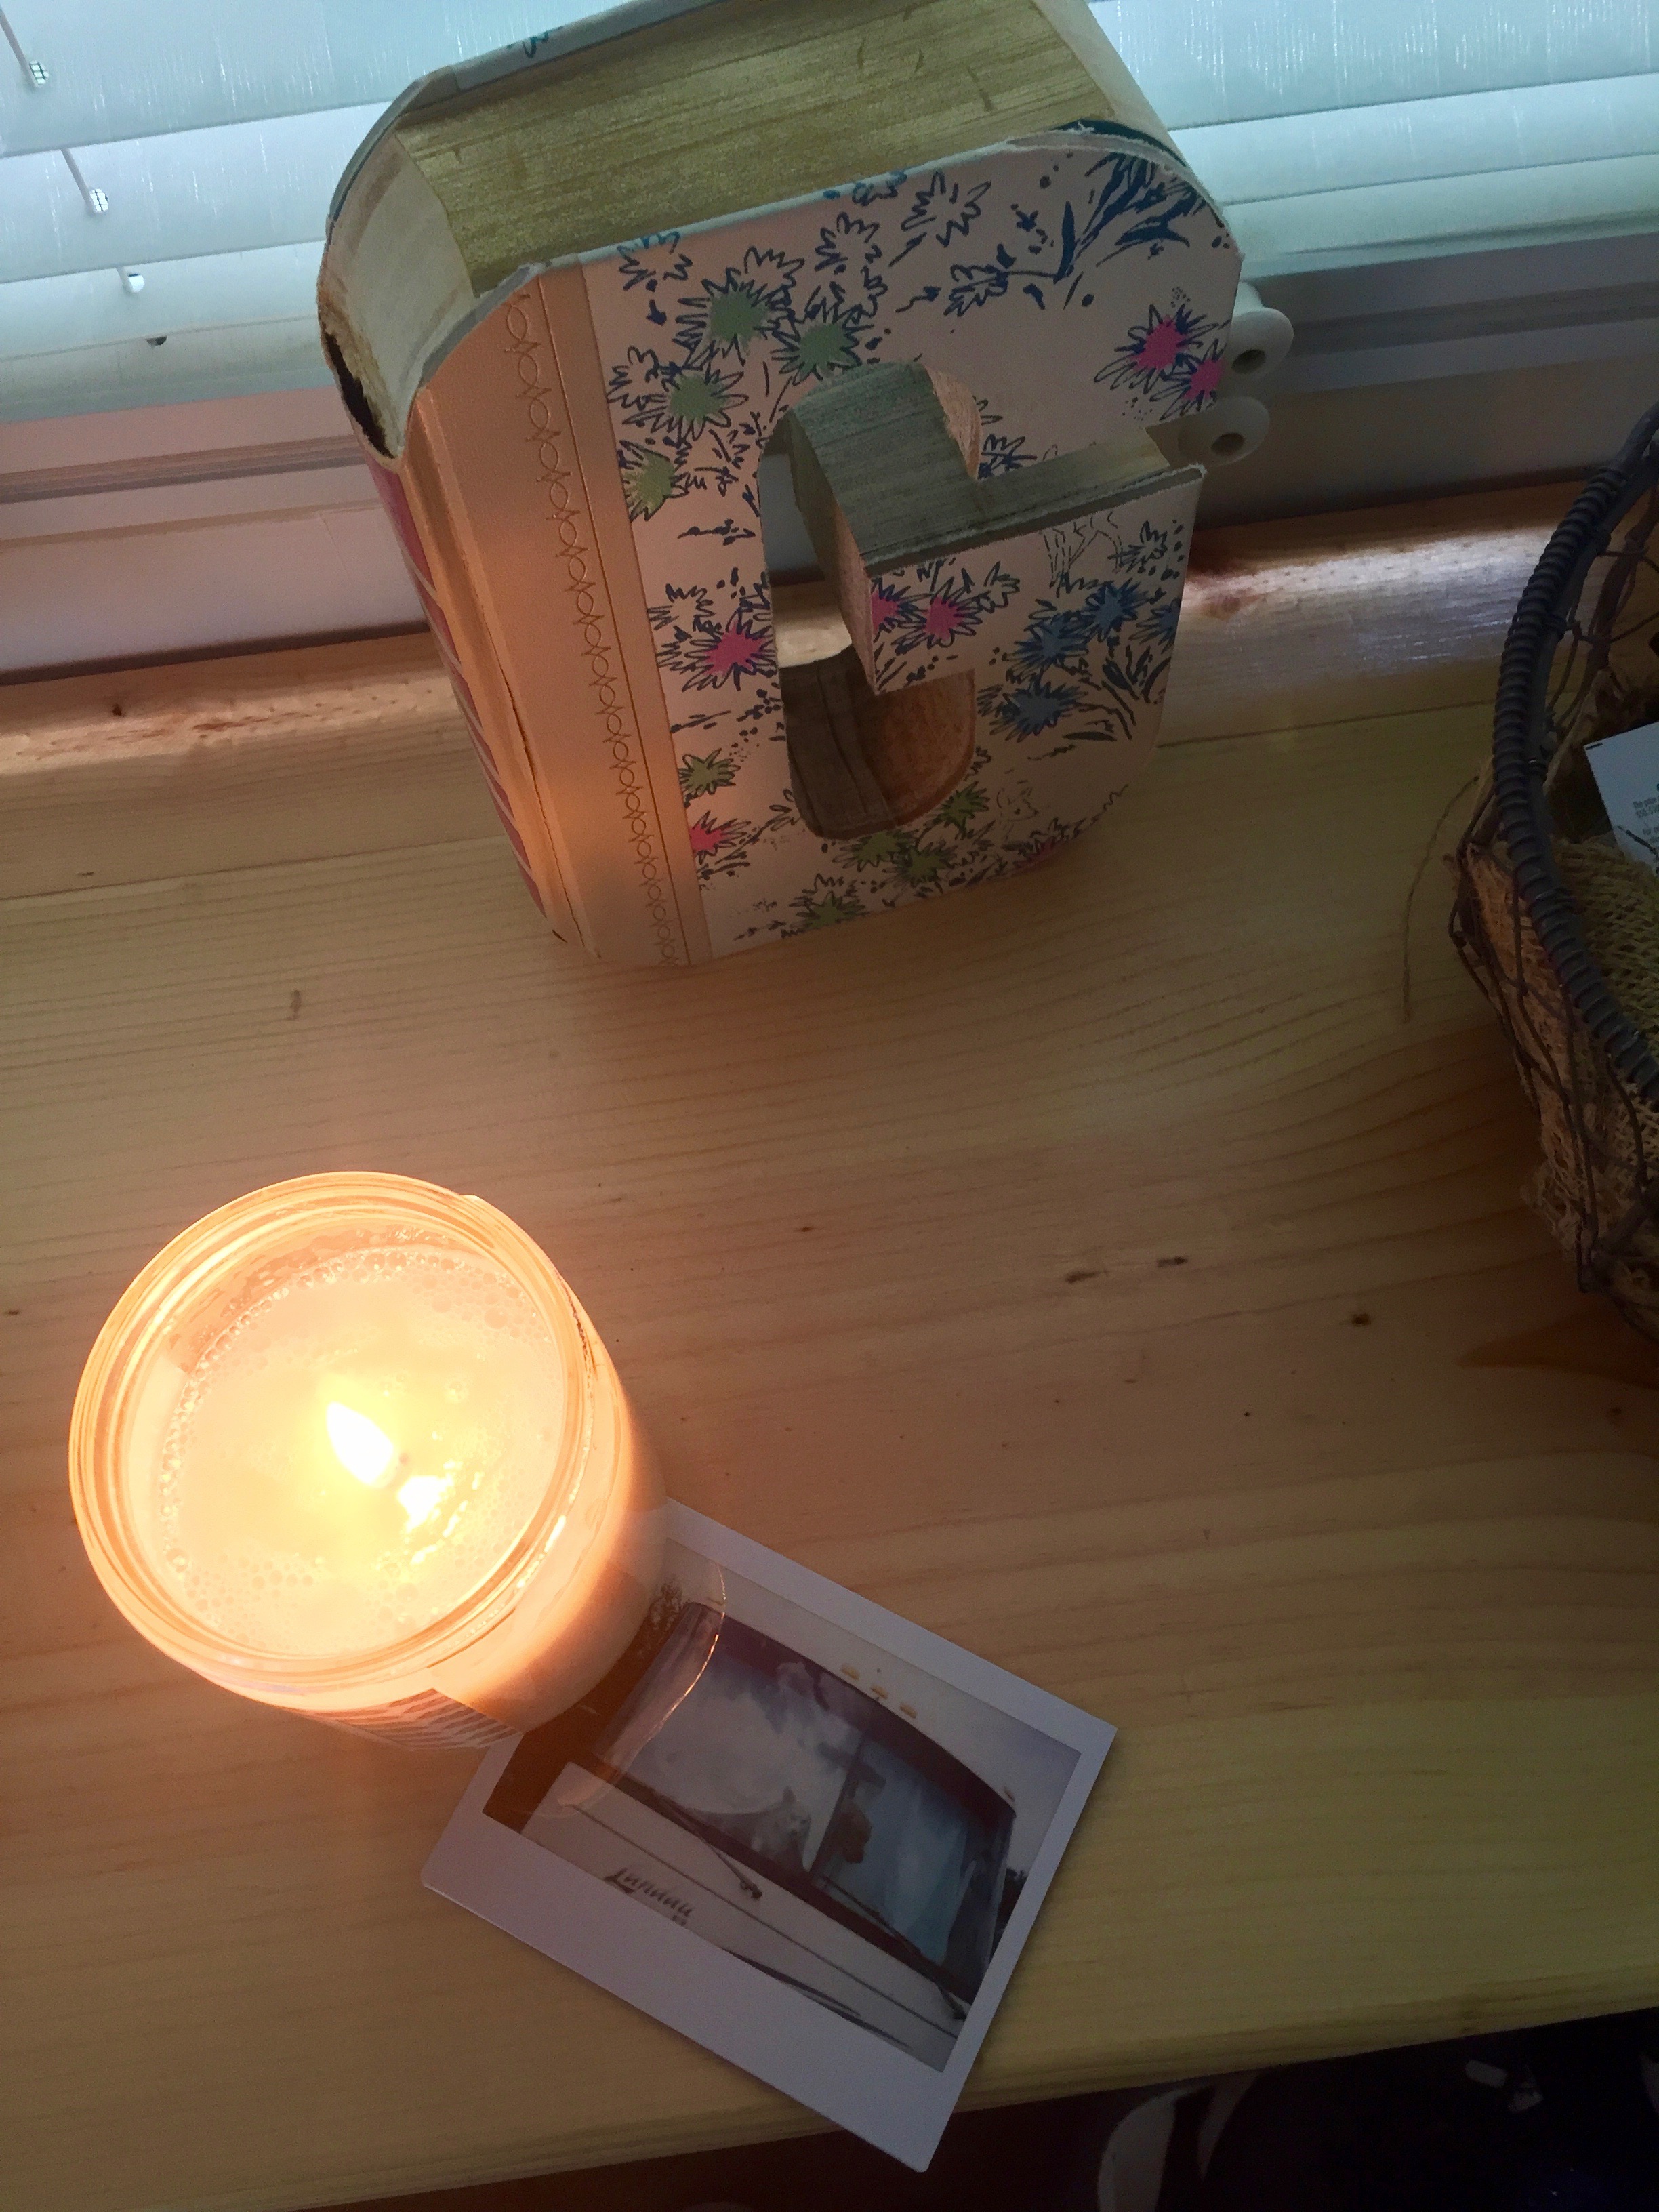
I added a few cork boards to the inside of some of our cabinets to hang photos and what not on and I've been loving them!!
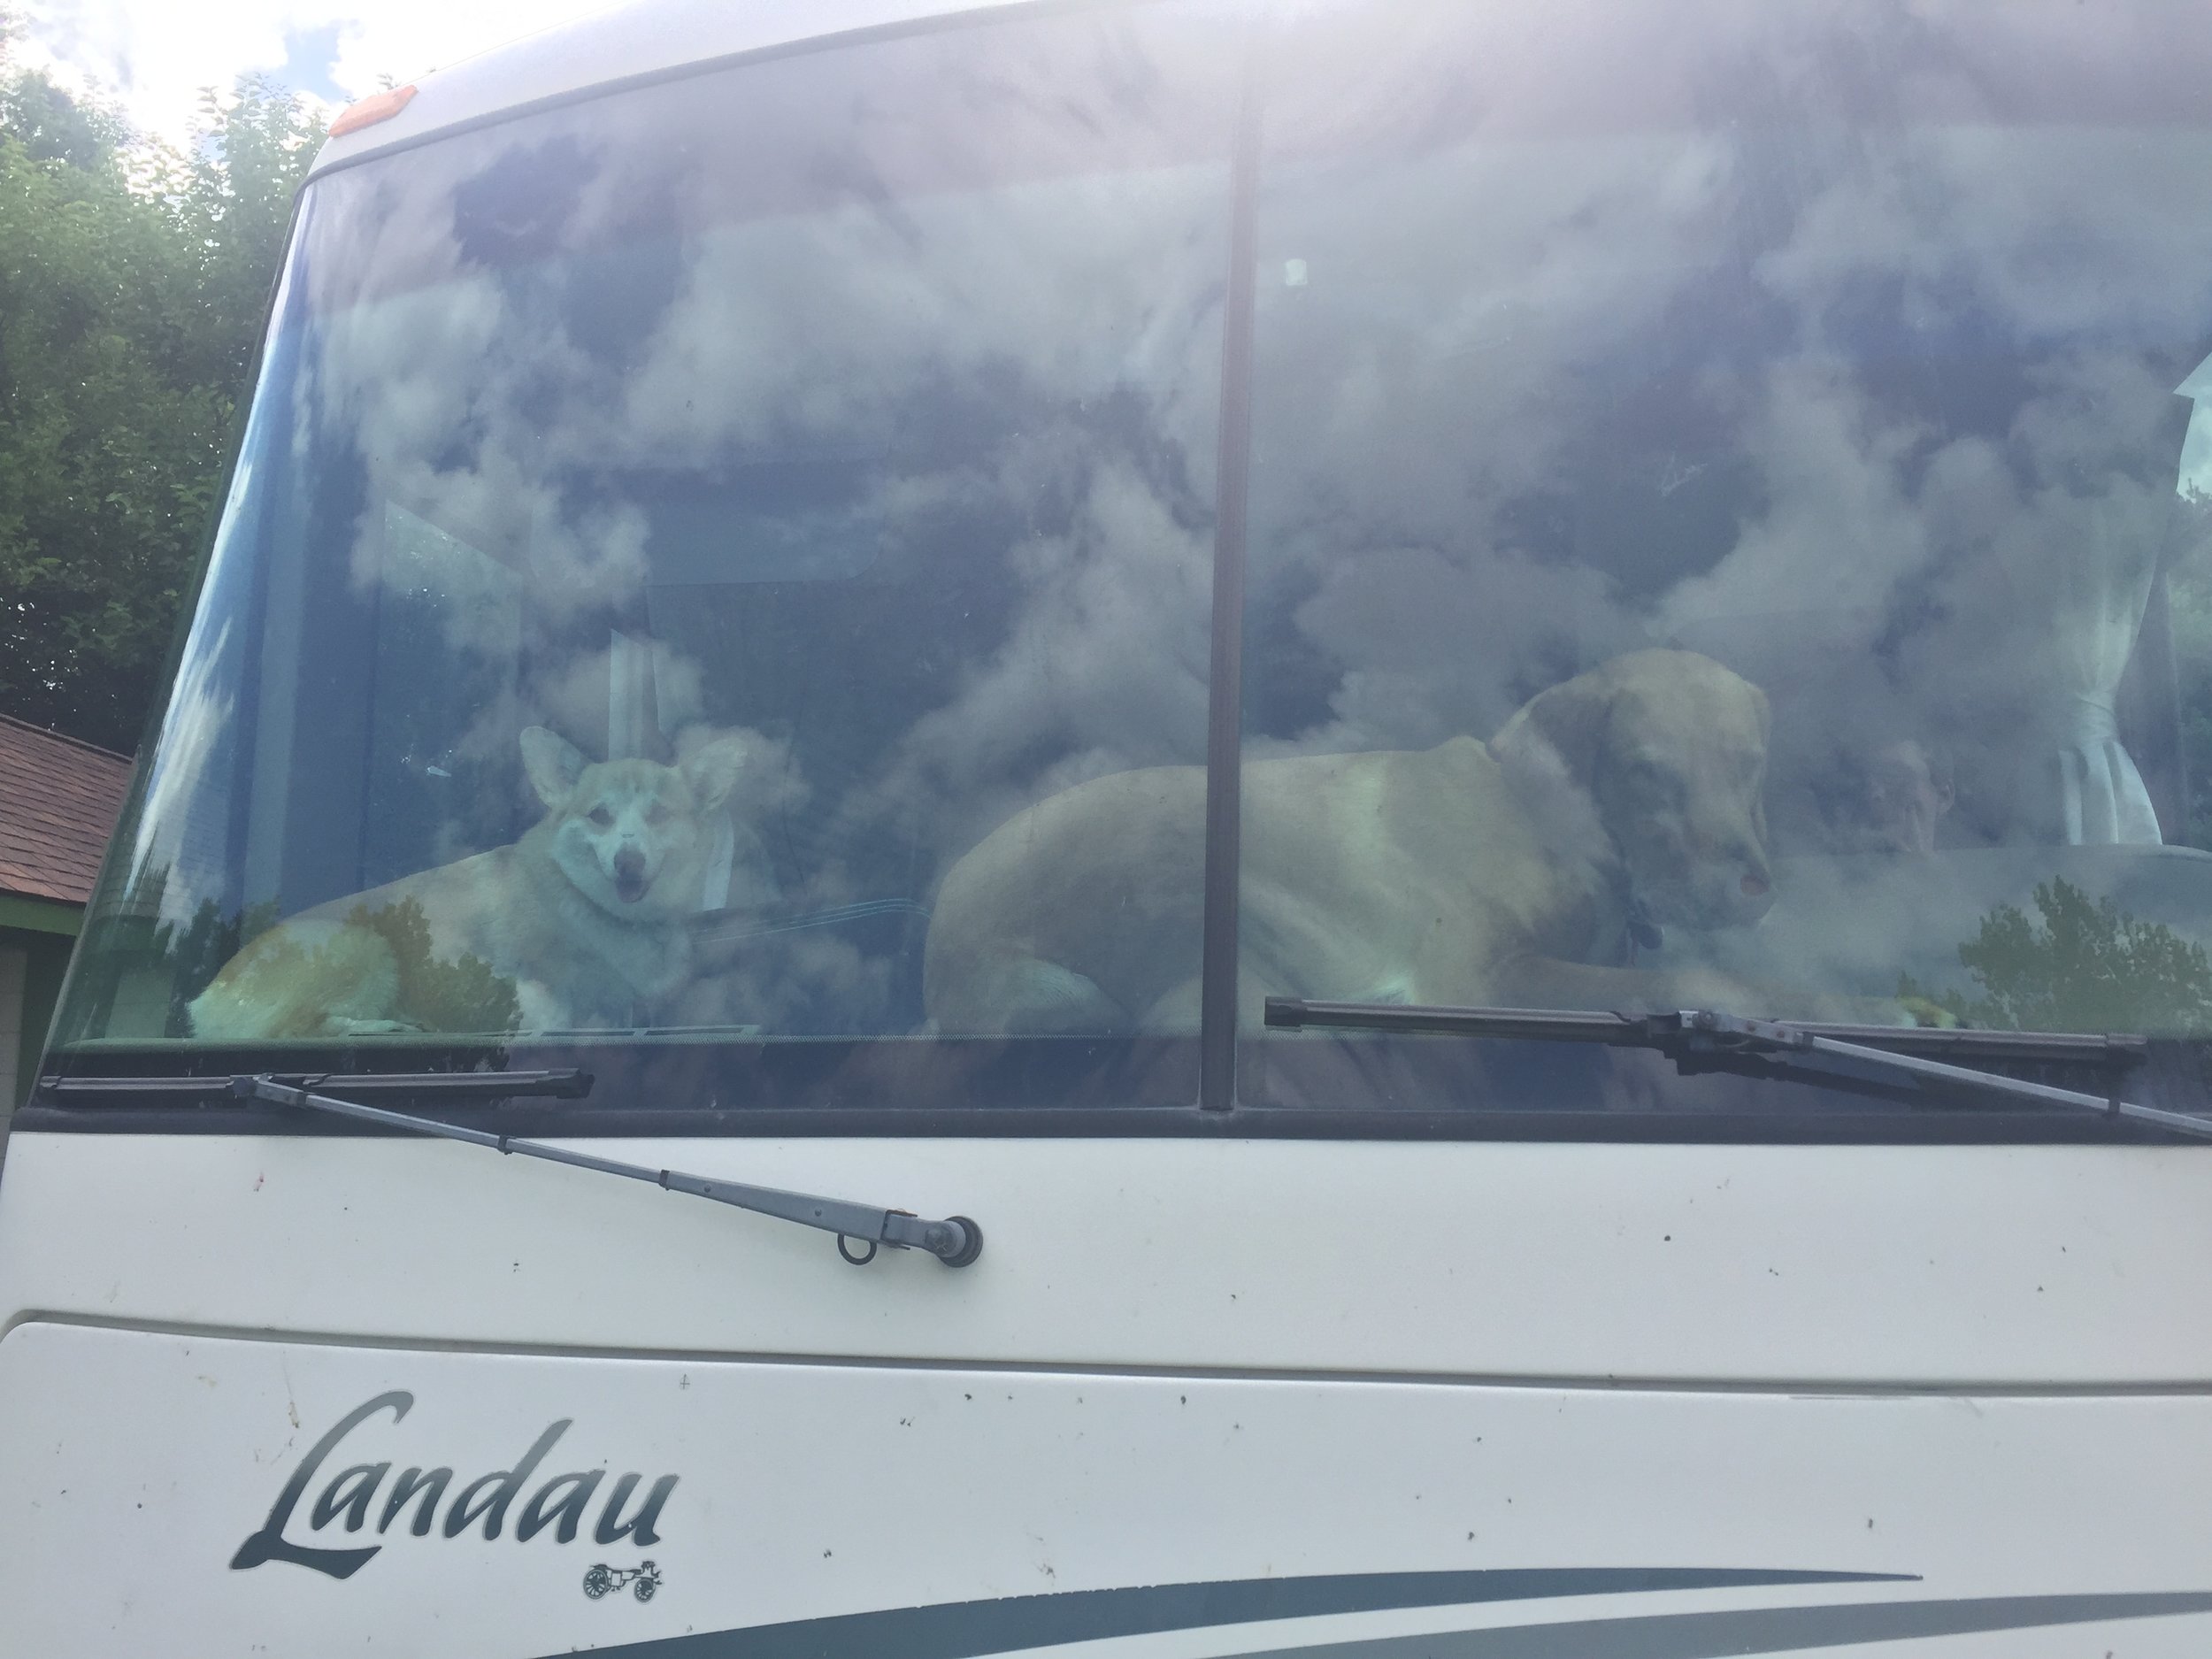
Puppies sunning themselves on the dash before we put up the sun-shade (:
What do you think of our progress?!? I'm beyond happy with everything we have got done, and have been enjoying taking a little break from projects (: I'm still working on finishing the kitchen, bathroom, and steps (and decorating in the bedroom!) So hopefully next month I'll have more BEOFRE/NOW photos to share!!

Kitchen sneak peek (:


